The lack of a professional portfolio can have a serious impact on the types of clients or employers you attract – especially if you’re a freelancer. Many will not give this step the due care and attention it deserves, thinking it is too complicated or not knowing where to start. However, creating a professional-looking portfolio website on WordPress is a breeze!
WordPress is the perfect solution for freelancers who want to showcase their work on a budget. It has everything you need – out-of-the-box performance and lots of extra features through the tons of themes and plugins available.
Reading: How to create a wordpress portfolio website
By the time we wrap up this article, you’ll know how to create a simple ( (yet elegant) portfolio site on WordPress – and we’ll start right at the beginning for those of you unfamiliar with aspects like web hosts and WordPress installations. Let’s get started!
📚 Table of contents:
- Choose a good WordPress host
- Install WordPress
- Find and install the right themes and plugins
- Create a header
- Create a project gallery
- Create an “About Me” section
- Create a contact form
- Design your new portfolio website on WordPress
1. Choose a Good WordPress Host
We’ve debated this topic to death in the past, but if you want to get started right away, here are the four things to consider when choosing a WordPress host:
- Scalability: Your host should be able to handle demanding websites in case you want to pursue new projects in the future.
- Security: A good host should take web security seriously and offer features to keep you safe.
- Support: This is crucial. If anything goes wrong with your website, you should have access to a reliable support team.
- Reputation: Every web host will have its critics, but overall you will do what you want choose a host that has proven itself.
We wouldn’t do you any favors if we just suggested a single host and said, “Sign up here!”. Instead, you should take a look at our recent massive WordPress hosting survey and use that information to make a decision.
Let’s now move on to installing WordPress. 👇
2. Install WordPress
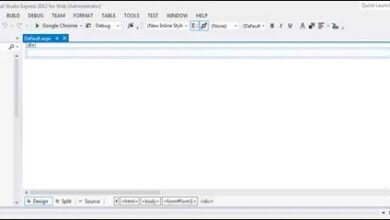
This process may look slightly different depending on the web host you’ve chosen, but the basic steps remain the same. After signing up with a provider, you get access to a private cPanel for your hosting plan. This will likely include a one-click option to install WordPress or the Softaculous Apps Installer:
Click the Softaculous Apps Installer icon and locate the WordPress option on the next screen. Then click Install Now to begin the process:
See also: How To Make a Resume in Google Docs
The next screen will ask you to enter the details of your WordPress site, including name, description, account name and password. among other. Most of these are self-explanatory, but for security reasons, remember to change the default admin username and database name:
Once you click install and wait a few moments, you’ll have created your first WordPress site ! Next we will make a nice portfolio out of it.
3. Find and Install the Right Themes and Plugins
This step is a bit more open-ended than the rest of this guide, for the simple reason that we can’t pick the perfect theme and plugins for your own needs. For the purposes of this tutorial, we’ll be using the Zelle Pro theme as a base (which also comes with a free version):
While ZellePro is a rock-solid choice, we strongly encourage you to look around and find yours a theme that feels just right for you. You can either go for a multipurpose theme (like Cell Pro) or look for something tailored for visual portfolios. As long as your theme has decent ratings and documentation, you should be fine.
Dealing with plugins poses a similar problem. It would be irresponsible to shoot down random plugin recommendations (although some are downright essential). However, we can teach you how to find the best free ones. Once you’ve learned that, you’re ready to dive into the official plugin directory and see what piques your interest.
After finding the perfect Portfolio WordPress theme and a promising plugin or two , you will need to install them.
To do this, you should start from the WordPress dashboard. You can access it by going to YOURSITE.com/wp-admin. Sign in and familiarize yourself with this dashboard:
Ours already has a few additional options, but don’t worry about them now. Instead, look at the Appearance and Plugins tabs. Click on Appearance and on the next screen you will find an option Add New. Clicking this will take you to a new screen where you can either select one of WordPress’ default themes or upload a new one:
If you select Upload Theme, a prompt will appear to upload your downloaded theme found on your computer.Select the folder, click Install Now and you’re done.
See also: Frequently Asked Questions
To install plugins, the process is very similar. It all happens in the Plugins tab instead of AppearanceWe can do this from the “Main Content” tab:
Before proceeding to the last step, go back to the “Big Title” section, to “Content” and add #contact under the “First button”. This is called anchor text and will link your call to action to the contact form below.
Next, it’s time to look at our site as a whole and see where you can go from here.
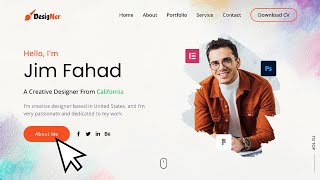
8. Design Your New Portfolio Website on WordPress
Take a moment to step back and admire your work – we just built a simple, professional-looking portfolio website on WordPress together!
What comes next is up to you. First, you should read up on everything you can do with cell, whether adding more projects, creating individual pages for each of them, or playing around with new sections.
Next, you’ll want some learn the advanced techniques to take your portfolio even further with the Zelle theme – check out our latest 👉 3 Killer WordPress Portfolio Tweaks to Make Your Site Awesome.
Conclusion 🧐
The whole process will take some time – especially if you’re unfamiliar with WordPress – but as we’ve shown, it’s definitely achievable with minimal effort.
Here are the eight basic steps You must follow to create a portfolio site:
Have questions about creating a portfolio site on WordPress? Feel free to ask in the comments section below!
See also: Resume Objective Statements: Examples, How-To, and FAQ
.