Email is alive and well. Especially in a professional setting where the average US worker spends 28% of their workweek reading, replying and sending emails.
Despite alternative means of communication like Slack or other collaboration tools 90% of surveyed Americans over the age of 15 are still actively using email.
Reading: How to create an email address for my domain
Here’s the bottom line: Email is the number one communication channel in the workplace.
So If you’re thinking about starting a business, your own agency, or freelancing, having the right professional email address is essential.
In this article, we’ll cover why this is important, provide examples, and walk you through how to get professional email with a custom domain.
Let’s get started!
Would you rather watch the video version?
Why is it important to create a professional email address?
Odds incredibly high are that you send regular emails to potential and existing customers. This is often the first phase of networking and building a relationship online.
This makes your email address a crucial part of your brand that you should protect and enhance as much as possible.
As a freelancer or business owner, you can’t afford the first impression an email address like “[email protected]” gives.
First of all, it’s difficult to Correctly assess the sender of the e-mail. at a glance. Second, even with a more serious email like “[email protected]”, your email recipients don’t have an easy way to verify your identity.
Anyone can match a Gmail or Outlook address with any create names. How can a potential customer verify that you are who you say you are when your email address doesn’t verify you?
If you’re not ready to put in a professional email address to invest, this indicates that you do not take your business very seriously. This is why you want an email address like [email protected] or [email protected]
Professional Email Address Ideas
Below we cover a comprehensive list with examples of your business email address. The type of email address you should choose depends on the domain name you have registered for your business.
If you use the company name for the domain name and your email address , you should mix and match it with your first name, last name or initials. You can also highlight your position in the company in the email address if you need additional permissions.
- [email protected] (For example [email protected])
- [Email Protected] (For example [Email Protected])
- [Email Protected] (For example [Email Protected])
- [Email Protected] (For example [Email Protected])
- [Email Protected] (For example [Email Protected])
- [Email Protected] (For example [Email Protected])
- [Email Protected] (For example [Email Protected])
- [Email Protected] (For example, [Email Protected])
In general, anything that includes your real name or initials is good enough, and it passes no need to complicate things. If you’ve ever worked for a large company, you’ve probably received an email like this.
If your registered domain name is your full name or last name, you don’t need to double it. You can use a filler word like contact or email, or you can use your position or initials to round out an email address with a personal name domain.
- [email protected] (Zum Example [email protected ])
- [email protected] (For example [email protected])
- [email protected] (For example [email protected ])
- [ Email Protected] (For example, [Email Protected])
- [Email Protected] (For example, [Email Protected ])
The most important variable in your business email is the domain name you choose. If you want other companies to take your business seriously, the least you can do is register the right domain name.
How to create a professional email address when your name is already taken
We have covered many templates and alternatives that you can use to create an email address. But most of them rely on you being able to get either your name or your company name on a .com or some other very trusted domain.
If any variations of your full name and initials as well as your company there are names, they’re taken, don’t give up hope.
It’s best to combine your company name or name with your location.
That doesn’t just make it easy for the people around you found online, but indirectly it also helps your website in search engine optimization for local searches and Google Business listings. There’s a reason so many businesses in 2023 are still called “Your City + Plumber” and other variations.
If your business isn’t based in one location and you won’t be staying in your current city, then you need to get a little creative.
You could start by mixing and matching initials and your name, or add your name or your initials to your company name and see how those sound to you.
The average AmericanEmployees spend 28% of their workweek on email…which means using a custom email address is essential to your business and brand. 💻 Here’s how to set one up ⬇️Click to Tweet
What is the best professional email hosting option?
Okay, so you’ve decided on a custom e -Mail domain decided. But what is the best option for hosting and processing your email?
You have a variety of options, from using the options included with your hosting provider to opting for a premium solution like Google Workspace (formerly G Suite). that’s what we use here at Kinsta.
Our entire team gets trusted, branded email addresses, but they can also keep the familiar UX of Gmail for their business communications.
And that’s the tip of the iceberg.
Why is Google Workspace the best choice for professional branded email addresses?
With top-notch spam filters and intelligent search, a intuitive and clean inbox experience and extensive add-on integrations make Gmail one of the best email services out there.
And the best part is that we get so much more than just email . All our team members get 30 gigabytes of storage and access to advanced features across the Google suite of cloud apps.
You can also use Google Hangouts Chat as an alternative to Slack, or even extend and create custom workflows with Google Apps Scripts. Read our dedicated post on the benefits of Google Workspace for more information.
How to create a professional email address with Google Workspace
Creating and registering your Getting a professional email address can seem overwhelming. But it becomes an easy process if you break it down step by step.
If you don’t already have a domain name, you need to register one first. You’ll also need premium web hosting with DNS support.
If you already have a domain and website, you can skip straight to step three.
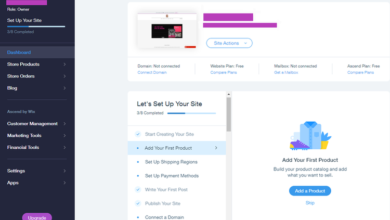
1. Register your domain name
Choose a reliable domain registrar like Google Domains or Namecheap. Look for an available .com, .co or other popular domain with a combination of your full name or your company name.
Stay away from untrustworthy or cheap domains like .biz and others. After choosing your domain name, proceed to checkout and you will become the proud owner of a new domain name.
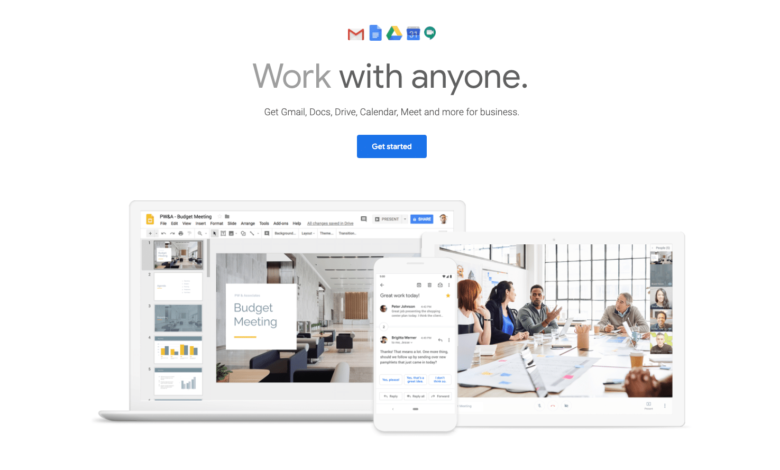
2. Create your Google Workspace business account
First, go to Google Workspace and click the Get Started button. Once you’ve done that, start the sign-up process.

Fill out the basic information required, including your number of employees, company name and country. It is important to select the country where your company is registered.
Do not select the United States, as the language should be English.
Click ‘Next step “, to continue.
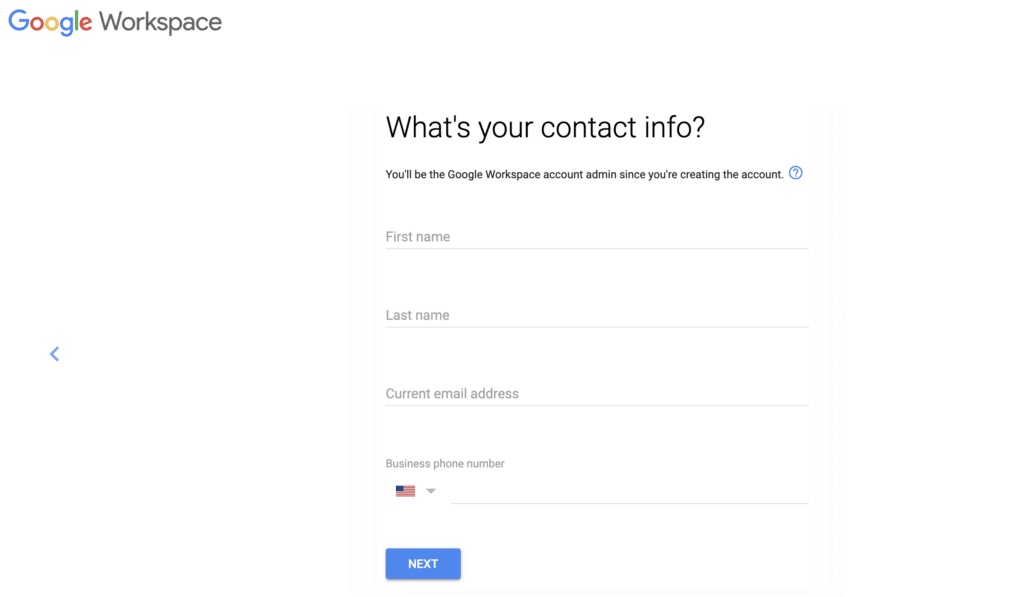
In the next step, enter your name and your existing email address. When you’re done, click the Next Step button.

Next, confirm whether or not you already have a domain for your business. If not, you can register one with the Google domain registrar before proceeding.

If you already have a domain, fill out the domain and click “Next Step” to to continue.
See also: MLM Blog: How to Build Your MLM Business by Blogging

Check again that the domain is correct and click Next Step to confirm your choice.

Finally, create a username and password to protect your Google Workspace account. Review the Captcha and click the “Agree and Continue” button to continue to the next step.
Note: If you already have an existing email provider for professional email, make sure you enter the correct username.


Confirm that you Have selected the correct Google Workspace payment plan before proceeding.
If you’ve followed us this far without any issues, you have successfully created your Google Workspace account.
3. Confirm Your Google Workspace domain
Now that you’ve created a user, go to the Google Admin console and sign in with your new credentials.
Once you’ve signed in, there is a tutorial that will help you set up google workspace, you start by verifying your google workspace domain.

Click on “Confirm”. Button to open your domain verification options.

The default option is to add a TXT entry to the DNS records of your company website. Adding the TXT record to your DNS will not affect your site or domain in any way.
If you are using Kinsta DNS, check out this tutorial to learn how to add your Google MX Add entries to MyKinsta.
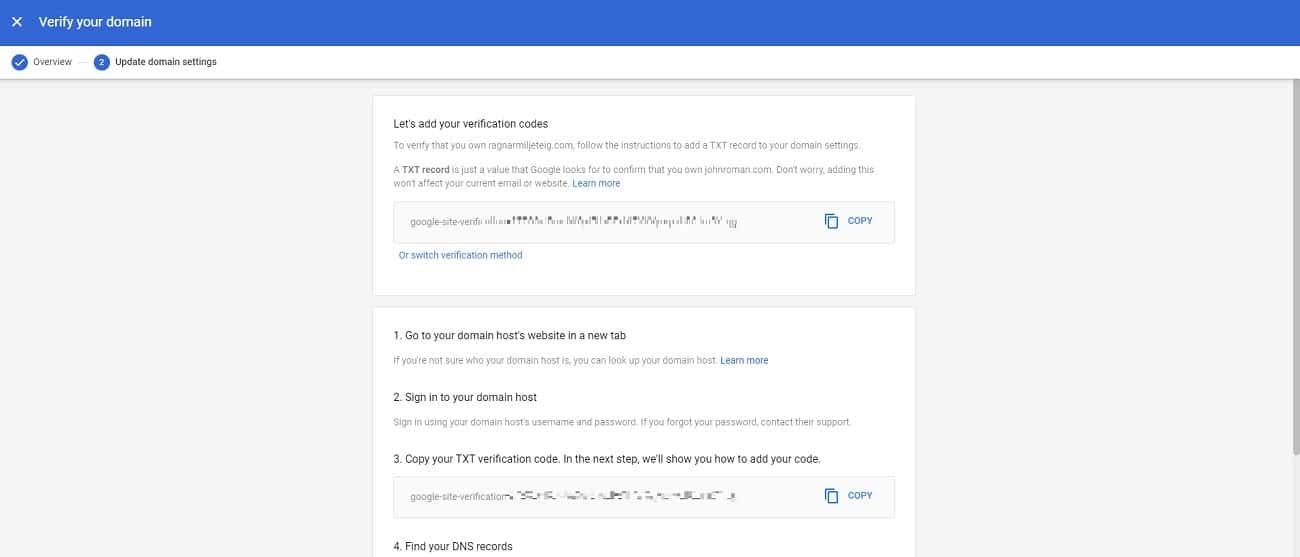
Once you have selected the TXT option, Google will generate code that starts with google-site -verify starts . Click the “Copy” button to copy the code to your clipboard.
Now you need to access your hosting provider’s DNS tool in a new tab or window. Do not close the Google Workspace tab.
Existing Kinsta customers should use the Kinsta DNS tool.

Click ” Add a New DNS Record button at the top of the page. This should open a new tab where you can add a record.
Select “TXT” from the “Type” drop-down menu.
Copy the verification code, paste it and press the “Add DNS record” button.

When finished, return to the Google Workspace login page tab.
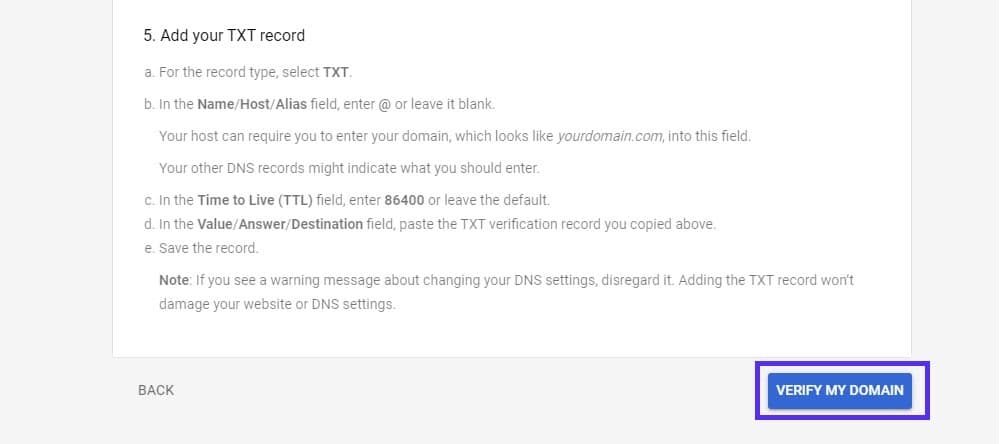
Scroll to the bottom of the page and click the “Verify my domain” button to complete the verification.
Note: It may take a while It takes a few minutes for the DNS records to go live, dah it will take some time for Google to complete the authentication.
4. Add Google Workspace users
If you’re not the only employee in your company, this is the best time to add the other users. Especially if you already use another email service to handle emails.

Click the Create Accounts button to continue.

Enter the name and username and click the Add New User button.
Repeat for all members of your staff.
If your company already has email addresses, make sure each username is accurate matches the existing one.
5. Enable Gmail for your Google Workspace account
The final step is to enable Gmail for your Google Workspace accounts.

Click the Activate button to continue to the next step.

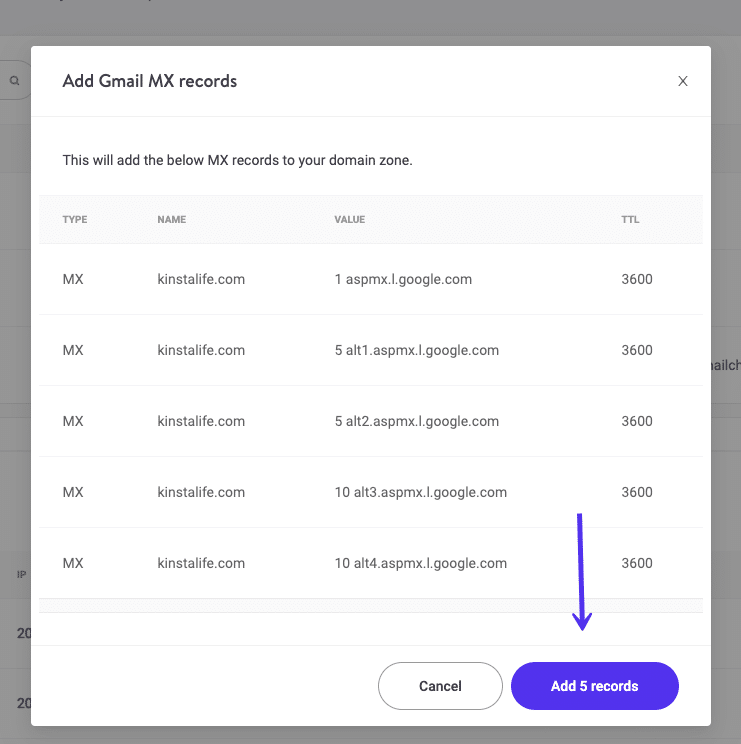
On the page you will see the following MX records :
- aspmx.l.google.com / priority = 1
- alt1.aspmx.l.google.com / priority = 5
- alt2 .aspmx.l.google.com / priority = 5
- alt3.aspmx.l.google.com / priority = 10
- alt4.aspmx. l.google.com/priority=10
You will need to open a new tab and go to your host’s DNS tool or re-open the DNS tool tab from earlier.
You would normally have to copy and paste manually, but not with Kinsta. Since we’re big fans of Google Workspace, we’ve created a one-click solution to help our customers get set up quickly.
Just access Kinsta DNS from MyKinsta and click the button ” Add Gmail MX Records”. at the top of the page.
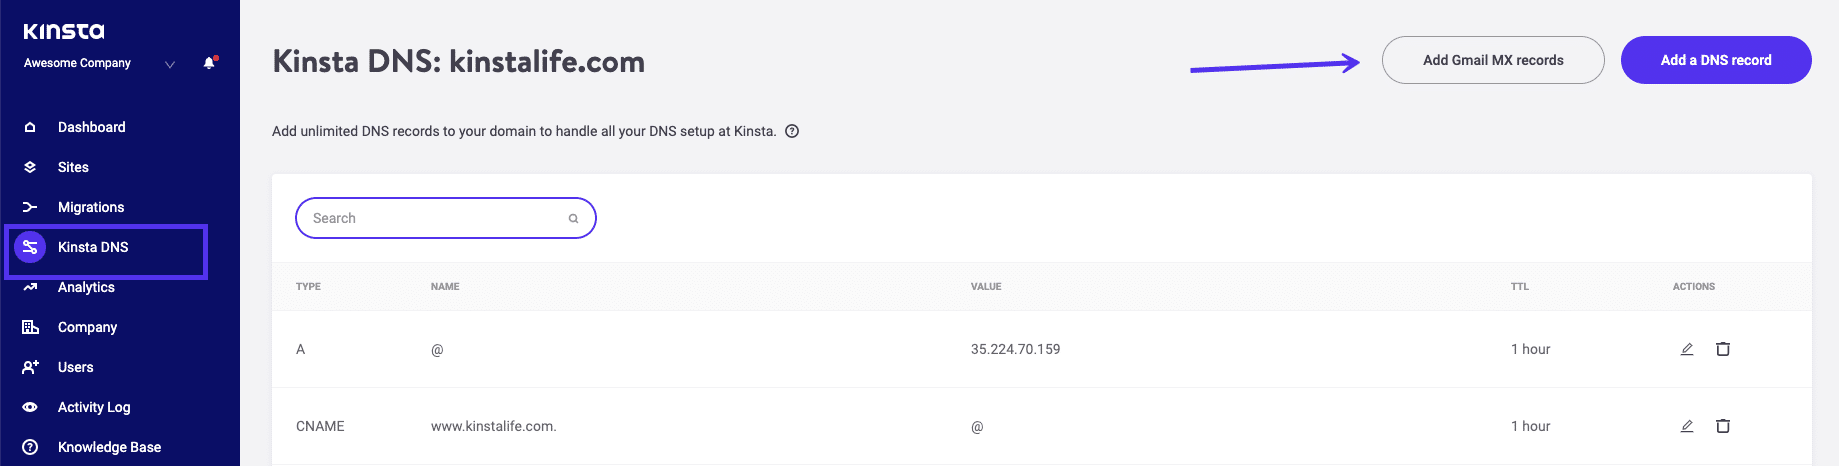
The MX records, like nameservers, are the same regardless of the user, so you don’t have to change anything . Press the “Add 5 records” button to continue.
As it may take some time for the changes to go live, you can take a tea or coffee break before continuing.
Alternative method for other hosts
For other hosts you will need to access your DNS tool, for example by logging into your cPanel and open the DNS Zone Editor.
p>
Select the appropriate domain and then click the Add Record button to open a new window.
Fill in the appropriate priority, and then copy and paste the target. Double check that everything is correct and click Add Entry to finish. Repeat the process for the four alternate MX destinations.
If your host has email enabled by default, you may need to remove existing MX records.
Once finished, should you do so, return to the Google Workspace Login tab, scroll to the bottom of the page and click the Enable button.

The verification will take a moment. If the new records aren’t recognized at first, wait a few minutes and then click the “Try activation again” button.
Once the changes go live, Google will find the MX records and take you to the last screen.
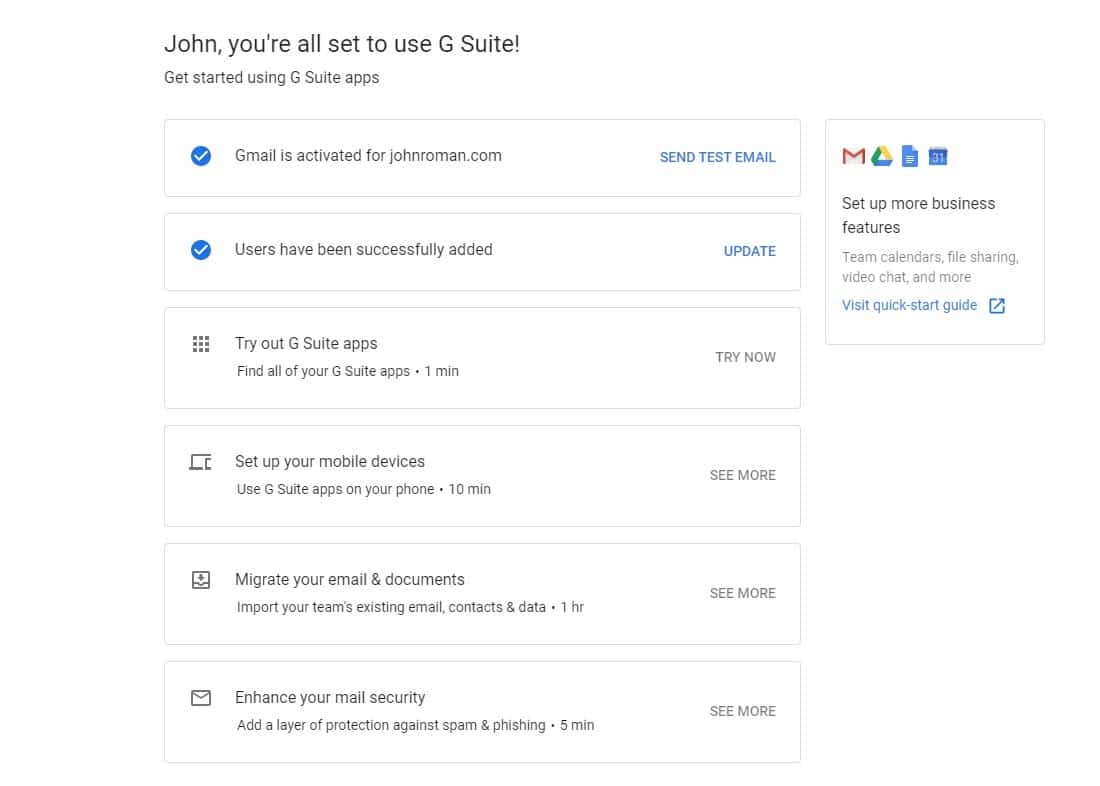
You now have your work email address through Google Workspace set up and can log in to Gmail to check and send email.
Now all you have to do is test that your new work email address works.
7. Test your email address
Since Google has verified that you’ve entered the MX records correctly, this isn’t technically a necessary step.
But it’s the quickest Way to take your brand new email for a spin into Gmail inbox.
See also: 12 Wedding Venue Website Design Ideas and Tips
Open another email account, Gmail, Outlook, AOL, it doesn’t matter. Compose a new email and enter your new email address in the To field.
Write a random subject like “First email” and send it.
Now go to Gmail and sign in with your Google Workspace credentials.

If you If you did everything right, you should see the test email you sent from your other account in your inbox.
You can also try composing and sending an email in reverse to confirm that you’re also fine sending emails.
How to Get Emails to Your Professional Email In Desktop/Mobile Apps
In this In this section we briefly cover how to use different apps with your new work email
Set up your new Google Workspace email in Mail for Windows 10
If you’d rather use your Windows 10 Mail app instead of your browser, it’s effortless to set up .
If you haven’t set up an email account yet, all you have to do is open the app. You will be automatically prompted to “Add an account”.
If you already have an active account, log out and click on the “Add a new account” link.
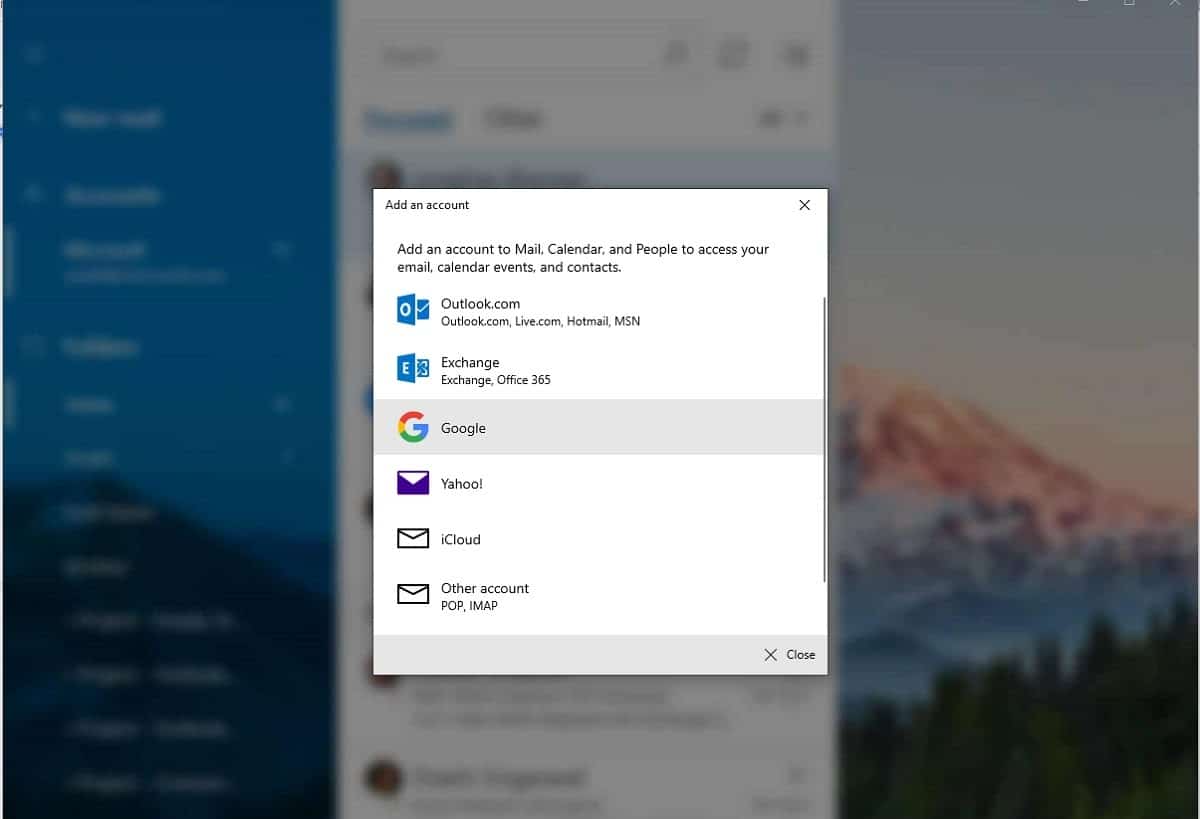
Next, click the Google button and sign in using your Google Workspace credentials.
Google will ask you to confirm that you allow Windows to access the data.

Just scroll down and click “Allow” .
Once you’ve done this, you’ll be able to read and send email in the Windows 10 Mail app.

The setup is complete and you don’t need to do anything else.
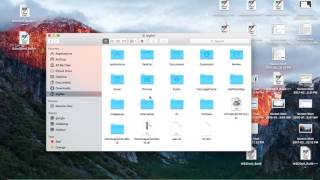
Setting up your new Google Workspace email on a Mac
If you don’t have your browser you can easily add your new Google Workspace email address to the Mail app.
First, open your Mail application, then click on the “Mail” option in the top menu to open the Expand Main Settings.
Select the Add Account option ‘, select ‘Google’ and then click ‘Continue’.
From there you can begin the simple activation process.

If you want, you can now even choose which apps to sync with the account, not just Mail but also your calendar and notes.
You can now send email from your new address using the Mail app.
How to use your professional email address on mobile
Since you have your email address over Google Workspace set up, accessing it from your mobile phone is very easy.
Using the official Gmail app
If you are not already using Gmail App available for both iOS and Android is available, download it Download and sign in with your newly created Google Workspace credentials. Easy as pie.
If you’re already using it with another address, you’ll need to add your new work email address.
To do this, open your Gmail app on your phone.
On Android devices, press the hamburger icon to expand the menu, scroll down and click Settings.

From here all you have to do is click on the “Add Account” link.

Next, click the Google button to go to the Google account sign-in page.
You may need to enter your smartphone’s PIN code before si e to continue.
Once you see the Set Up Email page, sign in to your Google Workspace account.
That’s it.
If you are using an iPhone, the steps are pretty similar. Tap your thumbnail in the top-right corner of the Gmail app

This will add a new window opened where you need to select the option “Add another account” on:

You should now be able to add your freshly created work email address, just select Google as your preferred option here:

What if you don’t want to use Gmail application but the default mail app on your devices? Well, here’s how to add your work email address.
Use the default Android email app
Access your Gmail email address via the default “Mail” app on your Android phone , the first thing you need to do is go to the account settings.

Next, tap on the Add Account option ” and select “Mail” or “Email” application (Email is the default for Samsung phones).

Finally select Gmail/Google Workspace and sign in to your new Google Workspace account.

Once you’ve signed up, you’ll receive emails and notifications from your Pro address.
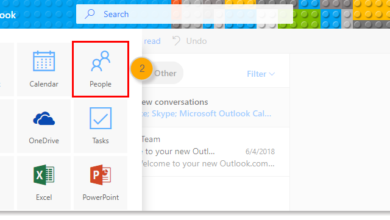
Using the Mail app on iOS devices
You would also follow the same process on iPhones.

Open the Passwords & Accounts menu in the general iOS settings.

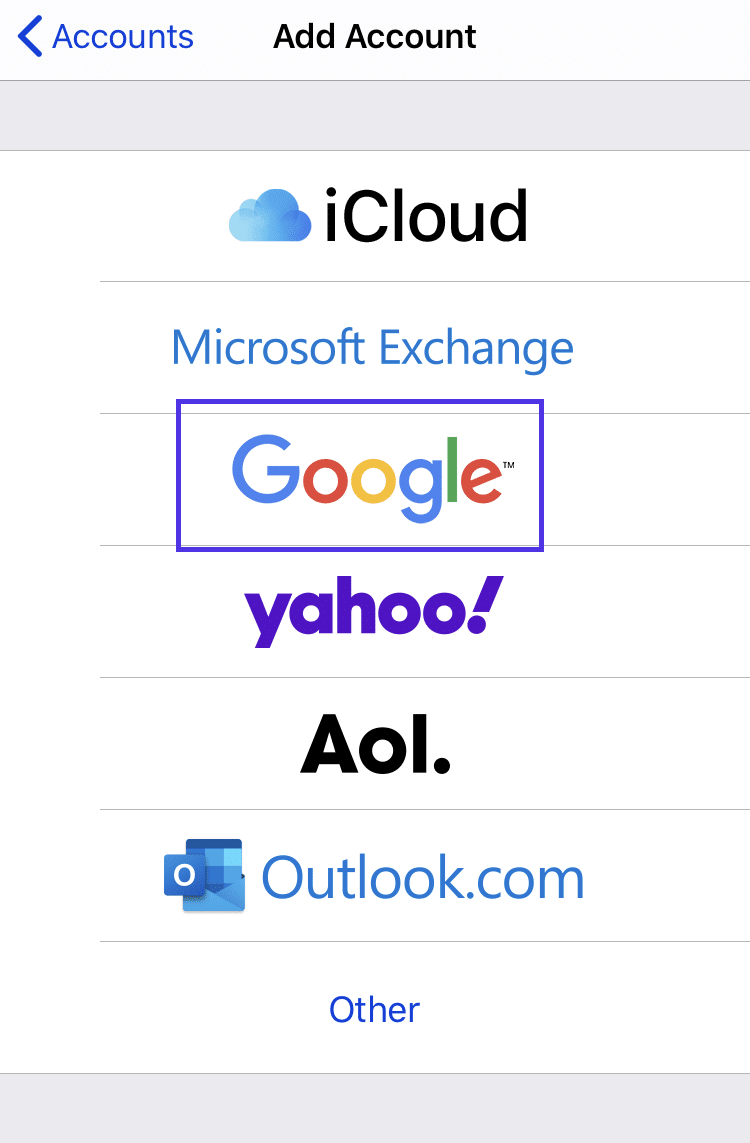
Tap on the “Add account” option and select Google:
Finish your signup and wait for the Mail app to confirm your signup.
Finally, select additional settings such as Contacts and Address Book and save the new account.
You can ever Now you can access your professional Google Workspace email from your iOS devices.
Want to instantly make your business look more professional? 💡Add a custom email address with this simple guide⚡️Click to Tweet
Summary
Setting up a professional email address is like laying the groundwork for your future business communications. You can set up your email using a traditional host and their cPanel dashboard. Or you can opt for a managed hosting option and integrate your Google Workspace account in a few clicks.
Just don’t waste too much time thinking about the email address, just make sure that it contains your real name or initials and start your business. This is the important part!
See also: How Do I Create an Email List From Excel?
.