by Christopher Heng, thesitewizard.com
KompoZer is a WYSIWYG (What You See Is What You Get) web editor based on Nvu, another free WYSIWYG web editor. It’s essentially Nvu with some bugs fixed and a name change. KompoZer runs on Windows, Macintosh and Linux.
This article will guide you through the steps to create your first website with KompoZer.
Reading: How to create a website using kompozer
If you’re interested in a newer web editor, you might want to check out the BlueGriffon tutorial. BlueGriffon is an open source web editor developed by the author of Nvu. Alternatively, you can also try the Expression Web Tutorial, which explores Microsoft’s web editor, a sophisticated and feature-rich editor that used to be sold in stores but is now free.
What you need
For this tutorial you will need the following.
-
You need KompoZer. There are versions of KompoZer for Windows, Macintosh and Linux. Choose the right one for your system. Note that this tutorial deals with KompoZer version 0.7.10, which at the time of writing this was the latest stable version available. Do not use the 0.8b3 development release (which seems to have been abandoned since February 2010 with no new releases) as it will likely behave differently from what I describe here.
And yes, 0.7.10 is very outdated and does not support many of the modern features used on websites today. As mentioned above, the original developer who created Nvu on which KompoZer 0.7.10 is based has transitioned to BlueGriffon. In general, if you want to design a modern website, especially one that’s mobile-friendly, I recommend using either my BlueGriffon or Expression Web tutorials.
UPDATE: The official site for KompoZer is gone. Even before that, the software appeared to have been abandoned for years. So I removed the link to the website I previously placed here.
-
You need a web host to publish your pages. For the absolute beginner, a web host is (roughly speaking) a business that has computers that are constantly connected to the internet. After you’ve designed your website(s), you need to get your pages onto your web host’s computer (called a web server) for the rest of the world to see.
There are other things required to get your first website up and running, such as: However, this tutorial doesn’t address those issues – it’s all about designing (building) and publishing your website with KompoZer. For those who are absolute beginners, it may be helpful to read How to Create/Make a Website: The Beginner’s A-Z Guide for an overview of the entire website creation and maintenance process.
Overall Goals of This Tutorial
By the end of this tutorial series you will have created a fully functional website with several pages including a main page, a working feedback form, a reciprocal linking pages , an About Us page, and a sitemap. Your site contains images, multiple columns, a form, links to other pages within your site, links to other sites, text in different font sizes, and so on.
More importantly, you know how to use KompoZer to build, design, and publish your site so you can design new sites at any time.
Aim of this chapter
In this chapter you will learn how to create and publish a rudimentary web page so that it is accessible on the Internet. At the end of this chapter you will be viewing your website on the Internet using your favorite web browser.
Note that this is a handy tutorial. To benefit from it, to even understand it, you must follow the steps as I describe them. The practical nature of this guide makes it difficult to follow or understand if you don’t do the things mentioned.
Install KompoZer
To install KompoZer, download it first.
If you are using Windows and don’t know what to do with the ZIP file after downloading it, follow the steps below.
Create a new folder on your desktop. Name it “kompozer” (without the quotes). Double-click the downloaded ZIP file. A window will open. In this window, drag the files into the folder you created earlier. Then go to this new folder and right click on the kompozer.exe file. In the menu that opens, click on the “Send to” menu item. Then click on the menu item “Desktop (create shortcut)”. A shortcut to KompoZer will be placed on your desktop. To run KompoZer, all you have to do is double-click this shortcut.
Create a simple first web page
To give you an idea of how easy it is to create a web page, first launch KompoZer.
You will be greeted with a window containing a menu (the top line of the window labeled “File Edit View Insert…” etc.), a few rows of toolbars (with buttons like “New”, “Open”, etc.), a left panel with the heading “Site Manager” and a large window on the right with a tab called “Untitled” . This is a large area where you design your web page.
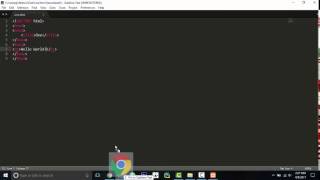
Type the following into KompoZer. You don’t need to do anything special – just start typing. Note that you can type anything you wish — i I’m just providing you with a block of text as an example, but for ease of explanation I’ll assume that’s where you typed the text in the rest of the tutorial, don’t let that stop you get creative, but get creative.
See also: How To Make a Clothing Website: A Quick Guide to Help Retailers Build an Online Presence
When you type, you are in KompoZer’s “Normal” mode. You can see which mode you’re using by looking at the row of tabs at the bottom of the KompoZer window.
p>
To see how your page will look in a real web browser, click the “Preview” tab to enter KompoZer’s “Preview” mode. Return to “Normal” mode before proceeding. I’m assuming you’re using “Normal” mode in this tutorial unless otherwise noted. “Normal” mode is the WYSIWYG editor mode of KompoZer. When you enter text in this mode, KompoZer converts it behind the scenes into an HTML web document so that web browsers can recognize it as a web page. If you want to see the HTML generated from your input , click the “HTML Source” tab at the bottom of KompoZer. Remember to return to “Normal” mode once you’ve admired the code.
Now save the page to your hard drive. To do this, click on the “File” menu and then on the “Save” item in the menu that appears. A dialog box should appear asking for the page title.
Note: for the sake of simplicity I will this sequence of clicking the “File” menu followed by the eleme nt “Save” in the future simply as “File | Save”.
This means that you have to click on the “File” menu, followed by the item “Save” in the menu that appears. There are shortcuts to saving a file in KompoZer, such as for the There are many commands in this tutorial, but I’ll leave the nitpicking to you and focus on the main task of creating a web page.
As mentioned before, using “File | Save” a dialog box asking you to give your page a title. Since this is the main page of your website, you should enter the name of your website here. For example, if you are publishing a personal web page, you might want your website to “Shakespeare’s Website” (without quotes) if your name happens to be Shakespeare. If you are publishing a company website, the name of the website should be your company’s name, e.g. “ABCDEF company” or something similar.
When you’re done with the title, click the OK button or just press Enter (or Enter on Mac).
A new dialog box will appear asking you to enter a filename Navigate to a directory (ie, folder) on your computer where you want to save your page Type “index.html” (without the quotes) in the filename portion of the dialog box do not use the default name provided in the dialog box. Do not use any other name. Do not use capital letters (ie capital letters) in the name. Most web hosts expect the main page of your website to be called “index.html”. Your computers are configured to display the index.html file simply by typing in your domain name such as http://www.example.com/. Changing the name to a different name does not work as expected.
After saving the file, return to the main KompoZer window. Look at the window title bar at the top of the window. Note that instead of the words “untitled” it now shows the title you typed earlier.
Uploading or Publishing Your First Web Page
Before we polish the page so that it looks at least halfway decent, we need to publish the page to your web host. One reason we’re going to do this now, even before we’ve finished the page, is that KompoZer needs the information about the address (or URL) of your actual website before it can properly handle things like links and images on your webpage. Although you may feel embarrassed by the page at this point, please follow the steps below or you will run into problems later.
Don’t worry about the page being so plain. If you haven’t given anyone your website address (URL) then nobody will know your website exists, so this preliminary version of your page will not be seen by anyone but you. People aren’t going to visit your website out of the blue just because you happened to sign up for a web hosting account today. It’s not that easy to get visitors.
Another reason you’re publishing your page at this point is so you can become familiar with the key stages of web page design.Once you get that hurdle out of the way and know how to transfer your website from your computer to your web host’s computer, you have mastered arguably the greatest technical challenge a newbie faces. But don’t let that put you off – it’s actually quite simple!
To publish the page, go to File | Publish (ie, the Publish item in the File menu). A Publish Page dialog will appear asking for more details.
-
“Site Name” is the name you want to give to your website. Use whatever name you gave your website when asked for the title earlier (e.g. “Shakespeare’s Website” or “Company XYZ” or whatever). This name is only used internally by KompoZer to refer to your site, but it’s probably best to use the correct name you ultimately intend to give your site to avoid confusion later.
-
The “Your Home Page HTTP Address” field specifies the actual web address (or URL) of your website. If you registered a domain name such as “example.com” for your website, enter “http://www.example.com/” in this field. This field is required because KompoZer uses this information to create links on your website. Be sure to include the http:// prefix as well.
-
“Publish server” is a bit more complicated to explain. When you signed up for your web hosting account with a commercial web host, you received quite a few details from your web host. Below that is something known as your “FTP address”. FTP or File Transfer Protocol is the common means by which you transfer your web pages from your own computer to your web host’s computer. Transferring your pages from your computer to your web host’s computer is referred to as “publishing” or “uploading” your pages.
For the purposes of this tutorial I will assume that your web host has told you that your FTP address is “ftp.example.com”. You should substitute your real FTP address whenever you see “ftp.example.com” in the examples below.
Before you enter this address, however, you need to know which directory (or folder) you need to put your web pages in. Some web hosts require you to put your web pages in a directory called “www”. Others require you to put it in a “public_html” directory. Still others say to put your web pages in the default directory you see when you connect via FTP. Etc. Find out the directory where you should upload your web pages.
When you have all the details you can form the address that you need to enter in the “Publishing Address” field.
See also: Gofundme Website Clone – How to Create a Crowdfunding Platform Like Gofundme
If your FTP address is “ftp.example.com” and the directory you want to upload to is “www”, type “ftp://ftp.example.com/www” a. Here. Note that you preceded your FTP address (“ftp.example.com”) with “ftp://”, added a forward slash (“/”), and followed it with your web directory name (“www”). If your web host tells you to just upload it to the directory you’re logged into when you connect via FTP, then just type “ftp://ftp.example.com” here.
-
The “Username” and “Password” fields in the dialog box refer to the username (or login name) and password assigned to you by your web host. It is required for KompoZer to connect to your FTP account and upload (publish) your pages.
When you are finished filling out the information, click the “Publish” button. KompoZer connects to your FTP account on your web host and uploads your pages. A dialog box will appear telling you that your page is being uploaded. The box will automatically disappear when KompoZer has completed its task.
If you get an error message from KompoZer, go back to the instructions above and double-check all your settings. Most problems at this stage are caused by one of the settings not being entered correctly. If you’ve eliminated all possible errors in your settings and still get an “Unknown publishing error”, read my FAQ about it.
Test website
Before proceeding, you must test the uploaded website. This way you will know if you made a mistake when entering your data previously.
Start your browser. Enter the URL (web address) of your website. This is the address you previously entered in the HTTP Address field. For example, enter “http://www.example.com” if that is your URL.
If you typed the “publishing server” correctly earlier, you should see the page you created earlier in your web browser.
If you get an error message like “No DNS for www.example.com” or “Domain not found”, it probably means that your domain name has not yet been shared with your ISP. Simply put, this means you probably just bought your domain name. It takes some time for a new domain name to be recognized worldwide (usually 2 or more days), so it’s possible that your ISP hasn’t yet updated their name servers to recognize your new domain.Some web hosts give you a temporary address that you can use to access your website in the meantime. In this case, use the temporary address to verify that your website uploaded correctly. Otherwise you just have to wait.
If you’re getting an error like “404 File Not Found” or your web host’s preloaded default page, you may need to go back and check the “Publishing Server” field. You may have published your page to a location that is not recognized by the web server as a default page that is displayed when only your domain name is entered.
You can change the settings you just entered by accessing the Edit | Publish Site Settings menu. Then, in the left pane, under “Publishing websites,” click your website name. One possibility of the page not showing is that you haven’t specified the correct directory on your website for your index.html page to be published to. A more remote possibility is that your web host requires your page to have a name other than “index.html”. This is very rare these days, so only explore this last option after you’ve ruled out all the others. Worst case, contact your web host’s support department or check their documentation for help.
If you see your domain parking page, which was created by default when you first bought your domain name, it may mean that you forgot to point your domain name to your web hosting account . I highly recommend that you go back and follow the steps in “How to start/create a website” in addition to this tutorial. As mentioned earlier, creating a website involves more than just using a web editor.
If you don’t get any errors at all but see the page you previously designed, congratulations! You have created and uploaded your first website. It may be a rudimentary site, but you’ve successfully gone through all the essential stages of designing and uploading a webpage.
Next chapter: Polishing up your website
In the next chapter you will learn how to improve this rudimentary website by adding images, changing fonts, etc.
Next: KompoZer Tutorial Chapter 2: Add images, change fonts, change colors, create a navigation bar, write your content.
Copyright 2003-2020 by Christopher Heng. All rights reserved. For more free tips and articles like this one on web design, advertising, revenue and scripting, visit https://www.thesitewizard.com/.
Did you find this article helpful? You can learn about new articles and scripts published on thesitewizard.com by subscribing to the RSS feed. Simply point your RSS feed reader or a browser that supports RSS feeds to https://www.thesitewizard.com/thesitewizard.xml. For more information on subscribing to RSS site feeds, see my RSS FAQ.
This article is protected by copyright. Please do not reproduce or distribute this article, in whole or in part, in any form.
- Is it possible to create a website without buying a domain name? The high price of “free”.
- Tips for choosing a good domain name
- How to register your own domain name
- How to choose a good web host
- Dreamweaver Tutorial: How to Design a Website Using Dreamweaver CS6
- My Biggest Website Regret
- Appearance, Usability, and Search Engine Visibility in Web Design
- Free HTML Editors, Free WYSIWYG Web Editors
- How to set the height of a DIV relative to a browser window (CSS)
- How to Generate the free Let’s Encrypt SSL certificate on your own (Windows) computer
- How to add meta tags to a web page with BlueGriffon
- How to add a song (or any other audio clip) plays ) from a list on a website
- How to draw a horizontal line on a web page with Expression Web
- How to make a website for free
- Why Can’t I create any domain? Is there a way to get rid of a registrar altogether?
- What is the difference between a domain name registrar and a web host?
- How to create a mobile-friendly website: responsive design in CSS
- What is the difference between a content management system (CMS), a blog, a web editor and an online site builder?
- How to create a Blog
- How to Create / Build a Website: The A-Z Guide for Beginners
- Tips on Choosing a Good Domain Name
- Expression Web Tutorial : How to build a website with Microsoft Expression Web
- Dreamweaver Tutorial: How to design a website with Dreamweaver CS6
- BlueGriffon Tutorial: How to design a website with BlueGriffon 3
- How to Design and Publish Your Website with KompoZer (Free WYSIWYG Web Editor)
- Free Feedback/Contact Form Wizard
To order this page from I To link to your site, simply cut and paste the code below to your webpage.
How to design and publish your website with KompoZer
It will appear on your page as:
How to design and publish your website with KompoZer
See also: How To Create A Blog Logo That Looks Professional – Easily, Quickly And On Budget!
.