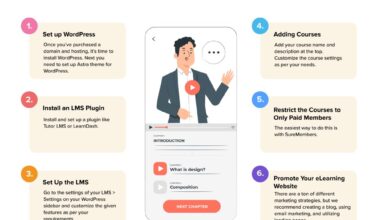
How To Make a Clothing Website: A Quick Guide to Help Retailers Build an Online Presence
Do you have a clothing store and are looking for a way to expand your customer base? Or maybe you want to start your e-commerce site selling custom made t-shirts?
Anyway, selling clothes online is a great way to reach new customers. You can open a clothing store without dealing with the usual overhead of a traditional physical store.
Reading: How to create a clothing brand website
All you need is a website. You don’t even need to know how to build an ecommerce website. Luckily, this is easy to do when you have the right tools and templates.
Let’s discuss how to create a clothing website so you can start your online clothing store and join the ranks of small business shopkeepers can online.
- How to create a clothing website
- Step 1: Choose a clothing niche
- Step 2: Choose a domain name
- Step 3: Choose your platform
- Step 4: Sign up for a hosting plan
- Step 5: Install WordPress
- Step 6: Install and configure WooCommerce
- Step 7: Add your products
- Step 8: Start marketing your store
- Last Thoughts: How to create a clothing website: How to get started for retailers
How to create a clothing website
- Choose a clothing niche a us
- Choose a domain name
- Choose your platform
- Sign up for a hosting plan
- Install WordPress
- Install and configure WooCommerce
- Add your products
- Start marketing your store
Step 1: Choose a clothing niche
The first step to creating a clothing website is to decide on a niche for your clothing store. You need to decide what type of clothing you’re selling and who would be interested in buying that clothing.
You’ll find it easier to sell clothing if you’re targeting a specific demographic need than if you try to serve everyone. They benefit from targeted messages resonating with a group and avoid talking to people with different tastes and needs.
An example of a clothing niche is a clothing store that sells newborn, toddler or used clothing sold.
Step 2: Choose a domain name
Once you know who you are targeting, you need to choose a domain name for your clothing store. A domain name is what your visitors type into their browser’s address bar to visit your website.
It’s a good idea to keep your domain name short and memorable so that your visitors can easily type it.
Step 3: Choose your platform
Once you’ve decided on a niche and domain name, it’s time to choose a platform.
You have several options, WordPress is often the best ecommerce solution. WordPress is a free and open-source platform that powers more than 40% of all websites on the internet.
There are also several free and premium WordPress themes and plugins that make creating a Website without programming knowledge.
See also: How to Create a Freelance WordPress Website for Your Business (Step-by-Step)
Thanks to plugins you can add all sorts of functions to your website. For example, WooCommerce is a plugin that turns your website into a robust online store.
Step 4: Sign up for a hosting plan
You will also need a hosting plan . A hosting plan provides server space – digital space where the website files reside. It is necessary for visitors to be able to access your store from the web.
You benefit from a hosting provider with plans tailored to small business owners and their needs. Nexcess has hosting plans optimized for WordPress and WooCommerce.
We’ve optimized our plans for faster speeds and better security, which are crucial features for online stores to build trust and increase conversions .
Check out our pricing plans and choose one that suits your needs.
Step 5: Install WordPress
Once you sign up for the hosting Once you’re signed up, you’ll need to install WordPress if your chosen hosting provider doesn’t preinstall it for you.
Most hosting providers have a one-click installation process for WordPress, so all you have to do is enter your username, website title and enter password to complete the installation.
Once WordPress has been installed, log in to your WordPress dashboard and go to Appearance> Themes.
Search for a topic related to WooCommerce compatible to ensure it has all the necessary features, layouts and web designs you need.
You can then drag and drop your homepage or storefront to customize the p interface and take care of it take care of your technical search engine optimization (SEO). In other words, you can create an ecommerce website that appeals to your target audience.
Step 6: Install and configure WooCommerce
The next step in creating a clothing website is to install and configure the WooCommerce plugin.
In your WordPress dashboard:
- Go to Plugins > Add New.
- Search for WooCommerce.
- Click Install.
- Click Activate.
If you activate WooCommerce, you will be taken to the Setup Assistant.
See also: Office Skills Blog
Here the plugin will create the necessary pages for your ecommerce store and you will have to fill in the details of your fashion store.
You will also have the option to configure your payment options, which credit cards you accept and shipping options for your online business. You also set up the checkout process.
Step 7: Add your products
After completing the setup wizard, you have the option to add your first product pages to your clothing line.
Click on the button that prompts you to add a product and you will be taken to the screen where you can add product information.
You can add a title, product description and images. And you can set the price, product variations, and more. When you’re done, click Publish. To add another product, click Products>Add New.
If you have many products, you can also go to WooCommerce > Home > Add products. You can then add products using a CSV file via the CSV import option.
Step 8: Start marketing your store
After adding all the products to your store, The last step is to start using the included marketing tools to promote your online fashion business and drive traffic. After all, you can’t sell online without traffic.
Here are a few ideas to get you started:
- Promote your clothing company’s store to social media platforms where your ideal target audience is spending time.
- Add an email signup that offers a discount code in exchange for their email address to send email marketing messages to prospects.
- Blog on your website to incorporate product-related keywords and links to your own clothes into your content to benefit from the marketing funnel.
- Paid Ads with Google AdWords or Facebook Ads.
- Optimize your website for search engines by including relevant product keywords in your product title, description, URL and more.
Final Thoughts: How to Build a Clothing Website – Retailer’s Starting Guide
Learning how to build a clothing website can seem daunting. But once you’re familiar with all the steps of the process, you can quickly launch your store.
Implement the steps we’ve discussed with Nexcess’ WooCommerce hosting.
It is specially optimized for online shops – so your website is always fast and secure.
Open your shop in a few clicks and see why more than 100,000 online shops host with Next.
Check out our plans to get started today.
See also: How to Make a Serverless Website with AWS Lambda (for free)
.