See the Compute Module chapter for a detailed description of how to create websites in Azure. The Azure website service is referred to as “Web Apps” throughout the management portal, so don’t get confused. This chapter discusses some other terms related to Azure websites. In a normal hosting environment, developers usually encounter problems when deploying their websites to production. The Azure website service ensures that developers encounter the fewest problems when deploying their websites. Also, the Azure website service falls under PaaS (Platform as a Service). This means websites can be deployed without actually having a full infrastructure.
Creating a website in the Azure management portal
Just to get back to website creation Let’s take a look at these steps to create a website in the Azure Management Portal.
Reading: How to create a website fir azure
Step 1 − Sign in to your Management Portal.
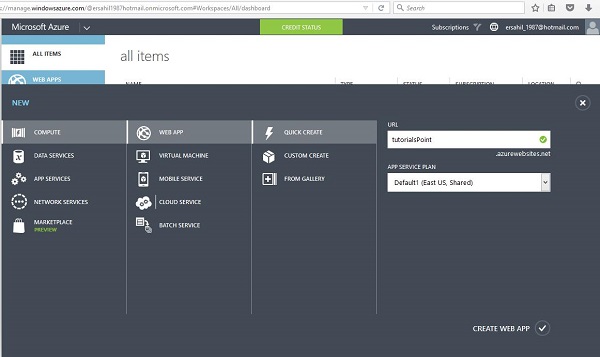
Step 2 − Click “New” in the bottom left corner of the screen → Compute → Web Apps → Quick Create.

Step 3 − Enter the details as shown in the image above and click “Web App create”.
Step 4 − Go back to Sites in your admin portal and you will see them listed. Click on the URL.
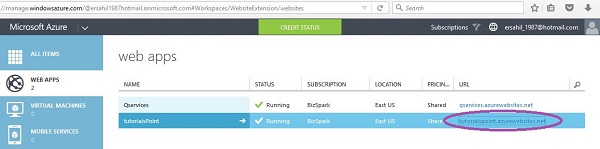
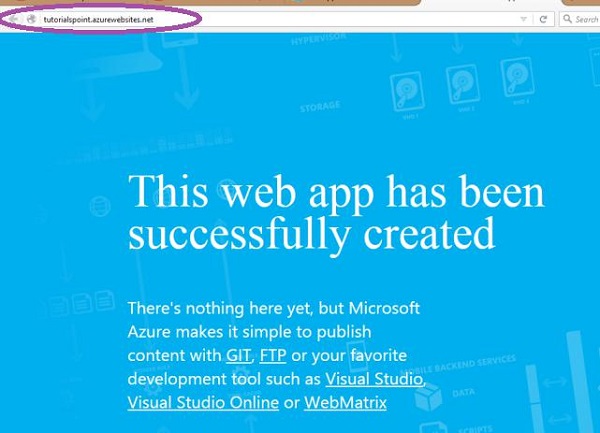
You will be redirected to the website that you just created.
Deploy the Azure -Website from Visual Studio
Let’s publish our website from Visual Studio under the domain name we just created. After a website or web application is created in Visual Studio.
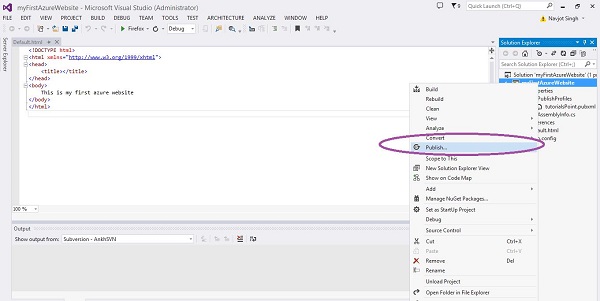
Step 1 − Go to Solution Explorer and right click on the website/web application name.
See also: The structure of an HTML document
Step 2 − Select “Publish”.
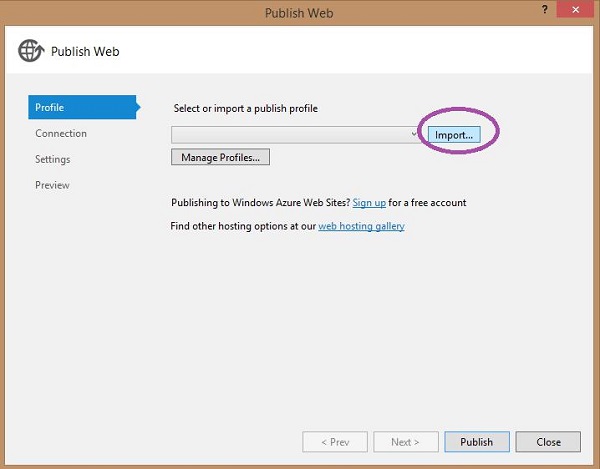
Step 3 − In this step, you need to connect to the Azure subscription account in turn. Click “Import”.
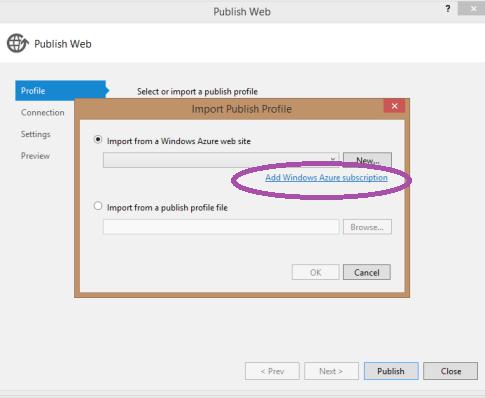
Step 4 − Click on “Add Azure Subscription”.
Step 5 − For the first time, you need to download the subscription file.
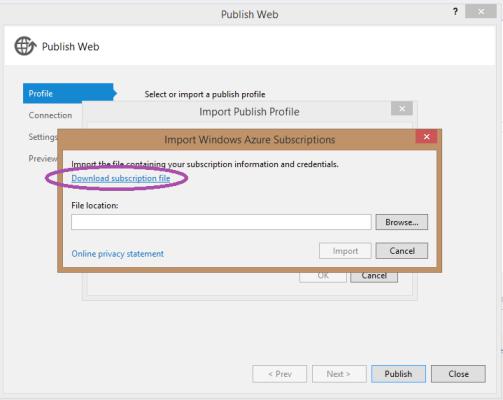
Step 6 − The above step will download a file with the extension .publishsetting to your computer (if you are not signed in, you will be prompted to sign in before downloading).
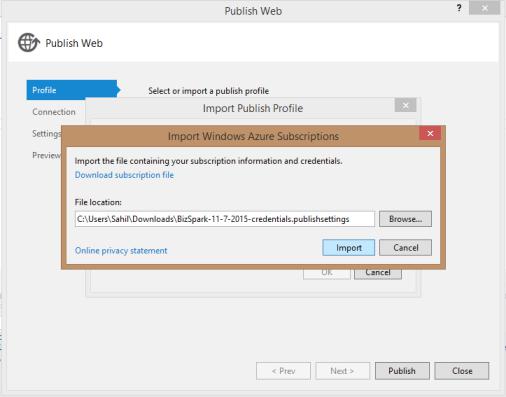
Step 7 − Come back to the same popup and now browse for the file you just downloaded.
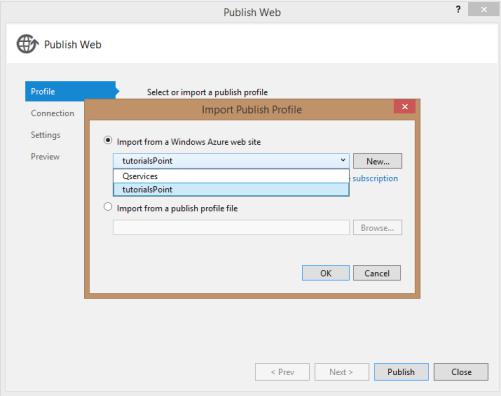
Step 8 − Now expand the drop down menu and you will see the websites available in your subscription. As in the picture below you will see two websites. Let’s select “tutorialsPoint”.
Step 9 − On the following screen, leave the default settings checked. There are many options for public methods. We need the “Web Deploy” method here. Click on “Validate Connection”.
Step 10 − On the next screen, leave the default settings selected again.
See also: How to Get a Professional Email Address With a Custom Domain
Step 11 b > – Finally, click “Publish” on the last screen.
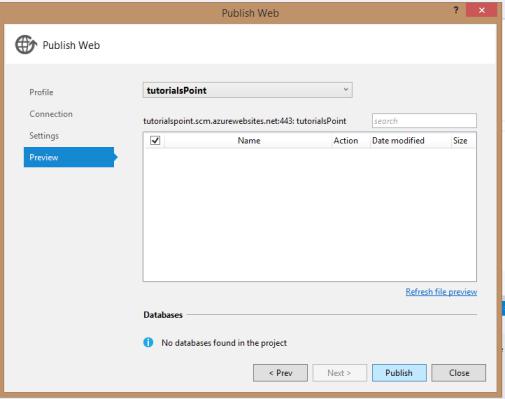
Step 12 – Go to the URL of the website and you will see your content.

You can see how easy it is to deploy a website to Azure using Visual Studio. You can make changes in Visual Studio and self-publish from there. This makes testing applications very easy.
Monitoring the website
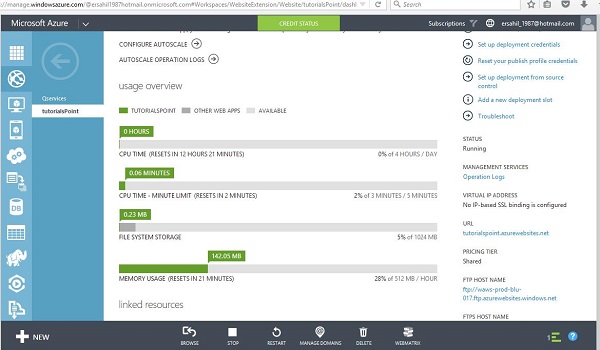
If you go to the website dashboard in the management portal, you can see the website metrics. In this section of your administration portal you can control many things related to your website. You can see the website metrics, create backups, configure settings and scale the website.
Step 1 − To view the website metrics, select Monitor from the top menu and You will see the following screen.

Step 2 − Go to the website and select “Dashboard” from the top menu.
Step 3 − Scroll down and you will see the information below.
Staged Publishing
Windows Azure allows deploying a website in stages. You can create the deployment slots.
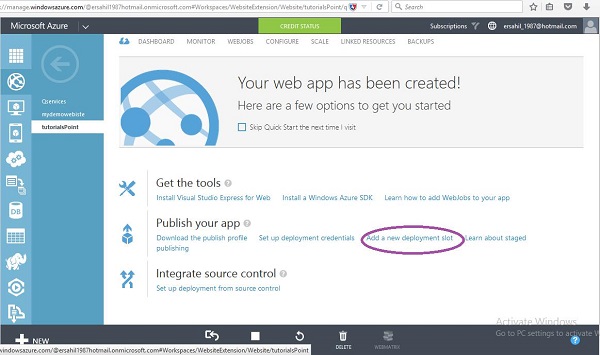
Add a staging slot for pre-production testing
Basically, this feature allows you to deploy your website in a separate slot for testing purposes, and then switch slots, if something goes wrong, you can simply revert to the previous version by changing the slot, sometimes applications don’t do it that way on a large scale behaving well as expected of them, this feature comes in handy in such situations, making deployment tasks very easy for developers and organizations.
See also: IRS Mileage Log Requirements
.