Notice
For more information about how Shopify collects, uses, and stores personal information, please see our Privacy Policy.
Be sure to review this before you install and set up Shopify Email Shop meets all requirements.
Reading: How to create an email for your shopify store
Requirements for using Shopify Email
To use Shopify Email, you must have an online store with Shopify and the Online Store Sales channel installed. If you want to send emails to your subscribers using Shopify Email, your store must have a paid Shopify subscription with a payment provider set up.
If your account is on the trial plan, you can create E mail messages and send test email messages to yourself but not to your subscribers using Shopify Email.
Note
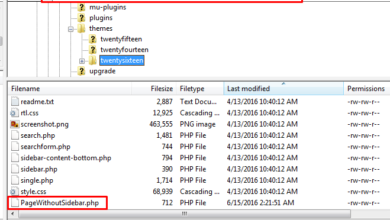
Your DNS settings may add additional CNAME -Entries added. These are required for Shopify email, so don’t remove them.
Install Shopify email
- Go to the Shopify email page apartment
- Click Add App. If you’re not signed in to your Shopify account, you’ll be prompted to sign in.
- Click Install App.
You can find Shopify Email in the Marketing section of your Shopify admin. Click Create Campaign > Shopify Email.
Pricing
All merchants on a paid Shopify plan can 10,000 free emails sent at the beginning of each month. Email costs are calculated using the following rules:
- Emails are counted based on each unique email address to which an email activity is sent. For example, sending a promotional email to 800 subscribers counts as 800 emails.
- Unused emails are not carried over to the following month.
- You can send additional emails beyond the 10,000 free emails at a cost of $0.001 per additional email. For example, sending 1,000 additional emails would cost you $1. You will not be billed for the additional emails until the cost reaches $0.005.
- Shopify Email is available on all paid Shopify subscription plans, and you’re only billed for the emails you send.
For more information, see Shopify Email Costs.
Confirm your sender email
See also: Stata: Do-files and Log-files
To verify emails with your sender -Send email address from Shopify Email , you must verify ownership of your sender email. You can verify ownership of your sender email by authenticating your email domain or verifying your sender email address in your Shopify admin.
Steps:
- Click Save Details.
- In the Contact Information section, click View Email Settings.
- Follow the prompts to authenticate your email domain, or verify your email to verify ownership of your From address.
Change your sender email address
Your sender email address is the email address specified in the From appears when your customers receive an email from you. If your domain is hosted by a third party, you need to connect it to Shopify’s SPF and DKIM records. If you don’t do this, the From field in your email messages might appear as [email protected], or the email message might be marked as spam. Use an email address with your store’s domain to increase your brand awareness and prevent your email messages from being flagged as spam.
If you have a Shopify-hosted domain , this is not required. Make additional settings to send from an email address that is linked to your shop’s domain.
If you want to change your sender email address , you must verify ownership of the new sender email address in order to successfully send email from the new address.
Note
Some email providers aren’t compatible with Shopify or require you to adjust your domain settings. Learn more about setting up your email address.
Steps:
-
Click Save Details.
-
In the Contact Information section, click Edit.
-
Change Your email address under Sender Email.
-
See also: How to Start a Blog on Facebook [Including 19 Post Ideas People Love]
Click Save.
-
In the Contact Information, click View Email Settings.
-
Follow the prompts to either authenticate your email domain or verify your email.
If your From email address ends with @gmail.com and not a custom From email address that ends with your store’s name , your email address may show up in inboxes as [email protected] through shopifyemail.com.
If your From email address is DMARC protected, your email address will Address in inboxes may appear as [email protected], and replies from your customers will be forwarded to the email address you select.
If your domain is unverified, also known as authenticated, your from email address will appear in inboxes as your selected from email address with via shopifyemail.com after it. Verifying your domain will remove via shopifyemail.com. Verifying your domain also helps with email deliverability.
If your domain hasn’t been authenticated, your sender email address will appear in inboxes as the sender email address you chose. Address with via shopifyemail.com behind it. To send email from your email address without going through shopifyemail.com, you can authenticate your domain by clicking Authenticate on the sender’s email page. A new window will open with instructions on how to create four new records with your domain provider. The host names and values for the new records must be entered in the order in which they appear in the new window. Verifying your domain can take up to 48 hours. If you’re having trouble or need help setting up your third-party domain, you can contact your third-party domain provider.
Not all domain providers use the same terminology to create new records. Instead of “hostname” the terms “name”, “description” or “prefix” could be used. Your data record refers to this. “Value” could be referred to as the place that this record “points” to. or the “goal”. Learn more about third-party domains or contact your third-party domain provider for more information.
Note
If the verification process fails, you should -Check that you created all four new records correctly. Check the hostnames and values to ensure they conform to the guidelines provided. If you entered the values incorrectly, you can try to verify your domain again.
See also: How to Create a Drop Down List in Excel
.