When you start working with datasets, there are two ways to record and save your commands and actions in Stata.
Creating Do Files
With Do- Files allow you to record all of your commands. There are a number of advantages to using DO files. By using do files to run your commands, you have a copy of what you did, allowing you and other researchers to replicate your analyzes accurately. Also, you can perform analysis without modifying your original data file until you are ready to save a clean dataset. Many researchers will maintain do-file record data management (address missing data, reverse scoring if necessary, etc.) and may have separate do-files for analysis for the final clean data set or subsets of the data. To create a do file you can either go to “File” -> “New do file” or use this toolbar icon in the Stata window.
Reading: How to create a log on stata
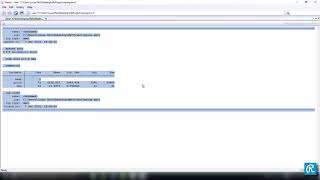
You should create a new do file create in a separate window that looks like this:
An optional step that can be helpful when creating do files is to place a comment at the beginning of the file that indicates what data you use, and other annotations you want. To separate notes and comments from commands in do files, start the line with an asterisk. If it’s a long note, you can highlight it by typing /* before your comment and */ after the comment. For example, if I’m using a data set called “relate”, I could start my data file like this:
See also: How to Create a YouTube Channel on iPhone
The first command you need is the use command to specify the file you want Stata to use. If the file isn’t in the working directory you’re currently in, just specify which directory you want to get the file from. Here are three examples of the use command, one from a record in the current working directory, one from the Internet, and one from a jump drive in a different working directory. Note that I add the clear option at the end of each command. This is to clear any data Stata is currently working with.
use related.dta, clear use http://www.stata-press.com/data/agis3/relate, clear use “E:
elate.dta”, clear
After specifying the data file, I type in the rest of the commands I want to run. Within this file, Stata assumes that each line is a new command unless you tell otherwise If you have a long command that you need on separate lines, add /// to the end of each line. That tells Stata that the next line is part of the same command. When I’m ready to run the analyses, I select the commands I want to run from (you don’t need to select any text if you want to run them all) and click the last toolbar icon in the Do-File window:
To do your do- Either use the toolbar icon or use the File -> Save As menu while the do-file editor is active.
Creating log files
Additional to record all your commands in a do file you can also make a copy of everything stata set what is sent to the result window, except for graphics. This is called a log file and may be useful for you to save all your output. This will also preserve your commands, although they won’t be saved in the same way as a do file (they will be embedded in the output). To create a log file, go to “File” -> “Log” -> “Start”. This will open a dialog where you save your log file. The default setting in Stata is to save the file with an .smcl extension. This allows you to open the log file in Stata, but other programs will not read this type of file. The other available extension is .log. This file format allows you to open your log file in other programs and may be easier to manage than the .smcl files. To save it as a .log file, simply select the Stata Log option under the File Format menu in the dialog box.
See also: How to Make a Small Business Website: Beginners Guide
Once you’ve created a log file, you can always pause it and resume later. You can do this by going to File -> Log -> Suspend (or Resume). You can also close your log from this menu.
You can also start, pause, resume, and close logs with the log command. I will use this command to start a log file, specify the file name and location, and the extension. If I were to create a log file called “creatinglogfiles” in a file on my desktop called “501” (file path: /Desktop/501), I would type:
log using “/Desktop/501/creatinglogfiles” , text
I included text because I want the file to be a .log file and not an .smcl file. If I wanted to overwrite a pre-existing file, I would add replace after the text.
After the log file is open, typing logout pauses the log file, logging in resumes the log file and the log Close closes Your log file.
See also: How to Make a Website Quickly: Your Easy 6-Step Guide
.