Building a website used to be a tedious and expensive endeavor. Registering a domain, arranging hosting, and configuring DNS settings were usually handled by different companies, making it difficult and time-consuming to build a website from scratch. Thankfully, those days are gone as companies like Amazon now offer full capabilities when it comes to creating and maintaining a website.
Introduction
Amazon offers a full set of tools for website management. In fact, most of these tools are available in Amazon’s 12-month free tier, which means you can start a website from scratch without paying any money upfront! The only thing you have to pay for is a separate domain.
Reading: How to create a website using aws 3
In this article we will cover the following aspects of creating a website:
- Hosting the website’s assets with Amazon S3 (free);
- Reduce latency and increase transfer speed by using AWS CloudFront (free);
- Register a domain and redirect to CloudFront (fee per domain) .
And with that, we dive right into the first section.
How to host a website on Amazon S3
First things first: us need to arrange hosting for our website’s assets (all HTML files, images, etc.). For this purpose, Amazon offers its cloud object storage – Amazon S3. To get started with S3, you must first sign in to the AWS web console. If you’re having trouble signing up for the AWS Console, see our article that explains the process in detail.
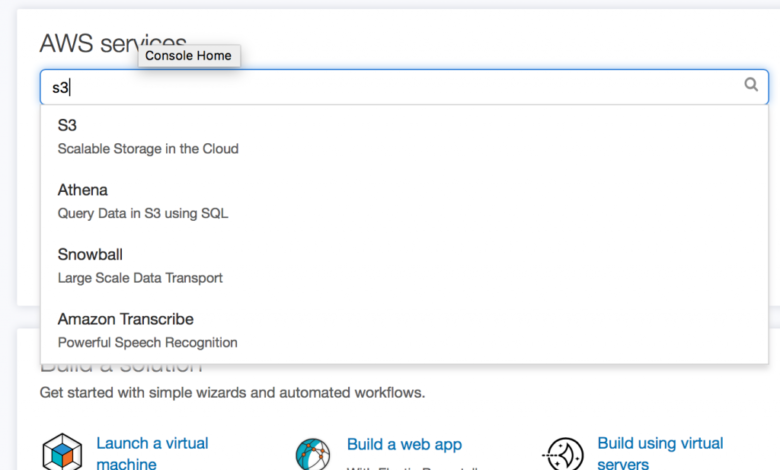
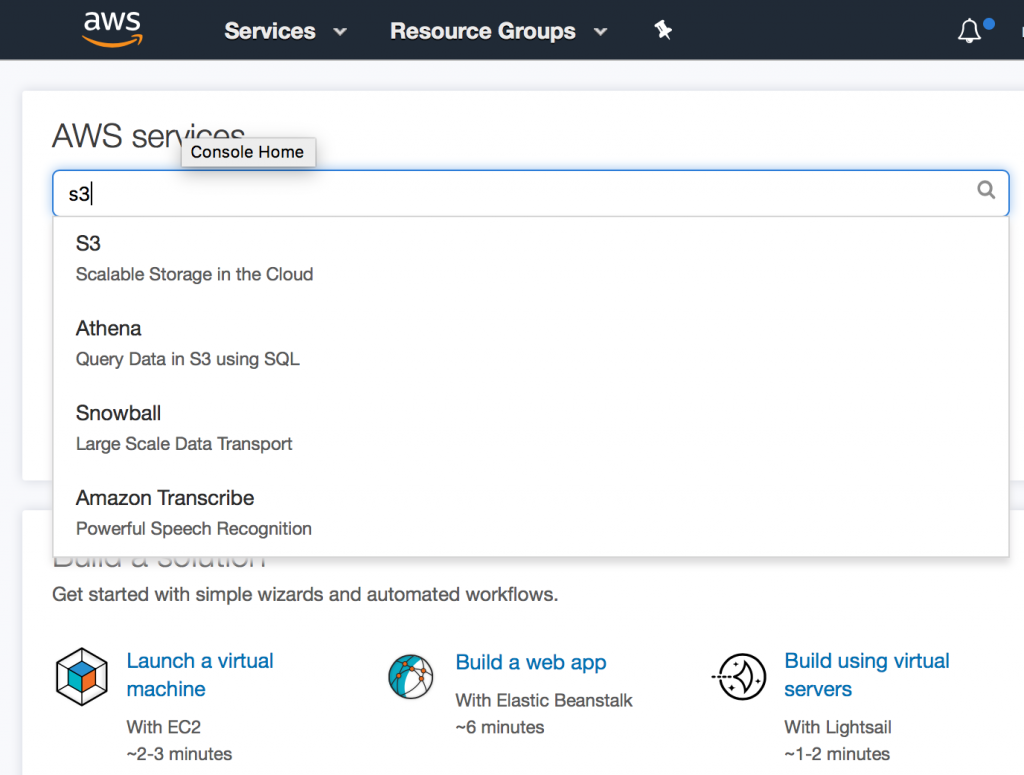
Once you’ve signed up for the console, open it and search for S3, the Amazon solution object store.

Now click Create Bucket.
Enter the bucket name, specify the region and click Next.

See also: How to Create a Website Free of Cost in 2023: Beginners Guide
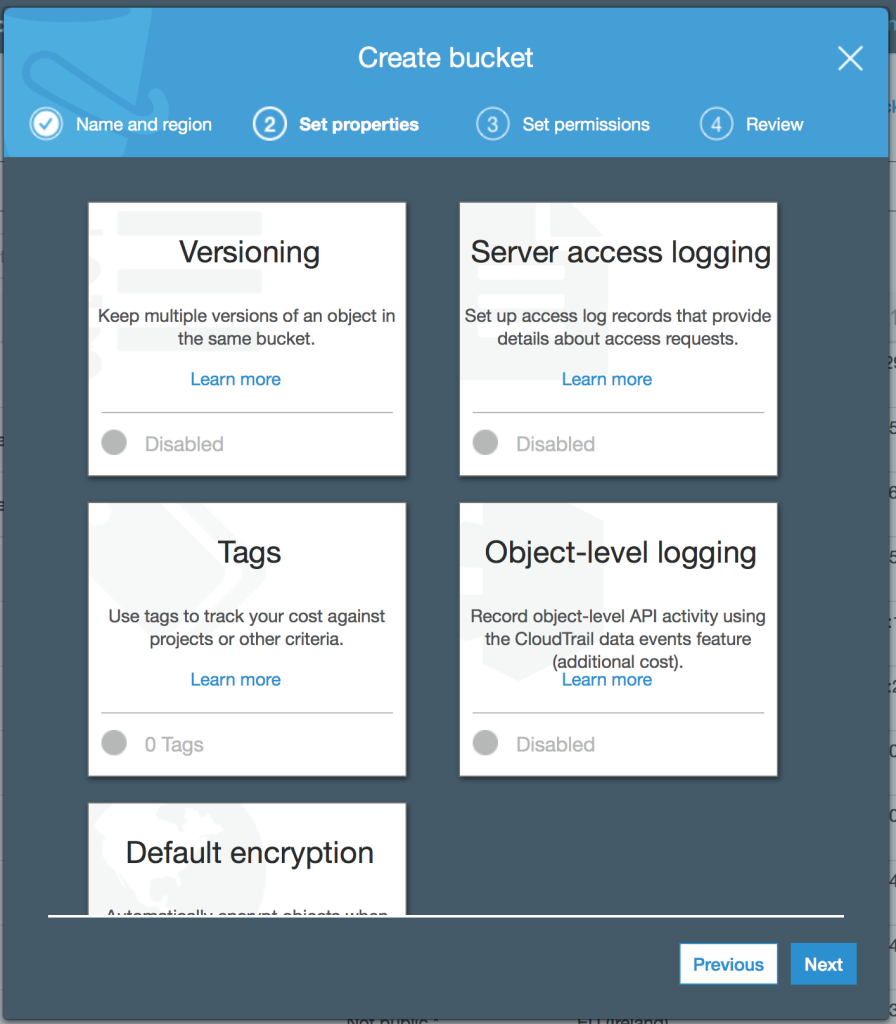
In the next step you can They versioning, server access logging, tagging, object level logging and standard dencryption. We don’t need this for now, so just skip these options and click Next.
In the next step you can set the required permissions. It’s important that you select Grant public read access to this bucket from the public permissions drop-down menu. Otherwise it will be impossible to access the content of the website that is in this bucket.
Check the bucket’s properties and permissions and click Create Bucket. p>

Now find your bucket in the bucket list and click on it.
Click Upload and upload the assets. In our case, we’ll just add an HTML file and an image to host a simple static page.

Well, that was easy enough! Our hosting is now ready and we can access the assets from anywhere. Just click on the HTML file and try to open the link. You should see the webpage you uploaded to the bucket. If you’re just using AWS for hosting and want to source the domain elsewhere, you’re done! Register your domain with another company and point to the link shown in the screenshot below.

Now that we’ve covered hosting, let’s move on to Network optimization with CloudFront.
Leverage Amazon CloudFront
Amazon CloudFront is a global Content Delivery Network (CDN) service that securely delivers data to your users with low latency and high transfer speeds. CloudFront delivers your content through a global network of data centers called edge locations. When a user requests content that you serve with CloudFront, the user is directed to the edge location that offers the lowest latency (time delay) so that the content is served with the best possible performance.
Search for CloudFront in the AWS console search bar. Open it.
See also: The 10 Best Free Resume Builders

Here you have a console that takes care of all things related to CloudFront. We won’t explain every aspect of the console in order not to overcomplicate this post It’s best to refer to Amazon’s documentationcom/resources/wp-content/uploads/2018/02/Screen-Shot-2018-02-28-at-19.10.57-1024×583.png” alt=”Register domain 3 steps” />
When you’re done, go to the hosted zones and click on your domain.

Now you need to create a recording set, forwarding internet traffic to your CloudFront distribution Click Create Record.
Now specify the following parameters:
- Name. Enter the domain name that you want to use to route traffic to your CloudFront distribution.In this example, we enter test;
- Enter Select A – IPv4 Address;
- Alias. Select Yes;
- Alias target.Enter the domain enname of your CloudFront distribution;
- Routing policy. Leave the default value of Simple e;
- Evaluate target health. Choose No.
Click Create.

It may take a few minutes for your traffic to be routed to your CloudFront distribution. If you did everything correctly, your content should be available at the specified domain.

Conclusion
Creating and maintaining a website with AWS is indeed a very simple task. Amazon’s well-integrated ecosystem allows you to effortlessly register a domain, host your website, and ensure fast load times with the help of CloudFront.
If you’re serious about AWS services and go all out , make sure your S3 data is regularly backed up in case of a server problem or failure. Options to consider for backing up your S3 data include: Google Cloud, Microsoft Azure, or even your local NAS storage. MSP360 Backup can help you do it conveniently in just a few steps.
See also: How To Send Mass Email In Outlook | Step-By-Step [2023]
.