So you want to set up your website but don’t want to pay for web hosting.
If you have a good enough internet connection and the necessary hardware, why not do it yourself with your own home server?
Reading: How to create a server for my website
Not only can this save you money on hosting costs, but it also gives you a lot more choice over what software your server can run.
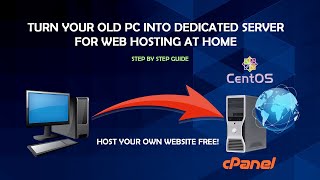
Let’s walk through how to set up your own server create at home for web hosting.
Choose your hardware
If you are planning to host a website, the first stage of knowing how to build a website server is the Choosing the hardware that can host it.
First, consider your potential usage needs. How many users do you expect? Do you need a lot of storage or processing power?
The good news is that you don’t necessarily have to buy additional equipment if your budget is limited (or not available). An old PC may run the software you need for your web server sufficiently.
However, be aware of the power requirements that an older PC may need, especially if you plan to run your server 24 hours a day operate day.
Choose your operating system: Linux or Windows?
Once you have the hardware, your next choice when deciding how to build a server for your website is your Operating system. You have two realistic options to choose from – Microsoft Windows or Linux.
It is estimated that almost 70% of the servers on the Internet are currently running Linux. The reasons for this can vary, but cost considerations and the ease with which these servers can be customized play a big part.
If you’d rather run a Windows web server, you’ll have to pay for a Windows license. In comparison, Linux is free and open source, and can be much more customizable than a typical Windows server installation.
See also: Database Driven Website
Linux servers are also a more secure option, with far fewer malware opportunities for hackers to exploit.
But that doesn’t mean they’re invincible. A lot depends on keeping your software up to date and keeping your server properly configured, no matter what operating system you’re running.
Is your connection suitable for hosting?
DIY web hosting requires an internet connection suitable for web traffic. Your download and upload speeds are important here – private internet connections may offer high download speeds but low upload speeds.
How fast your website data is for each user who visits your website , “upload” can depend on this speed. The number of users who can access your website at the same time must also share this connection.
Test your internet connection with speed test tools like this one to determine your current speed. You should also check with your ISP to see if you have any data caps on your connection.
If your ISP caps your data usage or throttles it back when usage is too high, you may need to change your provider.
Set up and configure your server
Once your hardware, connection, and operating system are ready, you need to set up the software you need to host your site.
p>
This depends on the operating system you have chosen for your server. Windows Server installations can install IIS, the web server add-on. This Microsoft support documentation for IIS gives you step-by-step instructions on what to do.
Once you have chosen Linux, you have three options to install Apache, Lighttpd or NGINX Disposal. Apache is the best known and you can find out how to install it here. You can also install Apache on a typical Windows installation.
You may need to open ports on your home router and firewall to allow your web traffic to flow back and forth from your web server. Ports 80 and 443 are the most important for web traffic, so make sure these aren’t blocked.
If you need help opening ports on your router, this guide should get you started help.
See also: How to Create a Freelance Writer Website That Actually Gets You Writing Gigs
p>
Once the server is set up and configured for web traffic, verify that it is working by visiting your server in a web browser. Most servers come with a test page that is displayed once it loads. You can later replace this with your website files.
You need to become familiar with the best tools to configure and maintain your web server. Here are some recommended tools for system administrators to use.
Set up your domain name and see if it works
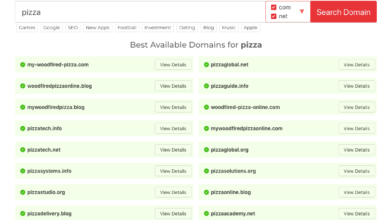
Once your server is configured to allow users to access the Internet, your final step is to set up a domain name so your users can find you.
Before you do this, users can only visit your website by entering your web server’s external IP address. Instead of a string of numbers, you want an easy-to-remember address that your users can type in.
You need to buy a domain name from a domain registrar, but you can sign up for a free subdomain from a service like No- IP if you want.
Once you have a domain (or subdomain) available, you will then need to set up the relevant DNS records for your domain to point to your server’s IP address. Your registrar has their own instructions on how to do this.
After a few hours for the changes to take effect, your server should be ready.
Do you know how to create your own server at home for web hosting the right way
If you know how to build your own server at home for web hosting, you can take control.
This can get expensive -effective way your Website hosting with the added benefit of keeping your data in your hands and not in the hands of an outside hosting provider. You also don’t have to worry about the type of website you’re hosting on your server.
Do you want to run a simple HTML page or a complex CMS like WordPress? You can run both – as long as you configure your server correctly.
If you host your website yourself, use our web monitoring tool to keep an eye on your website’s uptime, day or night. Sign up for a free account today to get started!
See also: How to Set Up Environment To Test Websites Locally
.