Believe it or not, knowing how to build a website from scratch is one of the most important skills you should master as a small business owner these days.
Please bear with me ! Here’s why:
Reading: How to create a website using wordpress.org
- Knowing how to create your own website will save you a lot of money on web developers and designers.
- So you can also follow the market trends and bring new things to your website without needing the help of a programmer.
- You will effectively stay one step ahead of your competition because while slowing down their projects by the need to consult developers, you will be able to create most things yourself (within reason, of course).
With that in mind, the most important piece of the puzzle here is that you can learn how to create a WordPress website and then you create something awesome for your business or project all by yourself.
Last but not least is the DIY approach (no coding required) that we present here , incredibly budget-friendly. In fact, you can build and run your WordPress website for only about $35 per year.
If you want to build a WordPress website, here is the whole step-by-step process:
- Sign up for web hosting (we recommend Bluehost).
- Choose a domain name for your website.
- Install the free WordPress software.
- Choose a WordPress theme.
- Create your first page.
- Install a few essential plugins.
- Don’t forget this Marketing.
When you’re ready to sign up for a web hosting account, make sure to use one of the Bluehost links on this page. Going through them reveals two things: (1) these are affiliate links, which means we get a small commission if you buy through them, (2) It will Unlock a $2.75 discount versus $3.95 with a free domain. You won’t get this discount if you visit the Bluehost site any other way.
How to create a WordPress website – bird’s eye view
- Why choose WordPress as your website? Website Platform
- How to choose a name for your website, buy a domain and hosting
- Get familiar with the WordPress interface
- Choose a theme/design for your website
- Get plugins to expand your website’s capabilities
- Create simple pages
- Consider starting a blog
- Customize Your Site Navigation
In short, what you’ll get at the end of this guide is a functional, beautiful website that won’t go to your fault.
Speaking of money, in this guide we will not focus on how you can make money from your website. But we have other resources for that. Check them out:
- How to Make Money Blogging – 17 Best Ideas
- How to integrate AdSense into WordPress in 3 easy steps
Step 1: Choose WordPress as your website platform
To be honest, there are many website platforms that you can use when creating a new website – content- Management systems (CMS) are what they are usually called.
The idea of a CMS is to provide you with some easy-to-use tools to edit the content of your website without any programming knowledge can. From the user’s point of view, these CMS are largely similar to the well-known interfaces of Facebook or Google Docs. You basically create new pages or documents and then have them published on the web.
But enough with the technicalities! As said, there are many CMS out there – more than 100 in fact, as listed by Wikipedia.
Fortunately, however, choosing the best one is easy. There’s only one king on the top of the mountain – and that’s WordPress.
WordPress is used on more than 43% of all websites (according to data). Again, these are all websites!
Or, to put it another way, about one in three websites you visit is based on WordPress.
Here are the key details on why building a website with WordPress is the right option:
- it’s open source
- it’s free
- it is the ultimate do-it-yourself solution for building websites and online shops
- it’s extra versatile – can power any type of website
- it’s fast, optimized and secure
- It’s SEO ready
- It makes social media promotion easier
Well, an important difference: the “WordPress” from which we are talking about is “WordPress, the software”. You can find it by going to WordPress.org.
There’s also the other flavor of WordPress – “WordPress, the commercial service” which you can find by going to WordPress.com. We describe the differences between the two here. For now though, let’s remember that we want WordPress.org as it is a more versatile and cheaper to use version of the platform. All of this will become clear in the next few steps.
🎯 Action note. At this point there is no actionable task that you need to do.Step 1 is just about getting acquainted with the tool that you will use in the next few steps to create your WordPress site.
Step 2: Choose a name for your website, buy a domain and hosting
When you’re learning how to create a website, choosing a name is probably the most entertaining aspect of the whole process.
After all, you have complete freedom here. You can literally choose any name you want for your website.
But! There are still some things you need to understand in order to be successful later.
First of all, there are almost 2 billion (!) websites online on the Internet (at the time of writing this article). . That said, it can be quite difficult to stay original.
It’s a really good idea to wrap your website’s name (and therefore your domain name) around either your organization’s name (the most obvious approach) or around constructing a sentence around it related to the niche you are in but with some words added for better branding.
In short, a good domain name should:
- brandable – sound unique like nothing else on the market
- easy to remember
- short – they’re easier to remember too
- easy to type and hard – you don’t want people wondering how your site’s name is spelled
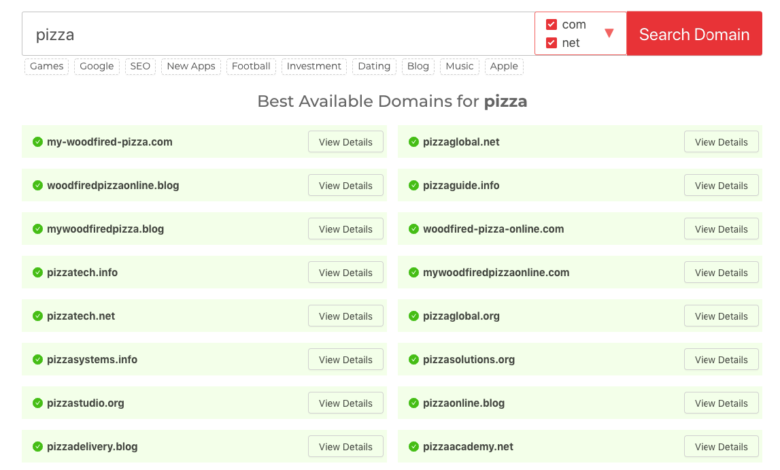
- including niche keywords – for example, if you do something with pizza, it would be cool to put “pizza” somewhere in the to have site name; it works in the non-pizza industry too. 🍕
Here’s a quick tool to help you find out if the domain name you’re interested in is available:
If you don’t know which one Domain you want to get, then head straight to our #1 generator – Domain Wheel and see how it can help you.
Start by entering a seed keyword that describes your website well defined.

Domain Wheel will come back with some suggestions. From there, you can narrow it down to find your perfect domain name.
The next step, once you know what domain name you want, is to register and purchase a hosting plan all at once. That’s what we’ll take care of next:
a) Buy your domain name and hosting
💡 Note. While things like buying a hosting package might sound intimidating at first, there really isn’t anything to worry about. The process we present here is simplified and doesn’t require you to do any technical heavy lifting.
There are dozens, if not hundreds, of different companies that can register a new domain name for you. Then there are also a lot of companies that can sell you a hosting package…
But let’s not make it too complicated and instead we get everything from one source – and all in one go.
We will be using Bluehost. Here’s why:
- Bluehost is a reputable web host that’s optimized for WordPress and will ensure your website runs without hiccups
- it’s one of the few companies that Recommended on the WordPress.org official site
- It’s cheap (from $2.75/month)
- It’s easy to use and beginner-friendly
- You will get a domain name for free
This will happen now:
- We go to Bluehost and choose a hosting plan for our website.
- We will also register a custom domain name with Bluehost (that’s a free domain name).
- We will instruct Bluehost to install and configure a clean version of WordPress on our new hosting setup.
- We’ll go home with a 100% working WordPress website!
Let’s start – how to make a website:
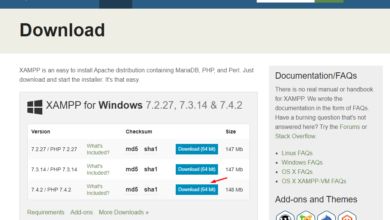
First click here to go to Bluehost. Once on the page, click on the “Choose a plan” button.
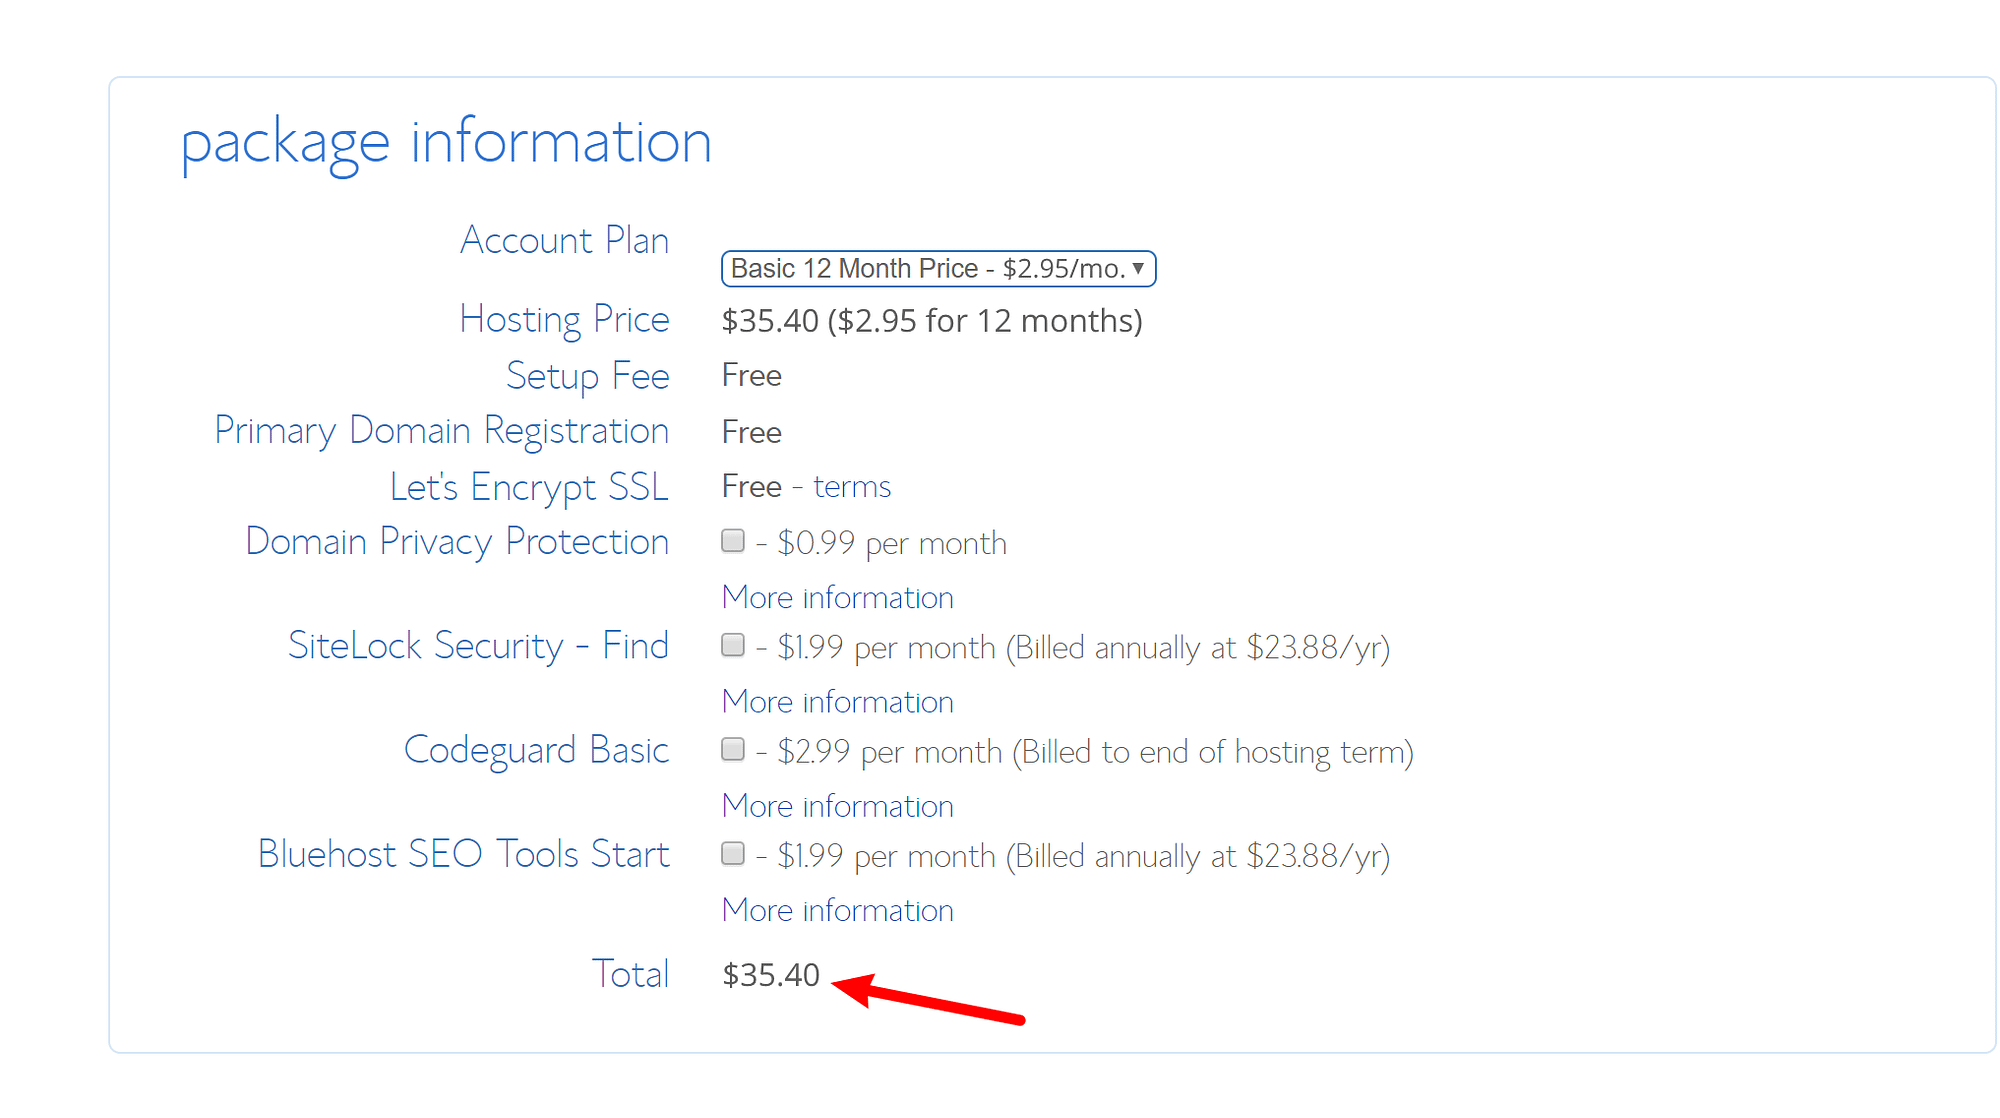
In most cases when you launch a new website, the cheapest plan is called – Basic – chosen range. It only costs $2.75/month:
In the next step, enter the domain name you have decided to use for your website:

Next, provide your personal information:
Before proceeding, you should set the parameters review and confirm the hosting setup you have chosen. These can be found in the Package Information:

Note; You get the lowest price if you buy your hosting package for at least 12 months.
At this stage you can click “SEND” and complete your purchase.
b) Tell Bluehost to install WordPress for you
Now that you’ve signed up for Bluehost and your hosting setup is ready, all that’s left is WordPress.
Although you can technically install WordPress manually, why would you do it when you could get other people to do it for you, and it’s free! Here’s how:
Once you’ve completed the Bluehost signup process, you should have received an email from the Bluehost crew with some details on how to log into your customer profile and start working on your site
Once you’re logged in, Bluehost will show you an easy-to-use wizard that will walk you through the process of installing WordPress on your hosting setup.
Alternatively, you can use WordPress also install it by going to the My Sites section and clicking the Create Site button:
Everything Bluehost needs to install WordPress for you is the name of your new website and the username/password you want to use when managing WordPress. Once you’ve completed the wizard, your website is installed and ready to go!
Step 3: Familiarize yourself with the WordPress interface
What you’ll see:

Use the credentials you set up on Bluehost in the previous step ( the “WordPress installation screenshot” above).
After you’ve successfully logged in, you’ll see the main WordPress interface in all its glory:
- ( 1) Welcome Message – Some of the most important areas of the admin panel are listed as quick links – these are usually your shortcuts to create a website.
- ( 2) The current one Status of your website and what’s going on with it.
- (3) Posts – go here to create blog posts.
- (4) Media – upload/manage images and ot your media files here .
- (5) Pages – go here to create subpages.
- (6) Comments – Here you can You moderate comments.
- (7) Appearance – Change the design of your website here and/or customize how certain things are displayed in the current design.
- (8) Plugins – Install new plugins here.
- (9) Users – Manage user accounts running on the admin panel from the website.
- (10) Settings – the main settings.
At this stage it is good to take care of some basic Things to take care of -started WordPress settings that will improve your experience later.
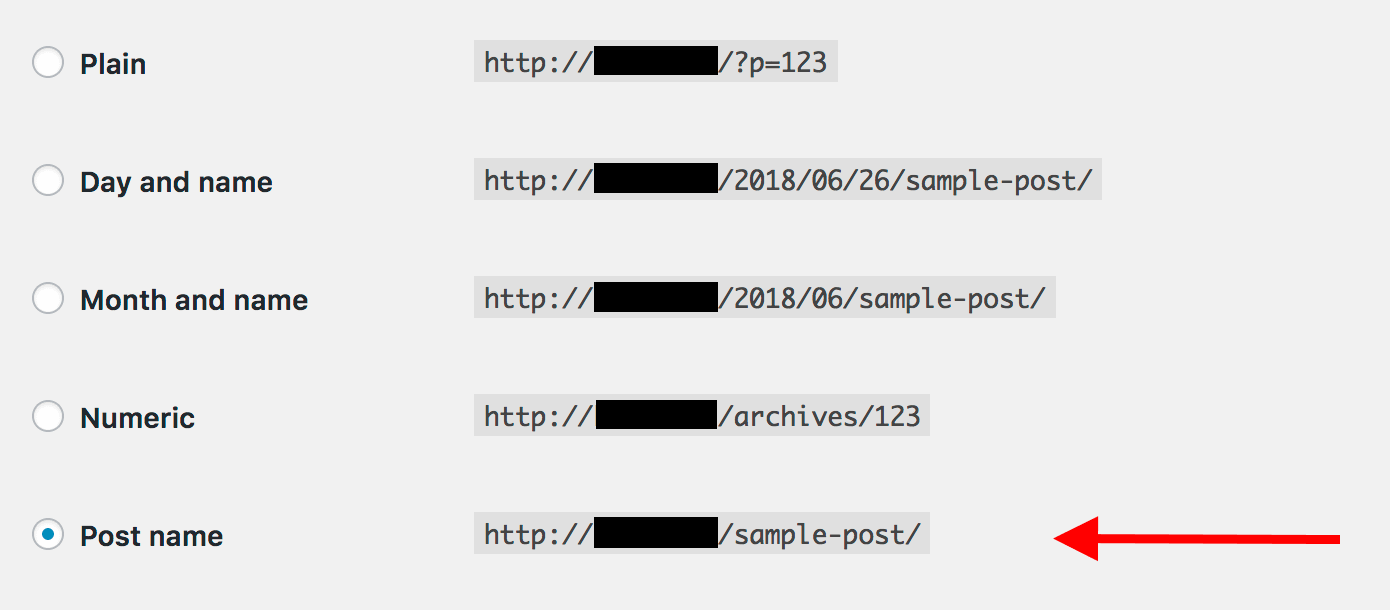
a) Set permalinks
Define permalinks, wi e the individual web page addresses – also known as URLs – are structured within your website.
The most optimal structure is to have the title of the page in the URL. For example, your “About” page (more on that later) should be available at something as simple as YOURSITE.com/about. Setting the permalinks correctly allows you to achieve this.
To set your permalinks, go to Settings → Permalinks on the main sidebar of your WP Dashboard.
Select this setting there:
b) Making yours Website public
I guess you want Google to be able to find and index your website. To make sure this is the case, go to Settings → Reading and make sure the box labeled “Deny search engines…” is unchecked.
c) Set the title and tagline of your website
See also: How to Create a Drop Down List in Excel
Go to Settings → General and set the fields Site Title and Slogan on what you want.
Your website title and tagline can appear in different places on the website. Some WordPress themes display this on the homepage and in the SEO description – which Google uses when it lists your site on the results pages.
The tagline is optional – you can leave it blank if you have none for the side. It’s always part of the web design process, though, so it’s nice to bring one to match.
d) Allow or disable comments
Whether you want to accept comments or not your site is included You.
On the one hand, allowing readers to leave their opinions and questions under your articles/pages can be great for building a community around the site. On the other hand, you also have your hands full dealing with spam and making sure no trolling occurs. Sometimes it’s better to leave the contact page as the primary communication channel.
You can set whether to allow or disable comments in Settings → Discussion.

e) Disable pingbacks and trackbacks
I don’t know why this setting is even still in WordPress, it’s mostly a holdover from back then Day when pingbacks and trackbacks were still a thing.
However, if you want to learn how to create a website these days, you can easily disable them by disabling the following setting in Settings → Discussion.
f) Set your time zone
Getting your time zone right will make publishing new pages and posts more predictable.
General , you want to set the time zone to either your location or your audience, whichever makes more sense.
You can set the time zone in Settings → General.
Now that the basic settings are done, we can move on to the fun stuff:
Step 4: Choose a T hema / theme for your website
The great thing about WordPress is that it works with interchangeable themes called themes.
That means you can change the look Change your WordPress website with just one click.
strong>
For example, a WordPress website looks like this by default right after installation:

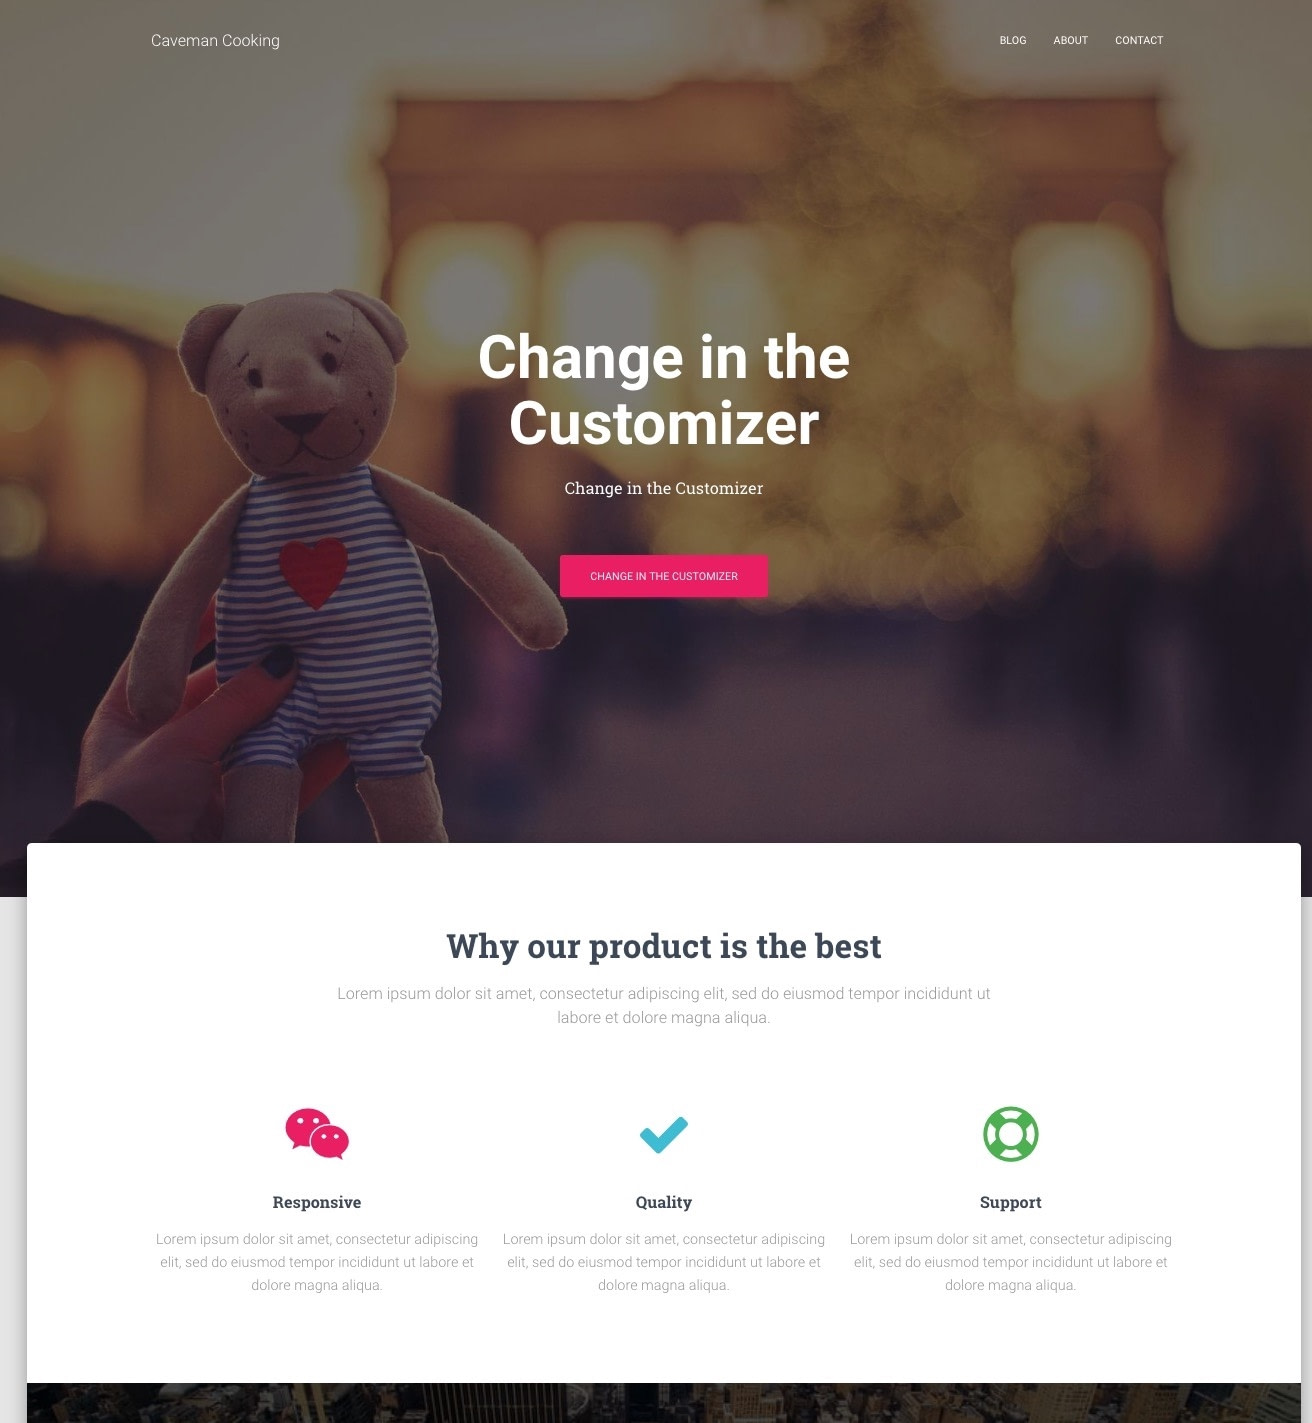
With just a few clicks and using, for example, a popular free theme called Hestia, we can make it look like this:
Here’s how:
a) Choose a theme you like
As I mentioned before, WordPress themes are ready-to-use theme packs that define the look of your website. You can quickly install them and change them later if needed.
Your website design should be chosen based on the purpose of your website – selling quality products, branding your online presence as a blogger, transitioning your business to the Internet , setting up a simple website, an ecommerce store or website, or for email marketing.
The key detail here is that themes don’t alter the content of your site, they only change the presentation.
There is a huge plethora of WordPress themes out there. If you just look at the official WordPress.org directory, there are hundreds of themes there.
But that’s just the tip of the iceberg. There are many more free themes available on the web on third party sites, and there is also a whole different world of paid themes distributed by independent theme stores (like ThemeIsle or aThemes) and even theme marketplaces (like ThemeForest). p>
While there are tons of paid themes out there, free themes are a great option for most users to start with. The surprising thing about some of the best free themes is how many impressive features they bring to the table without asking for anything in return.
So how do you choose a theme that suits you? Here are some tips if you want to take a closer look at this. In general though, you don’t need to spend too much time on it and instead go an easy route.
We can do that, because the topic you choose today doesn’t have to be your final decision. You can always come back to it later and change it in minutes.
So let’s play it safe and use one of the most popular free themes on the market today to demonstrate how WordPress themes work. This theme is the Hestia mentioned above.
🎨 Note. Although we’ll use Hestia as an example in the following section, it’s not the only free theme you can use. Here is a collection of topic summaries for various purposes ranging from business websites to blogs, travel, food, personal websites and more. You can use any of these themes. The procedure is the same.
b) Install your theme
If the theme you have chosen is available in the official WordPress.org directory, then the only thing you need to add in of the order you need to install it is the name of the theme. Yes. That’s it.
To do the theme installation:
In your WordPress dashboard, go to Appearance → Themes and then click New Add”.

Enter the name of the desired theme there install it like this:
You will see it in the list below the search box. Just click the Install button under your desired theme:
After a Second, the theme is installed.To fully activate it on your website, click the “Activate” button that appears instead of the “Install” button.
Hestia is one of those themes that offers quite a few Excellent onboarding for new users. To see what the theme has in store for you, click the button in the welcome prompt.
You will see your main Hestia window, from which you can learn more about and expand on the theme -the- box features with some extras and integrations. Let’s do that now.
First, click the Recommended Actions link to see what’s available.

From the options suggested there, we’ll only take “Orbit Fox Companion” for now. Just click the “Install and activate” button.
💡 Note. Orbit Fox Companion is a plugin. We’ll go into more detail about WordPress plugins later in this guide on how to build a website.
Orbit Fox is a nice addition to Hestia as it offers some cool features to enhance the look of your website . For example, you’ll get some useful new home page modules, a template directory that will help when creating your subpages (like About or Contact Us), and custom menu icons.
At this point, your new Design active on your website. You can see it in action just by going to YOURDOMAIN.com.
However, what you see there is far from the potential of the theme. At the moment we’re taking care of customizing the design, menus and other elements so that the website looks exactly how you want it to. Here’s how:
c) Customize the theme
Even though your theme looks nice out of the box, you should still make some basic adjustments to make sure it meets your needs hand hand. It may seem like a learning curve at first, but it’s really intuitive, especially over time.
To get started, go to Appearance → Customize. You will see the main interface of the WordPress Customizer.

Well from there you can – Tune a lot of things. We’ll start with the home page because it’s the most representative.
This replaces your site’s default list of recent articles with a fully customized home page. By default, you’ll see some cool elements on your new user-friendly homepage. These look great on laptops, smartphones, and other mobile devices.
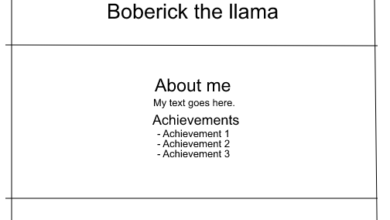
First, let’s change the main heading on the page. It’s a good idea to include either your company name or something else that will serve as the title for the entire site.
To make the changes, click the pencil icon next to the heading.
/ p>
When you do this, a customization panel will appear on the left.
Below this, you can customize any other available Homepage Blocks. It works similar to the mechanisms offered by the popular website builders (like Wix, Squarespace or Weebly). By default you get all of these (check out this list by going to Startpage Sections in the customizer sidebar):

- The Features section is a great place to explain what your business has to offer or what the purpose of the website is – this “purpose” is arguably the #1 thing to consider when learning how to build a website.
- The The About Us section is a great place to talk about your story.
- The Team section, which you can use if you have more people in your companies and you want to highlight them.

- The Ribbon is another place to mention your primary call to action.
- The Testimonials section is great for showing want to hear what your past customers had to say about your business.
- In the Contact Us section, you can view your contact information and share how they met you on best you can reach.
There are also some other sections available. It’s best to browse through these and select the ones that make sense for your business and your specific situation.
When you’re done customizing the home page, don’t forget to click the main Button Publish, which is at the top.
Customize typography.
See also: How To Build A Website On GoDaddy
Next, take care of your site’s typography – the fonts used throughout the site.
You can do this by going to Appearance Settings → Typography in the WordPress Customizer sidebar, where you can choose a font and instantly see it on your site.
Colors.
Out of the box, your new theme will use a few primary colors that define its default color scheme. You can change this setting in the WordPress Customizer. Just click on Colors in the main sidebar.

The accent color is more normal wise the color used for buttons, links and everything else is mean to stand out from the rest of the website design.
…
After you have performed the above steps your website will feel like it’s really yours. You’ve made all the necessary tweaks and adjustments to make it fit your brand.
💡 Note. There are many more settings in the WordPress Customizer that you can experiment with. Most of them are designed to improve your website user experience. For example, you can:
- choose the default layout based on your site’s needs – whether you want the sidebar to be on the left, right, or nowhere
- how you want the blog post to appear ,
- whether you want a main background image for the entire site,
- the shape of the buttons and much more.
Step 5: Get Plugins to expand your website’s capabilities
Plugins are to your WordPress site what apps are to your iPhone. 📱
In other words, they extend the standard functionality of your website by adding some much-needed features. While you’re figuring out how to make a website yourself, plugins can give you some great functionality without any coding knowledge.
Here are the plugins to consider – best of all, they are all free:
- Yoast SEO – helps you with search engine optimization and makes your website more accessible to search engines in general.
- Google Analytics for WordPress – this integrates your website with the most popular Traffic analysis solution on the web.
- Wordfence Security – improves the security of your WordPress website.
- UpdraftPlus – performs automatic backups of your website.
- Optimole – optimizes your images .
- WPForms – allows you to add interactive contact forms to your website that your visitors can use to reach you directly – much better than displaying your email in plain text on your website.
- Check out this list too e of the most popular WordPress plugins of all time. You might find something interesting there too.
Installing plugins is easy. If it’s a free plugin, all you need is the name of the plugin.
Go to your WordPress dashboard and then Plugins → Add New. From there, type the name of the desired plugin in the search box, then click “Install” and “Activate”.
- Here is a step-by-step guide to installing WordPress plugins .
Step 6: Create Basic Pages
There are some pages that all websites should have, regardless of their purpose or goal.
But first, how to create a page in the first place:
To do that, just go to your WordPress dashboard and then Pages → Add New strong>. You will see this screen:
- (1) A place for the title of the page.
- (2) The body – the main content of the page. The user interface is very similar to MS Word. You get all the basic text formatting features (like bold, italic, align text left/right/center, create lists, etc.).
- (3) You can add images by clicking click this button.
- (4) Switch between the Text and Visual editors. Only use the former if you are at least vaguely familiar with HTML code.
- (5) The Publish section. This is where the main Publish button is located.
- (6) Discussion. Decide whether you want to allow comments or not. You can leave the “Trackbacks and pingbacks” setting disabled.
- (7) Recommended image. Most WordPress themes use this featured image and display it in a prominent place next to your page.
When you’re done editing the content of the page, click Publish.”
Now that the instructions are out of the way, here are the pages you should create:
- About – I’ I’ve mentioned this a few times now because it’s really important. Your About page is a place where you can tell the story of your site and why people should pay attention. This one page is basically a must for anyone who wants to learn how to make a website.
- Contact Us – here you can display some contact information along with a nice message Contact form, through which you can be reached directly (you can get such a form through the WPForms plugin mentioned above).
- Privacy Policy – this page has become a hugely important element on the today’s network. Learn more about privacy policy pages in WordPress here.
- Portfolio – a place to showcase your past work.
- Store – a crucial thing if you want to sell something from your e-commerce site. You’ll also need a popular WooCommerce plugin for this to work – the best ecommerce solution for WordPress.
- FAQs – in case the scope of your new website requires additional information about potential users .
Once you’re done with that, you can also check out this list of some valuable pages that are worth having on your site. You can consider it a beginner’s guide to essential website elements.
Step 7: Consider starting a blog
A blog (as well as content marketing – aka “Content Marketing” in general) is among the most effective ways to not only promote your website, but also any products that you may wish to sell through that website.
And I’m not just saying that; it provides raw data proving that blogs are a great tool for online marketing, with 55% of marketers saying blogging is their top priority when it comes to inbound marketing.
Blogging is a simple concept. What you do is regularly publish articles related to your website topic.
From a technical point of view, WordPress has blogging tools built in from the start. In fact, WordPress started out as a blogging platform.
To create a new blog post, just go to Go to Posts → Add New (in your WordPress dashboard).
Creating a blog post itself is almost the same as creating a new page. The edit panel looks almost the same (screenshot below) and the options are mostly the same.
One of the few differences is that you can also assign categories and tags to your posts.
p>
When you are finished working on a blog post, click Publish.
To make your posts easily accessible, you should set one of your pages as the main blog post for the posts.
- To do this, first go to Pages → Add New and create a blank page. Name it “BLOG” – just to make things clear.
- Next, go to Settings → Reading and select your newly created blog page as the “Posts Page” like this:

At this stage you can navigate to the new page and see all your recent blog posts there. If you create a lot of content for your blog, consider an SSL certificate so your readers feel secure while browsing.
Of course, the hard part of starting a blog is writing blog posts regularly publish and make them attractive to readers. Here’s a step-by-step guide to creating a WordPress blog that rocks!
Step 8: Adjust your site navigation
When all your key pages are online (and perhaps your blog has started), now is a good time to customize your site’s navigation and overall make it more user-friendly for visitors.
We’re going to focus on two elements here:
a ) Menus
Menus are the primary means by which visitors navigate your website, so they are crucial when figuring out how to build a website.
Dependent From your theme you will have a few options to choose from regarding menu settings. Here’s what you can usually do (using Hestia as an example):
First go to Appearance → Menus in your WordPress dashboard.
You will see this Standard Panel:
On the left are all the pages that you can add to a menu. On the right you can see the menu structure itself and all of its settings.
Let’s start by selecting a few key pages and adding them to the menu. A good idea is to select About, Contact, and another page or two that you think are important and add them to the menu.
What’s great about this whole panel is that you drag and move it you can drop the menu items to rearrange them.
When you’re done, select the menu location below.Typically, selecting the location labeled “Main Menu” will result in the menu appearing at the top of the website. This is probably what you want for your main menu. Click Save menu to save the settings.
💡 Note. You can also create additional menus. Just click the Create New Menu link shown in the screenshot above. This will show you the same menu creation window. Each menu must appear in a different location. So for this new one you can assign it as “Footer Menu”.
Now when you go to your website you will see the menu in place.

b) Widgets
Widgets are an old school feature in WordPress. Simply put, a widget is a small block of content that can be displayed in various places on the website.
The usual placement of these blocks is in the sidebar or footer of the website.
To see what this might look like and to set up your widgets, go to Appearance → Widgets in your WordPress dashboard. You’ll get this screen:
The Hestia theme offers a number of widget areas next to the sidebar or footer, but let’s not focus on those additional placements for now.
Add To add any widget to a widget area, simply grab it from the left side and drag and drop it onto the selected widget area on the right.
For example, like You can see on my site I have Search, Recent Posts, Archives and Categories in my sidebar (pictured above). For example, this is what these widgets look like when I go to my About page:

After you’re done with your widgets and navigation, your website is basically ready for the world to see!
PDF “How to build a website with WordPress”
We’ve compiled our learnings into a 40-page e-book that shows how to build a website with WordPress (PDF) from start to finish. You can digest the whole thing in an afternoon. 🍛
👇👇👇
How to create a website with WordPress (PDF)
☝️☝️☝️
Conclusion
Building a website using WordPress as a platform is the most budget-friendly solution available.
If you want to learn more about what you can do with your website after launch – e.g . For example how to promote your website, monetize your website or increase website traffic – check out one of our other guides on the blog.
If you have questions on how to create a website from From scratch, ask in the comments below!
* This post contains affiliate links, which means that if you click on any of the product links and then purchase the product, we will receive a small fee. But don’t worry, you’ll still pay the standard amount, so you won’t be charged.
See also: 10 Best Free Blogging Sites to Build Your Blog for Free in 2023: Tested, Compared and Reviewed