One of the main reasons WordPress is so popular is its open-source nature. There are over 50,000 plugins developed for this widely used content management system (CMS). However, you may be wondering how to create your own WordPress plugin.
Fortunately, WordPress makes the process easy. Some coding knowledge is required, but it’s not very difficult to learn how to create a simple plugin for your website. This allows you to add more functionality to your content, among other things.
Reading: How to create a plug in to website
In this article we take a closer look at WordPress plugins and why you might want to create one. Then we will show you how to develop your first plugin. Let’s get started!
An Introduction to WordPress Plugins
WordPress powers well over a third of all websites on the internet. That equates to roughly half a billion different websites!
A major factor in the success of WordPress is its open-source nature. This means that the source code of the core software, its plugins and themes is available for anyone to work with and modify as they wish.
WordPress plugins are packages of code that extend the functionality of your expand site. These are created by various developers around the world and are designed for a variety of purposes.
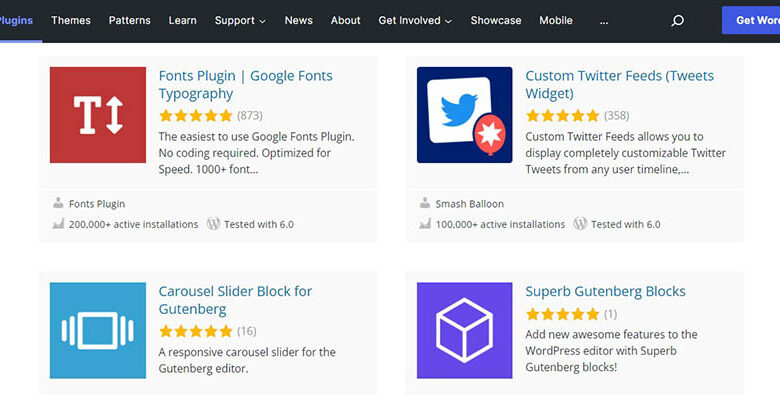
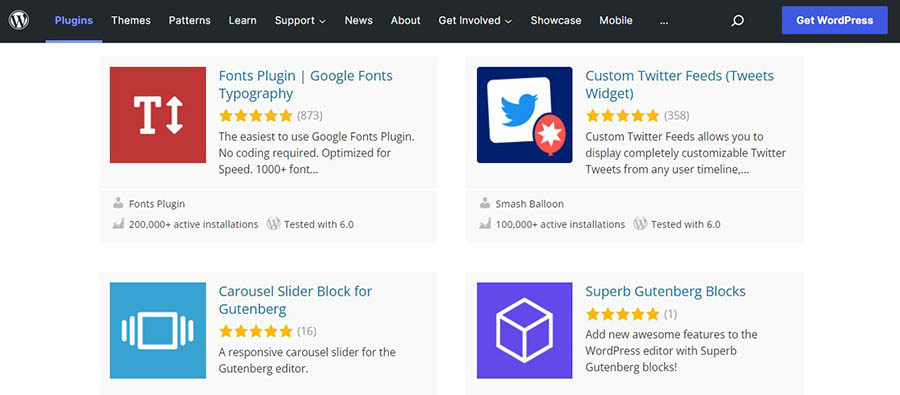
For example, find plugins for adding social media share buttons, newsletter signup forms, popups, converting WordPress into a full-fledged ecommerce site, and more:
The WordPress plugin ecosystem empowers users without coding skills to build and customize powerful websites. In addition, it offers almost unlimited possibilities for developers and webmasters alike.
Why develop a WordPress plugin
WordPress is one of the biggest markets for developers. This means that you will find many resources to help you develop plugins for the CMS.
Moreover, the earning potential for WordPress plugins is also very high. While there’s no shortage of competition, if you come up with a new or better solution to a common problem, you could quickly find that thousands of websites are using your plugin. In fact, most of the plugins available for download were originally developed to help solve a problem.
The magic of WordPress is that you can develop a solution for your own website – You don’t have to share them on the plugin market. However, many developers choose to make their plugins available to other users to help them work around similar issues that may be bothering them.
Last but not least, WordPress is a great platform to start coding on to learn. Since it’s been around for 19 years, it offers plenty of resources and documentation to help you get started. In addition, it has a huge user base that can help you become known as a developer if your plugin is widely used.
How to create a WordPress plugin (in 6 steps)
While different plugins require different amounts of coding and know-how, they all follow the same development process. Let’s see how to create a WordPress plugin in six steps.
Step 1: Research and plan
There are thousands of tools in WordPress plugin directory. Therefore, the first thing you should do is research whether your idea already exists.
But even if it does, you can still pursue your plan. You might want to explore similar plugins and find out how to improve them. Alternatively, you could supplement what’s already available with something like your own custom post type and additional features.
You may also want to check the status of existing plugins. For example, if a plugin hasn’t been updated in a while or isn’t compatible with the latest version of WordPress, there might be an opportunity to either adopt it or provide a better solution:

You can also look at the number of active installs to see if there is a big market for the type of plugin you have in mind. It’s also a good idea to test the plugin on your own site to see what it does well and what could be done better.
You should also think about how you will market your plugin. For example, some developers create their own website for their products. If you plan to monetize your plugin, you need to think about both pricing and subscription options.
Finally, you should read up on the WordPress coding standards. This is especially important if you plan to share your plugin with others.These coding standards are a set of guidelines and best practices that developers should follow when building themes and plugins for WordPress.
Related: Want to learn WordPress? Get started with these resources
Step 2: Set up a test environment
See also: SharePoint and Zip Files in Office 365: Do they get a long?
The next step is to set up a test environment. As a beginner, you’re probably going to learn a lot and don’t want to experiment on an active site. A local environment or staging site allows you to privately test your plugin while you work on it.
You can use Local to create a WordPress site on your computer:

You can also create an online staging environment. DreamHost allows you to make a copy of your existing website. This way you can test your plugin without breaking your website or interrupting your visitors.
Step 3: Create the plugin file
Once you have your staging environment set up, it’s time to create your plugin. The first step is to create a folder for it in your website’s directory.
You can use a Secure File Transfer Protocol (SFTP) client such as FileZilla to access your website’s files and folders:
If this is your first time using FileZilla, you will need to enter your credentials, including your username and password. You can get this information from your hosting account.
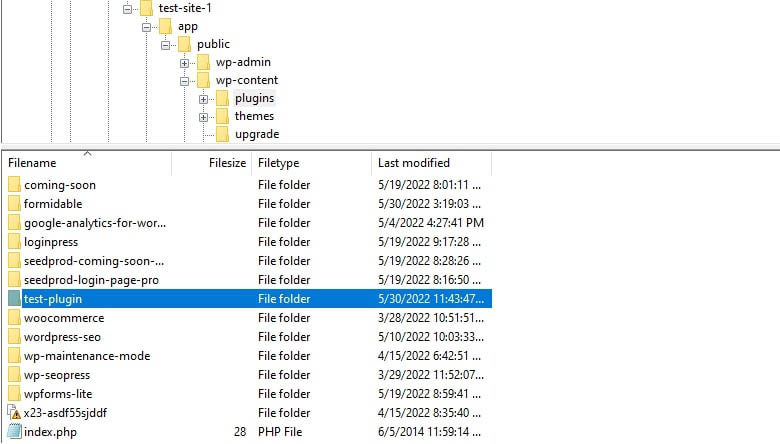
Once you’ve connected to your site’s directory, navigate to wp-content/plugins and create a new folder for your plugin:
Next you need to create a PHP file and add it to this folder. To do this, open your favorite text editor and enter the following information:
<?php /** * Plugin Name: test-plugin * Plugin URI: https://www.your-site.com/ * Description : Check. * Version: 0.1 * Author: your-name * Author-URI: https://www.your-site.com/ **/
Obviously you will need to change the information above to match what you have provided. When you’re done, you can save your file. Remember to use the php file extension (e.g. my-first-plugin.php).
Then you need to upload this file to the plugins folder you created earlier. Once you’ve done that, navigate to your test site’s WordPress dashboard and go to the Plugins page. You should be able to see your new plugin here.

This plugin will not do anything if you activate it. However, from this point WordPress will recognize it as a functional add-on.
Step 4: Add code to your plugin
Each plugin is different. However, they all have common components. For example, all plugins use hooks to interact with WordPress.
A hook is a plugin’s way of connecting to the pre-existing WordPress core programming code. In other words, the hook is the anchor point where a plugin plugs in to add or change the website’s functionality.
Hooks are an important part of WordPress development. There are hundreds of hooks that can be used to trigger a plugin, and you can even create new ones if needed.
There are two types of hooks to consider when building your plugin:
/ p>
- Actions: These add or change WordPress functionality and make up the majority of hooks.
- Filters: These are used to modify the functionality of actions.
In order to code your plugin, you need to become familiar with hooks and how they work. Luckily, the Plugin Developer Handbook can help you get started.
For this tutorial we will use the following code as an example.
function modify_read_more_link() { return ‘ Click to read!‘; } add_filter( ‘the_content_more_link’, ‘modify_read_more_link’ ); As you can perhaps see, this code uses a filter to change the default “Read more” link by replacing it with a different value: “Click to read!” If you add this snippet to your PHP file and the plugin in on your site, you will end up seeing the following anchor text under your post excerpts: 
Feel free to experiment with the code and try a different feature. Please note that you can also add this code to your theme’s functions.php file.This file contains code that adds functionality to your website and works in a way that is very similar to how a plugin works. However, if you switch to a different theme in the future – or your theme is updated to a new version – those changes will be lost.
Step 5: Test your plugin
As you continue to develop your plugin, it’s important to save your work often and save your changes to your staging test site. You should also be on the lookout for security issues so you can fix them before releasing your plugin.
See also: The 10 Best Free Resume Builders
Once you’re happy with your plugin, it’s a good idea to try it out on a live website. Again, you should make sure you’ve thoroughly tested your plugin for bugs and vulnerabilities.
It’s also a good idea to backup your live site before testing your plugin on it. This way you can recover your content if something goes wrong.
Once you are satisfied with the performance of your plugin, you can offer it to other developers for use and testing. This can bring you valuable feedback. You could also ask them to put your plugin through its paces and try to break it to prove its stability.
To do this, you should export your plugin to a ZIP file for easy distribution and installation. Locate your plugin’s folder in the website directory, then right-click on it and select Send to>compressed (zipped) folder:

Choose a destination and the files in your folder will be compiled into a ZIP folder that you can easily share. If you are developing on a live site, you may need to download the plugins folder from your SFTP client first before zipping it.
To install your plugin on a WordPress site, simply navigate to the Plugins page on your dashboard and select Add New. Next, click Upload Plugin and you will be prompted to select a ZIP file to upload to your website:

Select just download the zipped file and select Install Now. WordPress will unzip and then install the plugin on your website:

When this is complete, simply click Activate Plugin. That’s it – your plugin is now live! 🎉
Step 6: Distribute your plugin
Once you have built and tested your plugin, you can start distributing it. Let’s see the best way to do this.
1. Submit your work to the WordPress Plugins Repository
By submitting your plugin to the WordPress Plugins Repository, you can share your work with the community and gain exposure. You can leverage the huge WordPress user base and get new customers:

However, you must ensure that your plugin conforms to best practices and detailed plugin guidelines before uploading for checking. It may take a while for your plugin to be reviewed and accepted.
Once your plugin has been approved, you need to add your files to the SVN directory. Then WordPress users can install your plugin on their websites.
2. Share the plugin on your own website
Apart from uploading your plugin to the WordPress directory, you can also create a website for it.
You can use this website to provide more details about your plugin. You can also add documentation, tutorials and marketing information:

A developer often uses websites to promote their premium plugin while also providing a free or lite version in the WordPress directory. This allows users to download and test the product before upgrading.
You can lock certain advanced features behind a paywall. In addition, you can offer a multi-level membership model. For example, you could create multiple premium versions of the plugin to give users more options.
The power of open source
As an open source platform, WordPress allows you to develop your own plugin and share it with other users. While some coding knowledge will certainly come in handy, you can easily create a simple plugin to enhance your website’s functionality. Once you gain more experience, you can start selling premium versions of whatever plugins you might create.
To recap, how to create your own WordPress plugin:
- Investigate your idea.
- Set up a test environment a.
- Create the main plugin file and folder.
- Add code to the plugin file.
- Test your plugin.
- Distribute your plugin on WordPress.org.
Our DreamPress plans allow you to create a staging site so you can develop and test plugins with confidence. A staging site is the closest thing to reality, making it the perfect place to test how a new plugin might work once installed.
See also: 2 Killer Examples of Successful Health and Fitness E-Commerce Marketing
.