Want to create a paywall on your WordPress site?
A paywall allows you to monetize some or all of your content with a subscription plan. This freemium model is already used by many top publications, including the NYTimes and the Washington Post.
Reading: How to create a paywall for my website
In this article, we will show you how to easily create a paywall on your WordPress site and add paid content Publish.
What is a paywall and why use it?
If you have a lot of quality content, then a paywall is a great way to expand your website to monetize if you don’t want to sell ads on your WordPress blog.
A paywall hides or blocks your content until the reader pays to access it.
Paywalls usually ask the visitor to buy an ongoing subscription so that you can make money blogging online with WordPress in the long term. However, you can also charge a one-time fee for lifetime access.
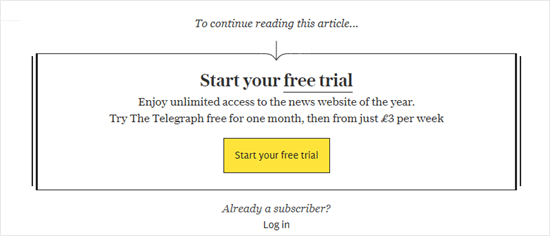
Many newspapers use paywalls on their websites. Here is an example from the British newspaper The Daily Telegraph.
Despite the name, not all paywalls require payment.
Some websites use a paywall to grow their email list by asking users to subscribe to their email newsletter or to register for a free account. Like the example below from The New York Times.

In many cases, paywalls offer a trial version, allowing visitors to bid on a limited amount for free can access content. For example, readers could get 5 free articles before having to purchase a membership.
With that in mind, let’s see how you can create a paywall in WordPress.
Creating a paywall on your WordPress site
The easiest way to create a paywall is to use MemberPress. It’s the best WordPress membership plugin that allows you to easily sell subscription-based products on your website, including access to premium content.
First you need to install and activate the MemberPress plugin. For more details, see our step-by-step guide to installing a WordPress plugin.
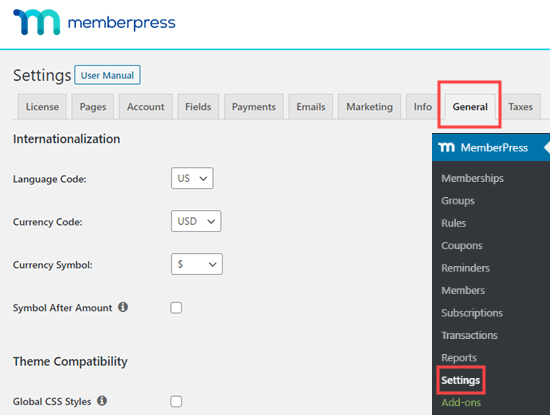
After activation, go to MemberPress » Settings and enter your license key into the ‘License key’ field.
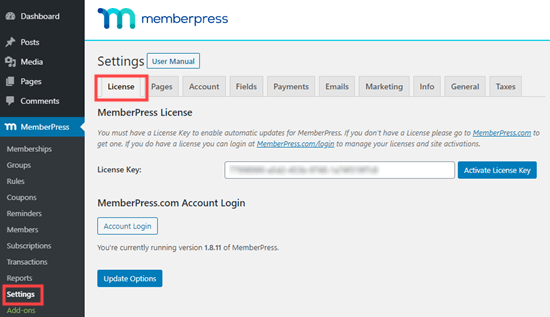
You can find the key by logging into your account on the MemberPress website. It’s also in the email you received when you purchased MemberPress.
Once you’ve entered this information, click Activate License Key.
Next you need to Set up a way to easily accept credit card payments in WordPress. The good news is that MemberPress supports several popular payment gateways.
You can add a payment method by going to the MemberPress » Settings page and going to the Payments tab.
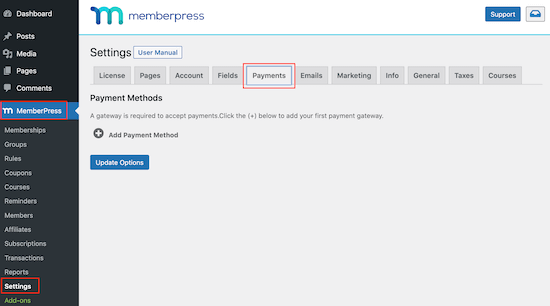
Here, click on “Add payment method” and open the “Gateway” dropdown menu.
You will see that MemberPress supports PayPal and Stripe payments. If you have purchased a MemberPress Pro plan, you can also use Authorize.net.

Once you’ve selected a gateway, MemberPress will display all the settings you need to configure that payment method .
For example, if you are adding PayPal payments to WordPress, you will need to enter your PayPal email address.

See also: The Sooner You Know Your Website Cost, the Better
If you are satisfied Forget about Don’t click the “Update Options” button to save your changes when setting up the payment method.
You may be able to increase sales and improve the customer experience by allowing users to choose a payment method . To add more gateways, simply click on “Add payment method” and repeat the process above.
Create a subscription plan for your paywall
After you’ve completed the initial setup, it’s time to create the paywall. To do this, you need to create a membership tier in MemberPress.
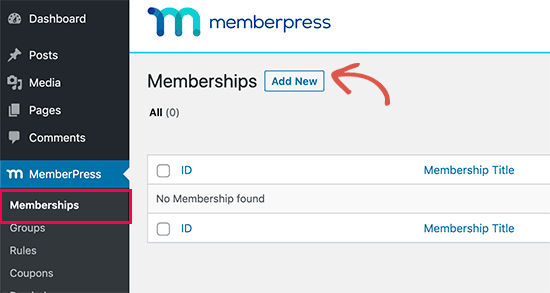
Just visit the MemberPress » Memberships page and then click the Add New button.
On the next screen you need to give the membership plan a title. This will appear in your admin panel and will also be visible to visitors to your WordPress site.
Next, in the Price field, enter how much this membership will cost. In the figure below, we are creating a “Premium Subscription” plan and setting the price to $5.

If you want to create a free membership, you can set the price at 0 .00. For example, your goal might be to collect email addresses as part of a lead generation plan.
You can also choose between “recurring” and “one-time” payments by using use the “Billing Type” dropdown menu.
By accepting recurring payments in WordPress, you can automate the billing process and save a lot of time from having to send invoices manually.
One-off payments will not be automatic extended, which can help calm down your audience and increase the likelihood of signing up ng increases. Every website is different, so you may want to try different settings to see what works best for you.
When selecting recurring payments, you can choose between monthly, yearly, weekly, quarterly or schedule set a custom interval.
If you select One Time, you can select Lifetime or set an expiration date, which can be either a calendar date or a time range, such as 12:00 p.m. B. one month since the person purchased their membership.
Optionally, you can enter a description for your membership plan in the text editor and further customize it in the “Membership Options” field. For example, you can create a custom thank you message or a custom welcome email.

Pro Tip: If you’re creating a membership-specific welcome email, it’s a good idea to test E -Mail is sent properly. If the email isn’t arriving in your inbox, we recommend using an SMTP service provider to improve your email delivery rates.
If you’re happy with the membership settings, simply click ” Publish”. Button to make the membership level live.
You can create multiple membership plans with different settings. For example, you can also create a VIP plan that grants users access to additional content and features.
To create additional membership tiers, simply follow the process outlined above.
Adding content behind the paywall
Once you’ve created one or more membership plans, it’s time to choose the content you’ll be hiding behind a paywall.
MemberPress is a powerful plugin that allows you to restrict access to your content in many different ways. For example, you can restrict WordPress sites by user role or even create a private customer portal.
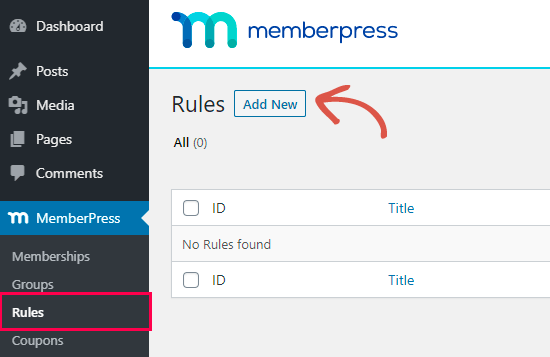
To place content behind a paywall, go to MemberPress » Rules and click the ‘ Add new button at top.
Next you need to select the content you want to restrict.
MemberPress allows you to restrict access to specific pages and posts. For example, you could lock the latest post on your WordPress blog so that only registered members can access it.

See also: 10 Logo Design Tips to Take Your Brand to the Next Level [ Logo Templates]
However, restricting access to each post or page individually can take a long time take.
If you have a lot of content to restrict, MemberPress also allows you to create rules for entire categories and tags. This allows you to restrict access to related content, for example, you can add a content block to all posts tagged as premium content.

For more information on categories and tags, see our guide on how to add categories and tags in WordPress.
When you’re done, open the Protected Content dropdown menu and select the type of content you want to restrict, e.g. For example, “A single post,” “Posts categorized,” or “Child Pages of.” .’
Depending on the option you choose, you will have access to some additional settings. For example, if you select Posts Categorized, you can enter the category name.
After that, scroll down to the “Access Conditions” section and select “Members”.

You can then select the membership for which this rule should apply.
By default, when a non-member tries to view the restricted content, the message “You do not have permission to view this page” is displayed, as you can see in the image below.
p>

It’s a good idea to customize this message to let visitors know that this content is behind a paywall. To do this, scroll to the Unauthorized Access section, then open the Unauthorized Message dropdown menu.
You can now select Custom and type a message in the post editor.
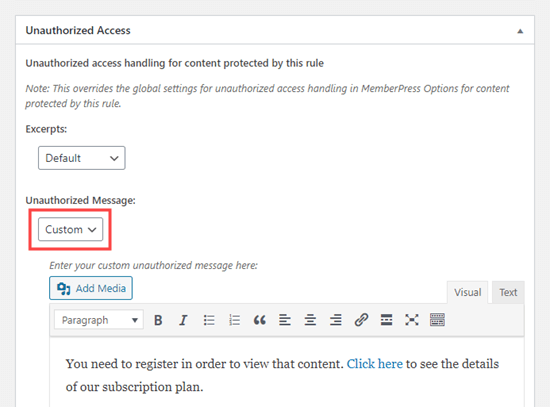
It’s also smart to add a link so people can just buy a membership and unlock the paywall.
After that, you might want to show an excerpt of the blocked content, as this will encourage visitors to read more. To create a paywall teaser, open the Excerpts dropdown menu and select how much of the post you want to display, e.g. B. the first 100 characters or the post excerpt.

Once satisfied with setting up the rule, scroll to the top of the page and click “Save Rule” to save the paywall to enable.
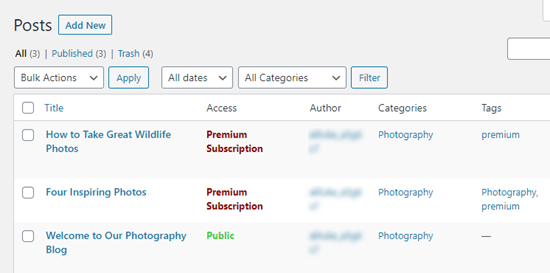
Now go back to Posts » All Posts in your dashboard and you should see that some or all of your posts are now marked as Subscription Only based on the rule you created earlier.
For a more in-depth look at MemberPress settings and features, read our ultimate guide to creating a membership site.
Non-members get a limited number of free views
You may want non-members to be able to view a certain amount of your content for free. This is a great way to promote your premium content and get more members.
You can create a free trial in MemberPress by going to MemberPress » Settings and then clicking on the General tab.
Here you need to scroll to the “SEO & PayWall” section and check the “Enable PayWall” box.
This adds a new section where you can enter the number of paywalled pages and posts that non-members can see before the paywall is triggered.
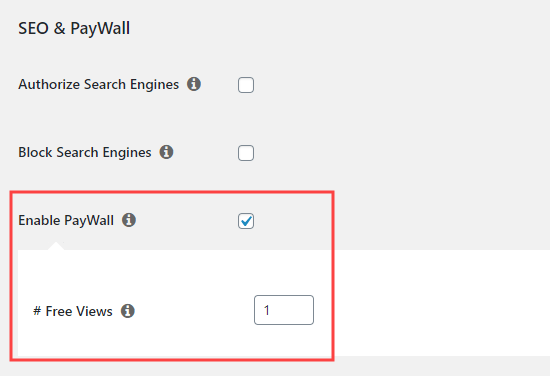
Note: On this screen, you can also allow search engines access to your protected content by checking the “Authorize search engines” box. This helps your paywall content rank in search results, which can bring you more visitors. However, this setting does not work if you have a caching plugin enabled.
If you are happy with the changes you made, scroll to the bottom of the page and click Update Options. to create a paywall on your WordPress site and add the option for free views. You might also want to check out our guide to increasing your blog traffic and our expert pick of must-have WordPress plugins to increase your traffic.
If you enjoyed this article, please subscribe to our WordPress YouTube channel- video tutorials. You can also find us on Twitter and Facebook.
See also: 5 Ways To Make Your Blog Unique
.