Are you a teacher, professor or other educator looking to create an online course? Or maybe you are an expert in a certain field and want to monetize it? Ever thought about creating your own online course website?
It’s easier than you might think!
Reading: How to create a course website
In this post, we’ll walk you through creating an online course website using WordPress.
We cover everything you need to know, including how to set up WordPress, the best WordPress course plugins to use, and answering some common questions
We also show you some of the best eLearning sites around the web for inspiration.
Finally, we show you how to run an online course using a free WordPress plugin
Ready to create your own eLearning site?
Before you understand why there is a need to create an online course, check out our latest infographic with easy steps to create an online course site.

Why create an online course?
If you are not family When it comes to online learning sites, you may be wondering what exactly the term eLearning means. Don’t worry – it’s easy.
E-learning sites are just websites with educational content. This educational content can be more formal, such as B. university lectures, or more informal, such. a web design course.
The acronym used to describe this type of website is LMS, which stands for Learning Management System. There are many different LMSs out there today, covering virtually every imaginable use case.
What do you need to create an online course website?
If so B. an educator, teacher or just want to share your knowledge, you should definitely create an LMS website.
There are three main reasons:
- It provides a framework for creating and delivering courses. Instead of creating everything from scratch, you can use an LMS to create curriculum, lesson plans, and other elements. This increases your productivity and makes the whole process less complex.
- Build an audience. If you don’t have a website, you’re missing a great opportunity to get new followers and subscribers. While you might think that Facebook, Twitter, and other social networks are enough, they’re just one piece of the puzzle. You should also have a website that allows you to capitalize on your audience.
- Earn income from your work. Last but not least, one of the most rewarding aspects of creating an eLearning website is that you are financially compensated for your hard work. By combining an LMS system with a payment plugin like WooCommerce, you can generate revenue from your courses.
Can you make money from an e-learning website?
Absolutely! As mentioned above, most LMS plugins easily integrate with payment plugins like WooCommerce and Easy Digital Downloads.
With these plugins, you can use any business model you want, from one-time individual purchase courses to memberships and all between. Once you learn how to create an online course, you can easily create it for different topics.
Many educators make a good living from their online courses. Additionally, many universities, schools, and other institutions use an LMS like LearnDash to manage their entire organization.
The Best Examples of eLearning Websites
Let’s look at some of the best eLearning -Sites to from around the web. There are thousands of different real-world use cases, but here are four of our favorites:
Infusionsoft / Keap

Infusionsoft, now known as Keap, uses LearnDash for their LMS. They use it to onboard new team members, train customers, reduce churn, and improve their overall productivity and bottom line.
University of Michigan
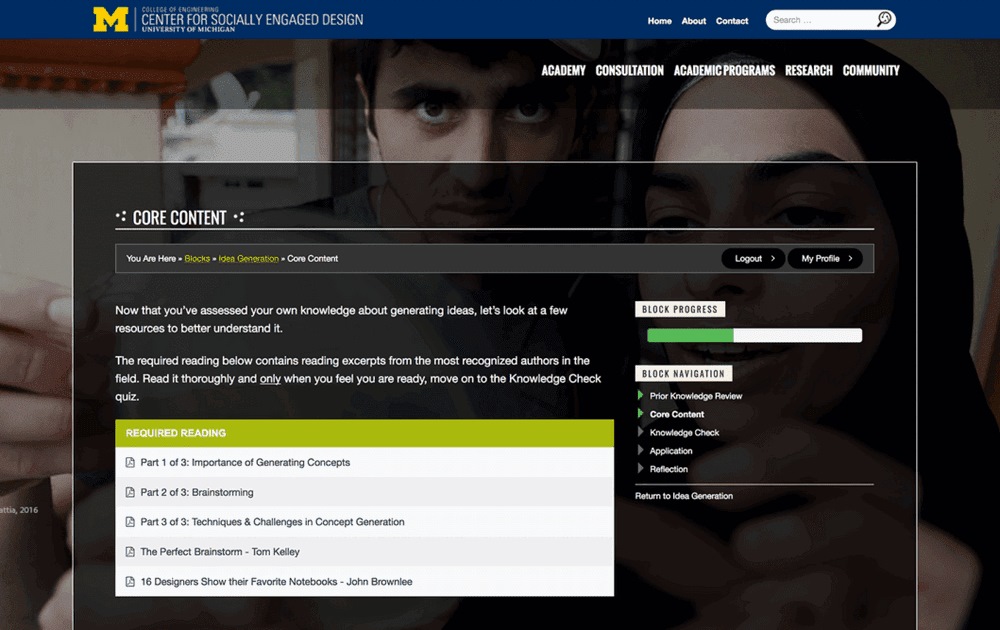
The University of Michigan Center for Socially Engaged Design uses LearnDash for some of its online educational programs. Their courses help students learn how to visit other countries and find creative solutions to local problems.
Yoast Academy
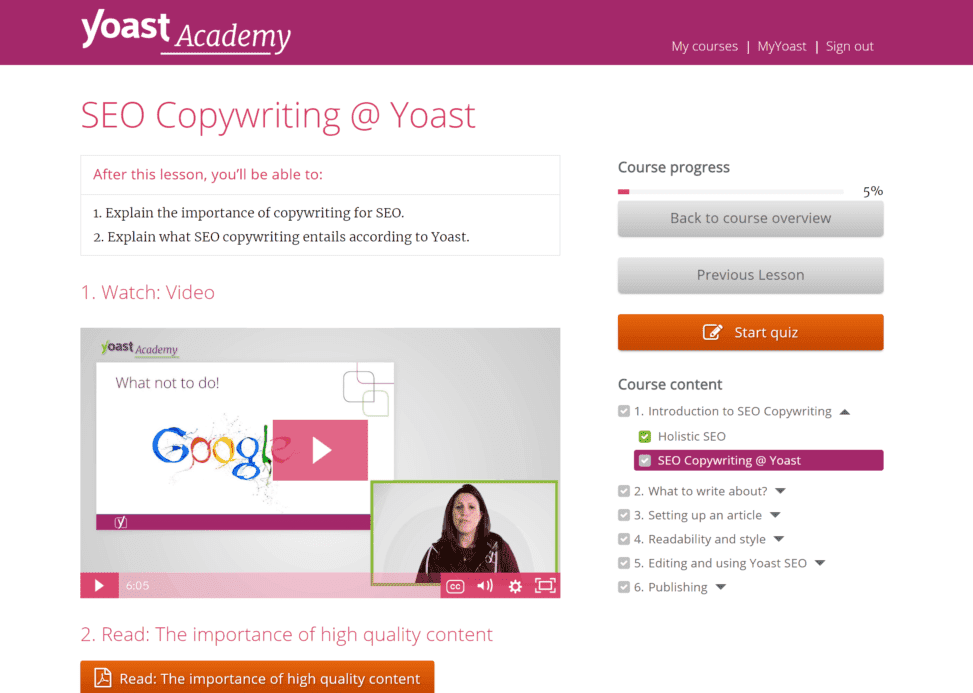
Yoast is the most popular SEO plugin for WordPress, and Yoast Academy helps students learn how to use it. They used the LMS to create a variety of SEO-related courses for thousands of users around the world.
How to Network

Last but not least, How to Network uses MemberPress to offer IT certification training to their students. They have streaming video training courses for various certifications from companies like Cisco and Microsoft.
WordPress Plugins for Creating Online Courses
There are many different eLearning plugins that you can use. Let’s get to the absolute best.
1. LearnDash
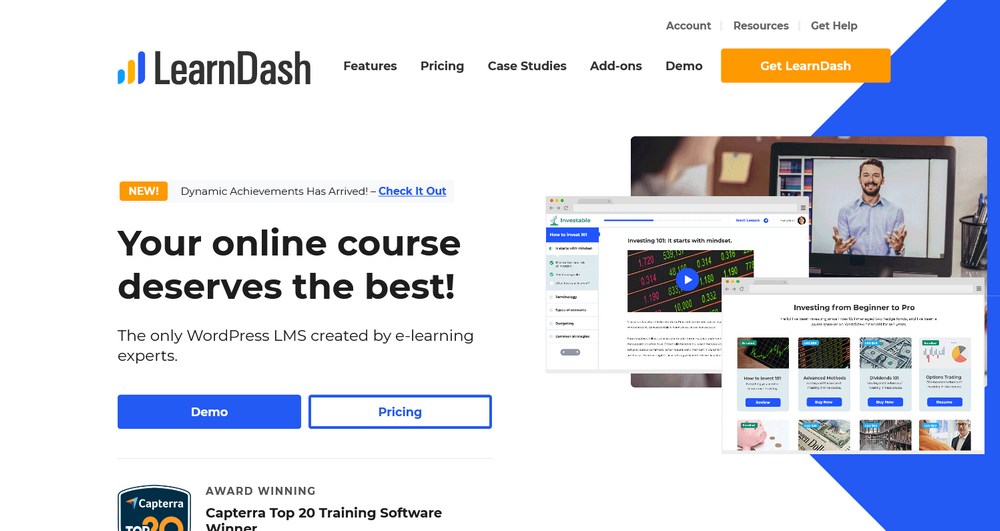
LearnDash is a WordPress LMS built by and for education professionals. This makes it very powerful, flexible and full of useful features. This includes quiz functionality, immersive learning experiences, renewal reminders, and tons of other features.
This plugin also supports whatever pricing model you choose to use. These include memberships, subscriptions, one-time sales, bundles, and others. This makes it ideal for those who have a variety of different products. For example books and recurring courses.
Features
- Easy setup without any technical knowledge
- Structure content to maximize learning
- Question features
- Use any pricing model, including memberships, subscriptions, and one-time sales
- Countless guides and FAQs to help you
Price
LearnDash starts at $159 per year for a single website.
Our take on LearnDash
If you are a professional educator looking to create an online course- website, LearnDash is a great choice that has everything you need.
2. MemberPress
MemberPress is an all-round membership plugin, packed with features. You can use it to create any type of membership site, including an educational portal that sells access to courses.
This plugin also has features aimed specifically at educators and course creators. Your Courses add-on, included with the regular plugin, has everything you need to create a robust course system.
It’s also easy to create pages and requires no technical knowledge.
Features
- Drag and drop editor
- Protect content with access rules
- Track learners’ progress
- Create subscriptions and plans and use coupons
- Advanced features for those who need powerful, custom solutions
Price
The Base Plan starts at $179 per year for one site.
Our Opinion on MemberPress
MemberPress is an extremely powerful plugin for anyone looking to build a membership site. However, it might be a bit too complex and expensive if you only want to sell a handful of courses and/or don’t need a detailed website.
There are quite a few LearnDash-compatible themes that will do that Greatly improve the design and functionality of your website.
3. Sensei
Sensei is an add-on for WooCommerce, the most popular e-commerce solution in the world. It integrates directly with WordPress, making it easy to create learning materials such as lessons, tests, courses, exams, and other content.
Nothing requires coding knowledge, which is a benefit for all non-technical users.
The best part is that Sensei is absolutely free to use, as is WooCommerce itself. If you want to use more advanced features, you need to download the paid WooCommerce course plugin, which costs extra. But it is possible to set up a basic LMS for free.
Features
- Seamless integration with WordPress
- Support for all WordPress themes
- No coding required
- Quiz and other tests
- Works well with other WooCommerce extensions
Price
Both WooCommerce and Sensei are free to use. However, if you want advanced payment features, you need paid WooCommerce courses, which cost $129 per year.
Our take on Sensei
If you’re looking for a simple, free solution, that works well with WordPress staples like WooCommerce, Sensei is a great choice for any project.
4. WP Courseware
WP Courseware is a popular plugin that simplifies the creation of an LMS site. It features a drag-and-drop course builder, integrations with WordPress ecommerce plugins and email marketing services, assignments, and course requirements. Basically anything to do with creating a powerful e-learning system.
You can add any type of media you want, from images, videos, text, file uploads and other multimedia content. Also, you can have unlimited courses, unlimited students, course tracks, drip content, teacher roles and many other customization options.
Features
- Unlimited courses and students
- Use any type of multimedia
- Drip content
- Integrate with plugins and other tools
- Drag and drop course creation
Price
- Cheapest plan starts at $129 per year for 2 sites
WP Courseware Opinion
This veteran plugin has pretty much everything you’ll ever need to build a powerful LMS system. Since it’s quite old, there’s also a lot of documentation and guides online.
5. LifterLMS
See also: Offline Survey Apps: 12 Tools to Help You Get the Job Done
LifterLMS is a course building plugin aimed at online businesses and training programs. You can create courses, tests and other teaching materials with their drag-and-drop system.
The courses themselves can be simple or have multiple steps and multiple instructors.
You can Use any business model type you like, from a one-time payment to memberships. No other ecommerce plugins are required for setup, which is a nice bonus. Finally, there are a ton of different tools to help keep your students engaged and on track.
Features
- Create simple or complex courses
- Use any payment method
- Powerful student engagement features
- Keep course content private
- Integrate with other tools
Price
The basic plan includes the plugin and an add-on and costs $120 per year.
Our opinion on LifterLMS
Overall, LifterLMS is a powerful plugin , that can works in almost any situation. However, it seems to be optimized for companies and training courses rather than individuals.
6. Tutor LMS

Tutor LMS is a freemium plugin that allows you to create online courses. You can create quizzes, interact in class, provide student reports and other class materials. Everything is drag-and-drop and requires no coding knowledge.
The basic plugin is free, while paid add-ons add additional functionality. These include the ability to offer certificates, email alerts, a shopping cart and a few other features.
Features
- Unlimited courses and lessons
- Teacher Profiles
- Quiz
- Track Course Progress and Difficulty Level
- Course Marketplace
Price
The base plugin is completely free while add-ons are paid and start at $149 per year.
Our Opinion on Tutor LMS
One of the few free options available, Tutor LMS is one powerful tool that can get the job done for most users.
7. MasterStudy LMS
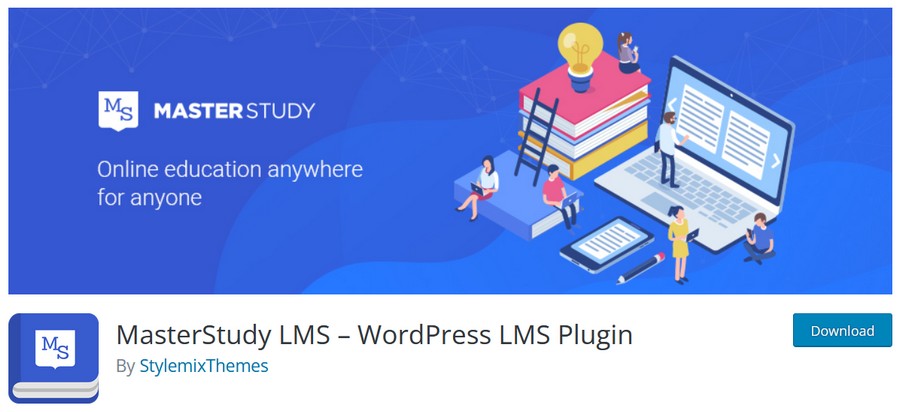
MasterStudy LMS is a freemium plugin for building WordPress educational websites. You can add quizzes, courses and other elements with its visual editor.
It has a messaging system, quiz section, quiz results, course announcements, wish lists, shopping cart and course builder. Everything is added via shortcodes.
The basic plugin is free to use, making it cheaper than some other options. There are also paid add-ons that add additional features, such as a certificate maker and an email manager.
Features
- Unlimited courses and lessons
- Front-end course maker
- Profiles for students and teachers
- Course preview, announcements and repetitions
- Different lesson types
Price
The standard Plugin is free, while paid add-ons start at $55 for a single site for a year.
Our Opinion on MasterStudy LMS
MasterStudy is a good “medium” option, as there is a free version and an affordable paid version.
Creating an online course website with WordPress
Now that you are familiar with it, check out the different eLearning courses available Plugins, let’s go through the process of creating an eLearning website.
There are a number of different steps, but the whole process isn’t too lengthy or complicated. We will show you how to create an online course step by step.
For this tutorial we will use the Tutor LMS plugin because it is free and has many features that you will want to use . Depending on your situation, one of the other paid options might suit your project better.
Step 1: Set up WordPress
First you need to set up your WordPress website.This requires you to purchase a hosting plan and a domain name.
We recommend a managed WordPress host, as they take care of many of the more technical aspects for you. SiteGround, Hostinger, and GreenGeeks are some of the most popular options.
Once you’ve purchased a domain and hosting, it’s time to install WordPress.
Typically, this is done through yours hosting provider or via cPanel. The setup wizard is very easy to follow and will only take a few minutes.
Next we need to choose a theme.
Astra is the most popular theme for WordPress (and it’s our theme!) , so we’re using it.
To install Astra, go to Appearance > Themes in your WordPress sidebar and then click the Add New button strong>.
Search for “Astra” then install and activate the theme.

Astra comes with over 200 pre-designed Website templates supplied, about a dozen of them are specially designed for online courses and LMS websites.

You can choose from templates for LearnDash Academy, eCourse and online courses to name a few e a few. For this demo we will use the LearnDash Academy template.
Recommended Astra Templates:
- Educational Website Themes and Templates
- Coaching Website Themes and Templates
To install the template, go to Appearance > Starter Templates in the sidebar. Type “learndash”in the search bar, then select the first item.

Now you can choose to preview the template, the full site or import a single page in the template.
Since we have a brand new website, click the Import entire website button.
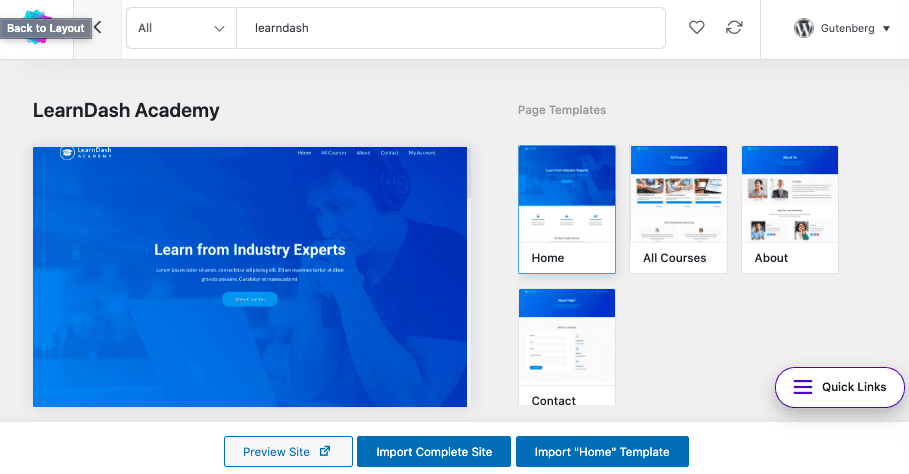
Voila! We now have a full fledged eLearning theme installed and set up on our website!
Last but not least, we want to secure WordPress to keep your courses, students and data safe. There are many different things you can do to secure your website, including just using updated plugins, creating a strong password, and using a firewall.
First, however, we recommend using a WordPress -Security plugins such as Sucuri or Wordfence. They’re both easy to install and set up, and they’ll keep your site secure.
Good job!
We now have a secure WordPress site with a beautiful theme.
p> p>
Step 2: Install an LMS plugin
Now let’s install an LMS plugin. Since there is a powerful free version, we use the Tutor LMS plugin. If you have a larger budget, we recommend LearnDash.
You can install Tutor LMS by clicking this link or by going to Plugins > Add New in your WordPress sidebar and then search for “Tutor LMS.”
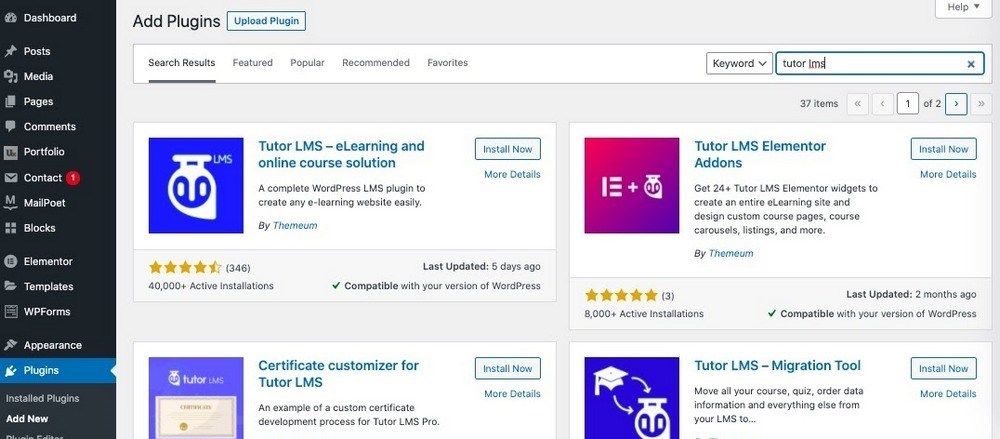
Once you have installed the plugin, activate it.
Step 3: Set up LMS
Now we have With an installed LMS plugin, let’s set up some of the basic functionality.

First, go to Tutor LMS > Settings in your WordPress sidebar.
This is the settings page. On it you can customize pretty much everything that has to do with the plugin. There are literally hundreds of different settings.
Some of the more useful ones are:
- On the General tab
- In the Spotlight mode lets you hide the header and footer when students view a course.
- On the Courses tab
- Gutenberg editor, you can use the Gutenberg editor on the course description page.
- Enable/disable access to course content allows administrators and instructors to view a course without logging in
- On the Monetization tab
- You can enable monetization for your courses. The plugin supports WooCommerce, Easy Digital Downloads and Paid Memberships Pro.
Step 4: Add courses
Now we add a course . Go to Tutor LMS > Courses in your WordPress sidebar and click Add New.
See also: How to Make a Logo in Photoshop – Easy and Advanced Examples
Add your course name and description above.

If you scroll down, you can also adjust various settings for the course, such as the maximum number of participants and the difficulty level.
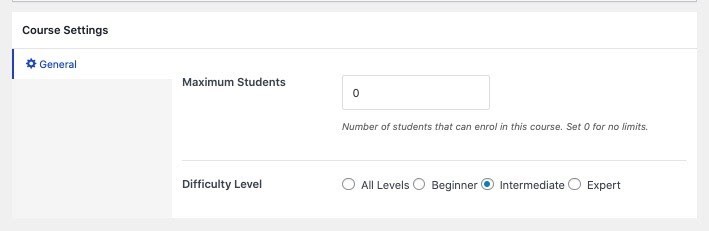
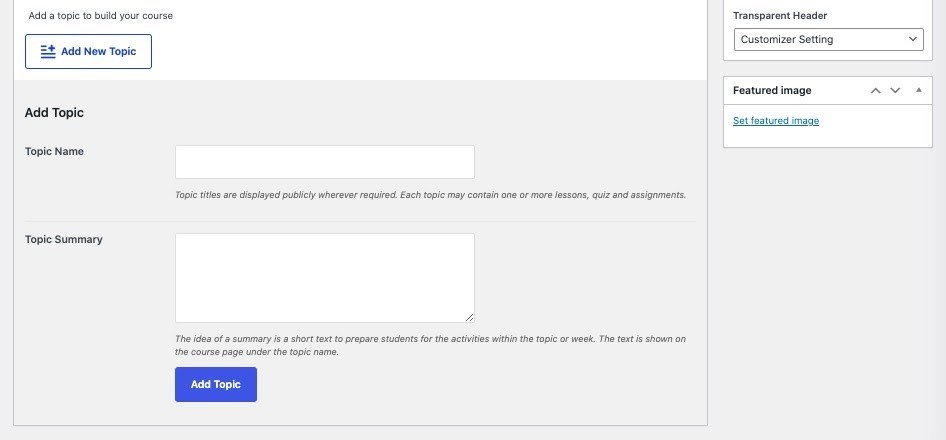
Go further down and you will see a course builder button.Click on it and you can add a topic, which is space for one or more lessons, tests and assignments.
Finally, below, you can add additional data about the course. This includes the duration, course benefits, requirements, intended audience, and materials included. You can also add a course video.

When you’re done, click the Publish button.
Step 5: Restrict courses to paying members
Once Once you’ve added courses, you’ll most likely want to restrict them to specific people. To do this, you need to add a product and then connect it to your course.
The easiest way to do this is with WooCommerce.
To create a product in WooCommerce, go to Products > Add new in your WordPress sidebar.
Enter the name and description.

Then scroll down and add the price . Also make sure to enable Virtual above.

Next, add any other settings you want to include, such as: B. Product category, product tags, short product description, retail price and more.
When you’re done, publish the product.
Go back to the course and scroll down to the

As a final step, make sure you select the WooCommerce provider (or other payment service provider) on the Tutor LMS > Settings set up, on the WooCommerce tab.
You also need to have set up WooCommerce yourself for it to work.

Creating a new registration page
Now that we have a course set up, it’s time to create a registration page. This is the page where students can enroll and enroll in your courses. Note that we will be using the Gutenberg editor to create this page.
But first, we should note that by default, two registration pages are already created for you when you install the Tutor LMS plugin.
You can find them by going to the Pages section of your site and looking for Registration.

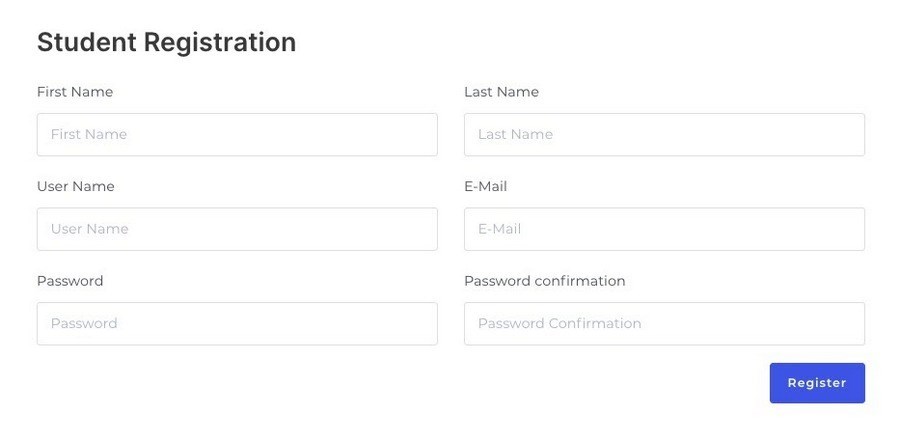
There are two pages: Instructor Registration and Student Registration. The first is when you have a complex website with a bunch of different courses, while the second is for students who want to enroll in your course.
If you click Show You can see what the page looks like:
If you want to create a separate registration page, you can add a Gutenberg block for it.
First, create a new WordPress page by navigating to Pages > Add New. Give your page a title like “Login” or “Registration”.
Then add a new block. Search for LMS and you will see two different blocks: Student Registration and Teacher Registration.

For this walkthrough we will only add the student registration book page . Add block.
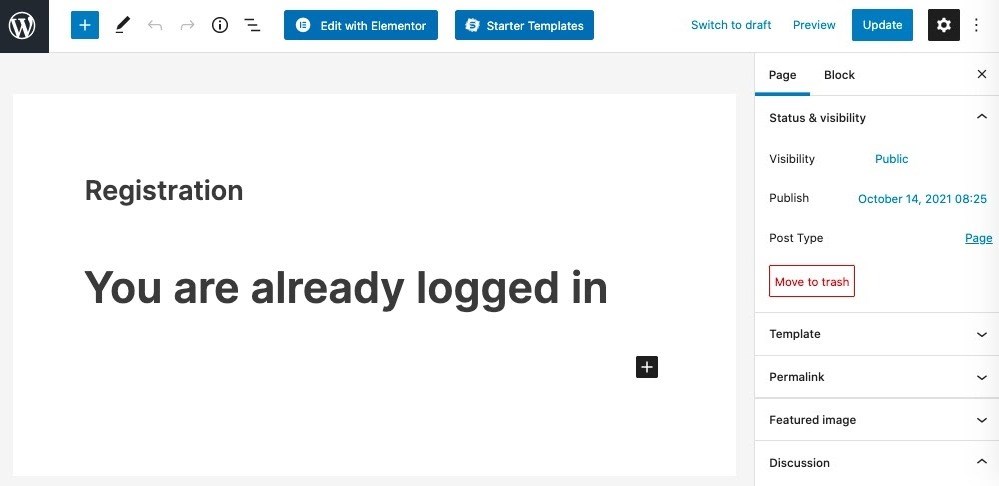
You will then see a message that says “You are already enrolled.” This is because your admin account is already enrolled in a course by default.
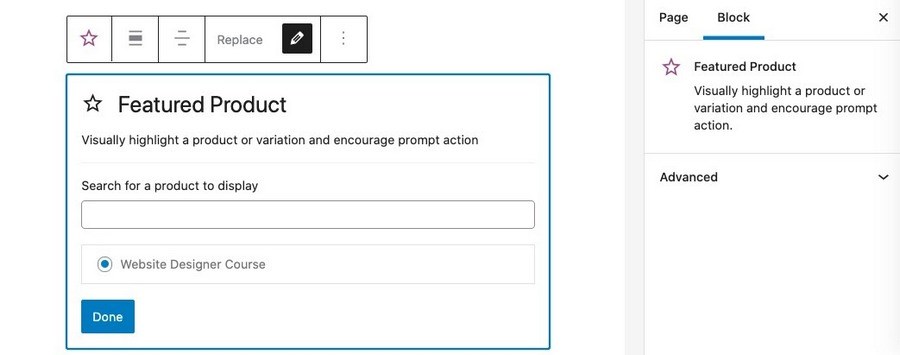
Leave also see us how to add the product to the page yourself.
Add another block and search for WooCommerce. Select the format you want to use – probably Featured Product if you only offer one product.)

Then find your course and add it as a product.
Add any other descriptive text you want to add, then click Publish.
Done! You have successfully created a registration page and a products page!
Access Denied
To view the page properly, either log out of WordPress or view the page in an incognito window at. When you do this, you may see another message that says “Access is denied.”

To fix this, go to Settings > General.
Scroll Locate the Membership item and click the checkbox next to Anyone can register.

You should now see the registration page without Show problems.
Promote your eLearning website
Now that you’ve learned how to create an online course, it’s time to promote it!
There are a lot of different marketing strategies n, but we recommend doing at least three things:
- Use email marketing tactics. Email marketing is an extremely powerful way to build an audience and market your products to them.
- By creating a blog on your website and writing great content. Good content may be the best way to get people to visit your website, check out your courses, and buy one.
- Create a landing page that converts. Effective landing page design can increase your conversion rate and sell more courses.
Using gamification in e-learning
Everyone loves games! They are often a welcome break from work as they are less serious and more fun. This is why gamification is a great method to use in e-learning.
Gamification simply uses a gamified approach to teaching your material. This is often more effective than teaching in the normal, simple way. There’s a lot of science behind gamification in learning, and it’s a great tactic to employ.
There are many different ideas for implementing game-like tactics into your courses. Here are a few ideas:
- Add challenges to each lesson. For example, don’t just add simple tasks, add different challenges with different levels of difficulty. Have easy, medium and hard versions of the challenge.
- Have a scoreboard. Competition is a great way to drive promotions. If your course results can be published, consider adding a public scoreboard that shows everyone’s results.
- Hand out badges. Badges are a great way for users to show their to show achievements. If your site has a public profile for each student, be sure to add a place to share badges for the courses they’ve completed.
- Add sequential levels. Just like in a normal game, having numbered levels leading from one to another is motivating for the user. For example, instead of just listing different topics as content, use Level 1, Level 2, Level 3, etc. to organize them.
FAQs About The Learning Site
On the Looking for quick answers? We have a quick FAQ for you here.
Summary
Whether you are a professor, teacher, or just a knowledgeable person who wants to share your skills online, you will do whatever you want Definitely create an eLearning site!
Building this site is super easy with WordPress and an LMS plugin like Tutor LMS or LearnDash. Also, you can easily monetize it by connecting WooCommerce, Easy Digital Downloads or any other payment plugin.
In this post, we have covered everything you need to know about creating an online course website on WordPress need to know. First we covered the absolute best plugins you’ll want to use on your WordPress site.
Then we walked you through setting up your own online course using Tutor LMS.
Finally, we talked a bit about promoting your eLearning website and using gamification to get students more involved in your lessons.
Run your own eLearning website? Which LMS system did you use and what is your experience?
See also: How to Build a WordPress Website (In 7 Easy Steps)
.