WordPress is known as the most popular website builder in the world. It powers over 43% of all websites on the internet. The main reason for this is that WordPress is easy to install, making it easy for anyone to create a website.
All the best WordPress web hosting companies allow you to install WordPress with just a few clicks. In most cases, installing WordPress is a simple process that takes less than five minutes.
Reading: How to create a wordpress website for beginners install button
In this tutorial, our goal is to provide a complete WordPress installation tutorial for beginners and advanced users alike.
For beginners, we will show you how to install WordPress on all top hosting platforms using 1-click installer scripts like Fantastico, Softaculous and QuickInstall.
We will also explain how how to install WordPress manual using FTP for our advanced users.
Last but not least, we will show our novice developers and designers how to install WordPress on local computer (Windows, Mac and Linux).
In addition to showing you how to install WordPress, we also give you tips on what to do after installing WordPress.

What you need before installing WordPress
Before When you install WordPress you first need a domain name and a good one Web hosting company that knows WordPress.
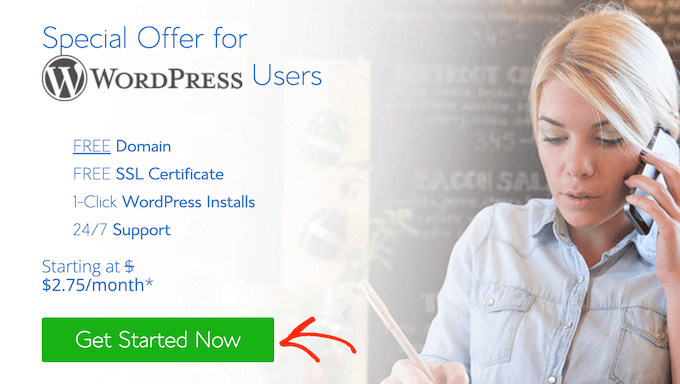
We highly recommend you to use Bluehost as it is one of the largest hosting companies in the world. They are also an officially recommended WordPress hosting provider.
Best of all, they give you a free domain and 60% discount on their hosting plan (specially for WPBeginner users).
After choosing a hosting provider, you can install WordPress. Just use the quick links below to jump straight to the method you want to use.
- How to Install WordPress on Bluehost
- How to Install WordPress on HostGator
- How to install WordPress on SiteGround
- How to install WordPress on WP Engine
- How to install WordPress from cPanel
- How to install WordPress with Softaculous
- How to install WordPress with QuickInstall
- How to install WordPress with Fantastico
- How to install WordPress with FTP
- How to install WordPress on your computer
- How to install WordPress in your language
- How to install a WordPress multisite network
- What you should do after installing WordPress
How to Install WordPress on Bluehost
Bluehost is one of the largest hosting companies in the world. They know WordPress inside out and have the most beginner-friendly WordPress installation process.
Bluehost automatically installs WordPress on your domain name when you sign up.
To easily create a new WordPress website Click on the “My Sites” tab on the Bluehost dashboard. Then click the “Add Site” button and select “Create a New Site”.

This will launch the Bluehost guided WordPress installation wizard.
First you will be asked to provide a page title and optionally a tagline.

Click the Next button to continue.
After that , Bluehost will ask you to choose a domain name and path for your website. If you have already purchased a domain name, you can select it from the drop-down menu.
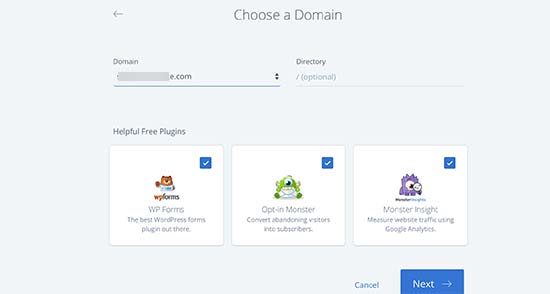
If you don’t have a domain name, you can purchase one by visiting the Domains page in your Bluehost dashboard.
Once you’ve selected a domain name, you can leave the directory path blank and let Bluehost pick it for you. The installer will also display some must-have WordPress plugins that you may want to install.
You can then click the Next button to continue.
The installer will set up your WordPress site, which may take a few moments. After that, you will see a success message with information about your new WordPress website.
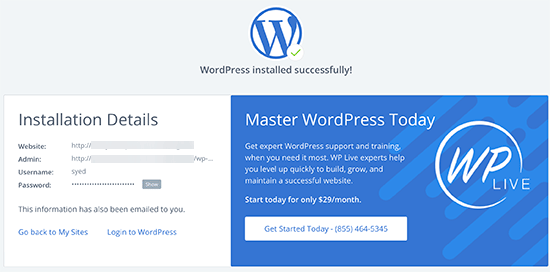
Bluehost will also send the information to your email address.
To login to the admin panel of your new website, simply click on the “My Sites” tab on the Bluehost dashboard. Then locate your website and click the “Manage Website” button.
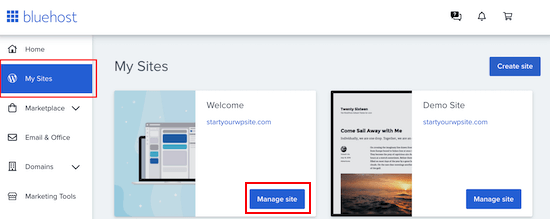
On the next screen, simply search “Login to WordPress” button.
This will take you to the admin area of your site.

Congratulations, you now have WordPress installed on your Bluehost hosting account.
How to Install WordPress on HostGator
HostGator is another popular shared WordPress hosting provider among beginners. They also make it super easy to install WordPress with just a few clicks.
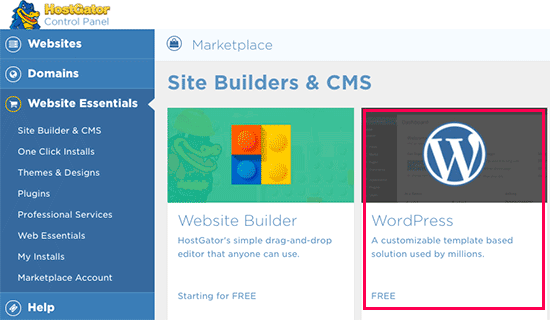
First you need to log in to your HostGator hosting account dashboard, from here you need to click on the “QuickInstall” icon in the “Software” section.

On the next screen you need to click “WordPress” to start the installation wizard.

Now you will be prompted to select the domain name where you want to install WordPress and enter a directory path.
Most beginners want to install WordPress in the root of their domain name (eg. e.g. wpbeginner.com). In this case, you must leave the directory field empty.
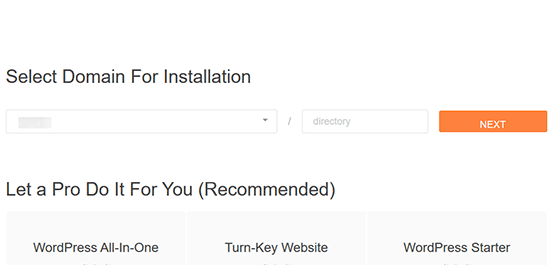
Click the Next button to continue.
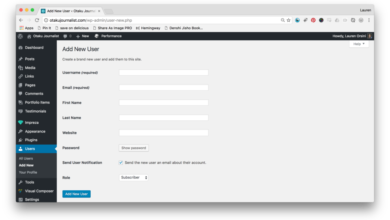
The installer will now prompt you to enter the details of the WordPress site. You must provide a page title, admin username, first and last name, and admin email address. Make sure you have access to this email address as this is where you will receive your WordPress password reset email.

Once you have entered all the information, click the “Install” button, to continue.
The installer will now run in the background to install WordPress for you. Once finished you will see a success message with your admin username and password.

You can now click the Sign In button to access the WordPress admin.
Congratulations, You have successfully installed WordPress on your HostGator account.
How to Install WordPress on SiteGround
SiteGround is a popular choice among WordPress beginners. They are known for their excellent WordPress support and highly optimized hosting plans.
SiteGround makes it extremely easy to install WordPress from your hosting account. Just log into the SiteGround hosting panel and then click on the “Websites” tab to get started.
Next, go ahead and click the New Website button.

If you don’t already have a domain, you can click New Domain and search for a domain you want to use.
To use a domain you’ve already purchased, just click on “Existing Domain”.
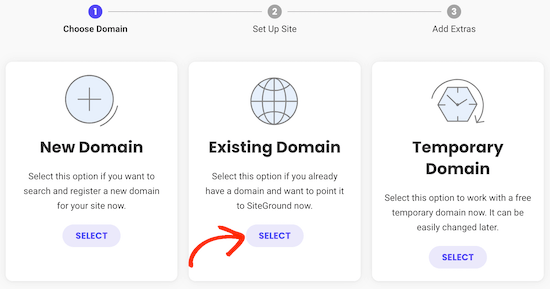
On the next screen Enter the domain you want to use.
Then go ahead and click the Next button.

On the next screen, click Start a new website.
You can now select the software you want to install ll. Since we want to use WordPress, just click “WordPress”.

After that, enter the email address and password you want to use for your WordPress admin account.
If you are satisfied with the information entered, click Next.

After that, you’ll have the option to add some extras to your account.
You can skip this step, so just scroll to the bottom of the screen and click Finish.

SiteGround will now create your website, which may take a few minutes.
When it’s done, you can click the Log in Admin button.
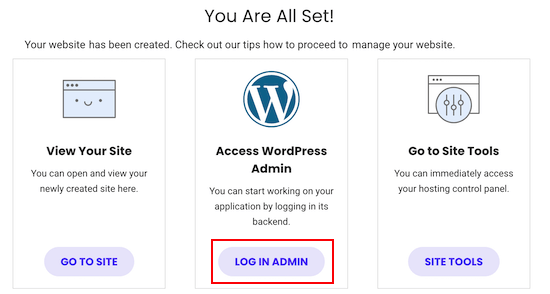
This will open a new tab where you can enter the admin username and password you just created and login to your new account.
The SiteGround website setup wizard will start automatically and help you get started with WordPress. To continue, click the “Start Now” button.

First, the starter wizard will ask you to create a theme for your WordPress -Select Site hlen.
It will show you handpicked design templates divided into different categories such as Fashion, Health and Fitness and Photography.

We recommend choosing a simple theme that resembles the look of your finished website. Remember that each theme is customizable so you can fine-tune it.
Next you will be asked to select the features you want to add to your website. SiteGround automatically selects “Contact Form” because every website needs a contact form.

If you open an online shop, you can select “Shop”. Your other options are Calendar and Jetpack.
After Select all the features you want to use and click the Next button to continue.
See also: How To Create A Multilingual Website in HTML
Now you can add some marketing tools to promote your website. SiteGround installs MonsterInsights for Google Analytics, AIOSEO for search engine optimization, and OptinMonster for lead generation.
All three tools can help your website grow, so we recommend selecting all of them.
Once you have done that, click “Finish” and the startup wizard will complete the installation for you. After a few minutes, you will see a success message with a “Go to Dashboard” button.
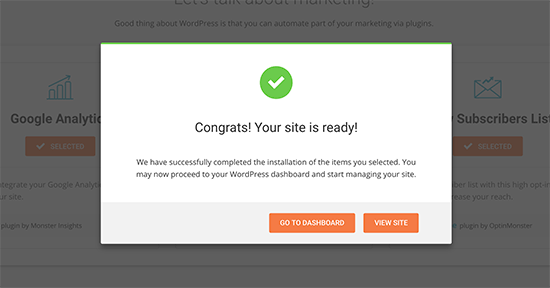
Just click the button to go to the WordPress admin dashboard.
Here you will see different menus to help you create content, customize your site’s design, and start working on your site can start .
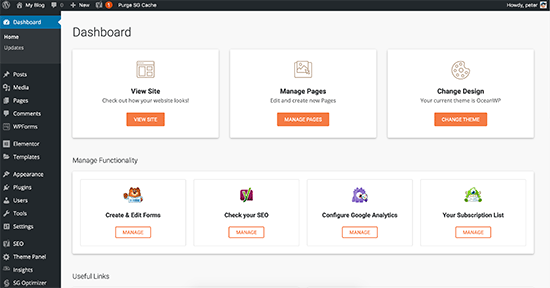
That’s all. You have successfully installed WordPress on your SiteGround hosting account.
How to install WordPress on WP Engine
WP Engine is the best managed WordPress hosting provider. A managed hosting account is basically a concierge service for your WordPress website.
You take care of managing your WordPress website updates, installation and performance optimization while you focus on growing your business
As a managed WordPress hosting company, WP Engine automatically installs WordPress when you sign up. Depending on your hosting plan, you can also create additional websites if needed.
Simply log into your WP Engine dashboard and visit the Sites page. You will see a list of all your WordPress sites. Click the Create Site button to add a new WordPress installation.

The next screen will ask you to name your production environment. Enter a name that will help you easily identify this website, then click the Create Environment button.

WP Engine is now installing your WordPress environment. It will take some time for DNS changes to propagate.
After that, you can access the WordPress admin by clicking the link in the sidebar. You can also see your login details on the same page.
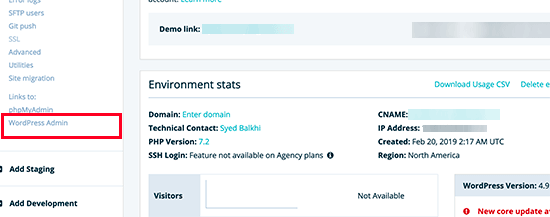
To add a domain to your website, you must click on the “Add a domain” link. Since WP Engine is not a domain registrar, you will need to point your domain’s DNS settings to WP Engine.
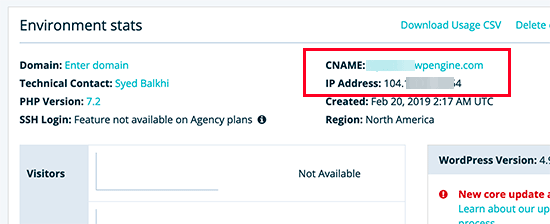
You will need your website’s IP address and CNAME to do this. You can find this information on your site’s dashboard.
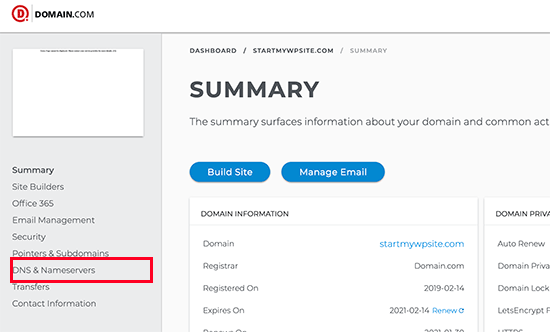
Now we will show you how to enter this information in Domain.com The settings are same for all domain registrars, you just need to find the DNS settings.
Log in to your Domain.com account dashboard and click DNS and nameserver settings for your domain name.
A In the next screen, you must first change the A record with the @ sign as its name.Click the Edit button to change its settings.

After that, you need to configure the WP Engine Enter provided IP address as this entry value and click e then click the Update DNS button.

Next you need to see if you have a CNAME record with www as the name. In this case, you must edit this CNAME record. Otherwise, go ahead and click the Add DNS Record button.

Insert the CNAME subdomain provided by WPEngine into the value field, then click the “Add DNS” button.
That was all you have successfully pointed your domain name to your WordPress site hosted on WP Engine.
How to install WordPress from cPanel
Cpanel is a popular piece of software , which is used by many web hosting companies. It offers website owners a simple web-based interface to manage their hosting account.
It’s one-stop access to several useful utilities, including auto-installer scripts to help you install WordPress help.
Hosting companies choose which auto-installer script to use. In general, Softaculous, QuickInstall, and Fantastico are the most popular options.
We’ll show you how to install WordPress using all three auto-installers. You can follow the instructions based on the installer you see on your cPanel dashboard.
How to install WordPress with Softaculous
Softaculous is a popular auto-installer script . It allows you to easily install popular web applications like WordPress with just a few clicks. Hosting companies like SiteGround and InMotion Hosting use Softaculous in their control panel.
Simply log into your cPanel account and look for the Softaculous or WordPress installer icon. You can find them in the Auto Installers section.
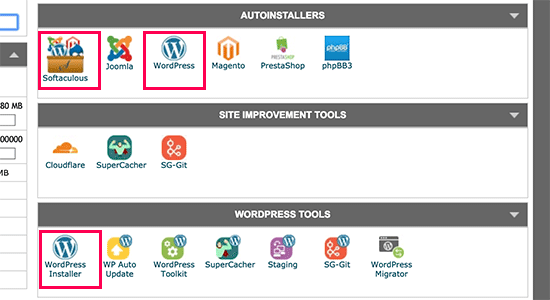
Clicking on any of these icons will launch the Softaculous automated installer for WordPress. First you will see an overview of WordPress. You must click the Install tab to continue.
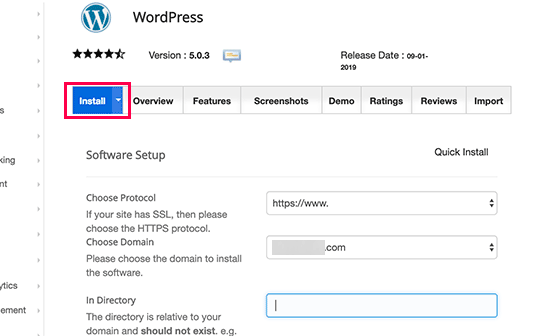
Softaculous will now ask you where you want to install WordPress. You must have http:// or http:/ Select /www as the protocol.
If your website has SSL and HTTPS, you can select https:// or https://www as the protocol.
After that, you must select the domain name under which you want to install WordPress. Most users want to install WordPress in the root of their domain, for example example.com. In this case, you need to make sure that the “In Directory” field is empty.
Scroll down a bit and you will see the site settings section.

Under this section you will first need to provide a title and description for your WordPress site. Don’t worry, you can easily change them in your WordPress admin after installation.
Next, you need to choose an admin username, password, and email address. Softaculous will automatically fill in the username and password fields for you. It will use a non-dictionary word for the username and a strong password.
You can change them if you want to make them easy to remember. However, we strongly recommend that you always use a strong password. Check out our guide to the best password management for WordPress beginners to learn how to easily manage strong passwords.
Make sure you put the right email address in the Enter the email field of the administrator. This is where WordPress will send notifications and a password reset link if you ever forget your password.
The rest of the options on the screen are optional. You can now click the Install button to run the installer.
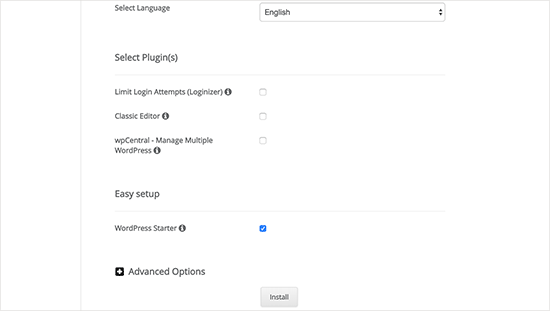
Softaculous will run the installer with the settings you specified. You will see a progress bar showing the installation status. It will take a few minutes. Do it Close Don’t close the window until the progress bar reaches 100%, otherwise it may affect your WordPress installation.

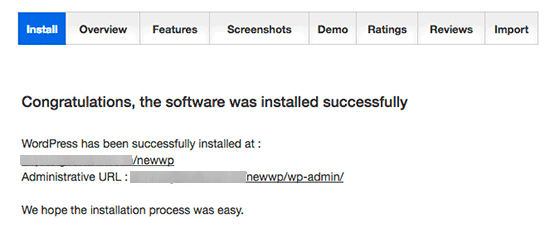
You will see a success message after the installation is complete. It will also show you links to your website and to your WordPress -Admin panel.
How to install WordPress with QuickInstall
QuickInstall is another one s popular auto-installer used by many hosting companies like HostGator and others. We’ll be using HostGator’s cPanel dashboard in the screenshots here, but it wouldn’t be much different if you’re using another host that has QuickInstall.
First, you’ll need to log into your hosting provider’s cPanel dashboard. register accounts. Scroll down to the Software section and then click the QuickInstall icon.

This will take you to the QuickInstall 1-Click Installer page. You’ll see that it offers installations for the most popular web applications including WordPress. You must click WordPress to start the WordPress installer.
The installer will now show you the WordPress overview. You will be prompted to select your domain name from the drop-down menu.
Most beginners want to install WordPress in the root of their website, for example wpbeginner.com. In this case, you must leave the directory field blank.
Now click the Next button to continue. The installer will now prompt you to enter WordPress details such as username, email address and page title.

After filling out all the information, click the Install button.
QuickInstall will now install WordPress for you. After that you will see a success message with your login details like username and password.

You can now click the Sign In button to go to the WordPress admin.
That’s all you WordPress successfully installed using QuickInstall.
How to install WordPress with Fantastico
Fantastico is an auto-installer script used by several WordPress hosting providers. It is similar to the other installation scripts in this guide and provides an easier way to quickly install WordPress.
First you need to log into your cPanel dashboard and scroll down to the Software and Services section and you’re done there you will find the Fantastico icon.

Clicking on the Fantastico icon will launch the auto-installer script.
Some hosting providers are still using an older version of Fantastico. In this tutorial we will show you screenshots of Fantastico F3 version.
If Fantastico looks different on your host then don’t worry. The basic installation steps are the same and should be easy to follow.
On the Fantastico main screen, you will see a list of web applications on the left. You must click on Blogs and there you will find WordPress listed among many other applications.
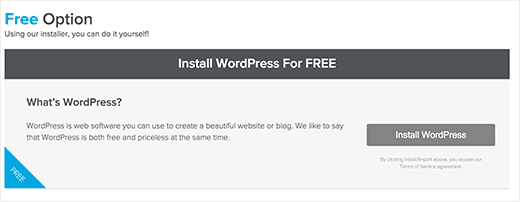
Clicking on WordPress will bring you an overview of the application with an install button.
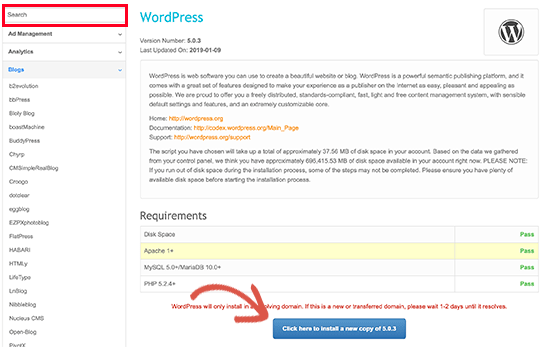
Just click Click here to install WordPress to continue.
Fantastico Auto-Installer for WordPress will now prompt you to enter your installation settings. First you need to select the domain where you want to install WordPress.
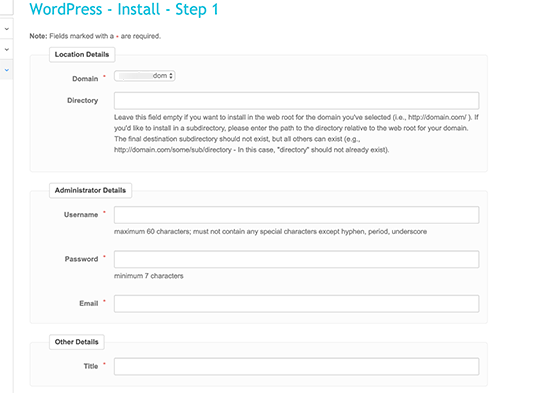
If you want to install WordPress in a subdirectory, you can enter the subdirectory name in the field below.Otherwise, make sure this field is blank.
In the Admin Details section, you must provide information about the admin user account. Enter a username, password and email address for your WordPress admin account.
See also: Using app passwords with apps that don&x27t support two-step verification
Click the Submit button to continue.
Fantastico will now install WordPress for you. Once the WordPress installation is complete, you will see a success message.
How to install WordPress via FTP
The manual WordPress installation is also known as the famous 5 minute install. There are only a few extra steps and you will need an FTP client to install WordPress manually.
Check out our beginner’s guide to learn how to use FTP to upload WordPress Use files.
First, what you need to do is download the latest version of WordPress.
The WordPress package comes as a zip file. You need to unzip the file and inside you will find a WordPress folder. This folder contains all WordPress files that you need to upload to your web server.

Now go ahead and connect the FTP client to your hosting server. Once connected, use the FTP client to upload the WordPress files from your computer to your website server.

If you want to install WordPress on your root domain name (like example.com), you must You WordPress upload files to the root of your website. Usually this directory is called /public_html/.
On the other hand, if you want to install WordPress in a subfolder (like example.com/blog), then upload it to a /public_html/blog/ folder. .
Once you are done uploading WordPress, go to your hosting control panel to create a database. We’ll show you how to do it with the cPanel. If your hosting provider has a different control panel, all you have to do is look for MySQL databases. The rest of the settings are pretty similar.
From your cPanel dashboard, click the MySQL Databases icon.

You will see a box to create a new database. Enter a name for your database and click “Create Database”.

After creating your database, MySQL needs a username. This username has access to perform actions on the database.
On the MySQL Databases page in your cPanel account, scroll down to the MySQL Users section. Simply enter a username and password for your new user and click the “Create User” button.

This new user still does not have access to the previously created database. To do this you need to add the user to the database and give them permission to perform all actions.
On the same MySQL database page in your cPanel account, scroll down to “Add a user to a database”. Section. Select the database user you created from the drop-down menu next to Users, then select the database and click the Add button.

You will now be asked for the privileges you want to grant to this user. Select all privileges and click the Make Changes button.
Your MySQL database and user are now ready, make a note of your database name and your MySQL username and password. You will need this information later.
Just go to the URL where you uploaded WordPress. If this is the main domain, enter your domain name in the browser window, e.g. B. yoursite.com or www.yoursite.com.
You will see the language selection page. You can select a language here so that the rest of the installation is displayed in your own language. You can also use English first and change the language later.
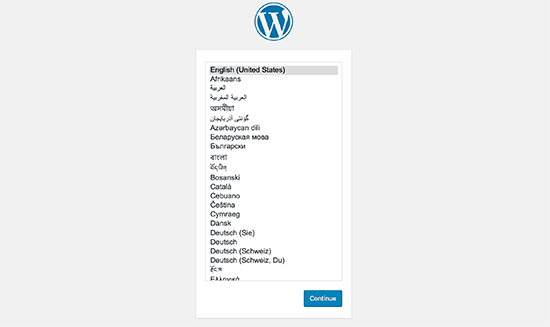
Click the Next button to continue.
You will now see some installation instructions. Basically, WordPress is now telling you that it needs your database name, password, and MySQL host information.

Click the “Get Started” button to continue.
WordPress will now show you a form . You must enter the database information you created earlier.
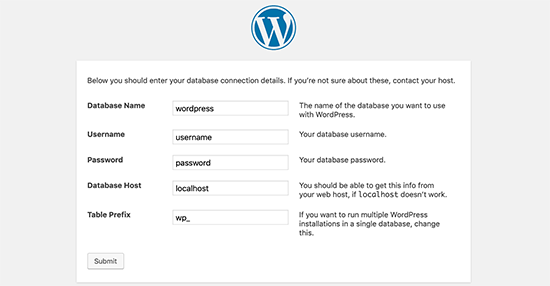
Paste the information, then click the Submit button. WordPress will connect to your database and give you a success message.
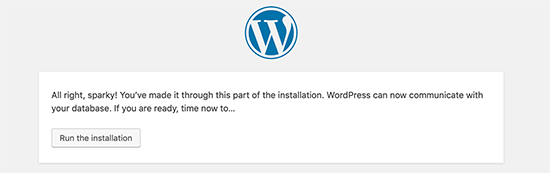
Click the “Run Install” button to continue.
WordPress will now create tables in your database and then redirect you to the next step of the installation.
Now you need to provide some information for WordPress to set up your website, including website title, username, password and admin email address.
If you don’t want your website to be search engines is visible, then you can check the box next to search engine visibility Later when you are ready you can change this in the WordPress settings. If you’re not sure what to do, just leave it disabled.

Click the Install WordPress button to continue. WordPress will set up your website and complete the installation.
You will see a success message with your username. You can now click the Login button to login to your WordPress site.

How to install WordPress on your computer
Many of our users ask whether they can install WordPress on their local Windows or Mac can install , or Linux computer. The answer is yes, but most beginners don’t need to install WordPress locally.
A local website is on your computer, not on the internet. This is perfect if you want a private place to create WordPress plugins and themes and test different WordPress features.
If you want people to visit your blog, then you shouldn’t use WordPress on your installed computer. Instead, you’ll need to buy web hosting and install WordPress using one of the methods shown above.
However, if you want to create a personal WordPress blog or website, we recommend using Local by Flywheel. This is local web software that allows you to install WordPress on your Windows, Mac or Linux computer with a single click.

After installing WordPress locally you will have access to the admin panel which works just like any WordPress website. From here you can install WordPress plugins, change your theme, and try out different WordPress features.
At some point you may want to publish your local website on the internet for others to see. The good news is that moving WordPress from a local server to a live site is easy.
See our guide to installing WordPress locally on Windows or Mac for more information.
How to install WordPress in your language
Just like Windows, Mac, iPhone and Android, you can use WordPress in your own language.
WordPress is available in many languages, including English, Spanish, French, Arabic, Korean, German, Hebrew, Hindi, Japanese, Vietnamese, Chinese (Han), Portuguese and many others.
You can choose a language during the WordPress installation or change it by visiting the Settings » General page in the WordPress admin.

More detail en see our article on installing WordPress in other languages.
WordPress is also widely used to create bilingual and multilingual websites. Watch our tutorial on how to easily create a multilingual WordPress site with TranslatePress.
How to install a WordPress multisite network
WordPress has a built-in multisite functionality. The Multisite Network allows you to create multiple WordPress sites using the same WordPress installation. It can automatically create new sites on subdomains or in subfolders.
This is useful for businesses, nonprofits, and government agencies with subsites for different locations or regions. Many educational institutions also use WordPress’ multisite network to allow students to create their own blogs.
Setting up a multisite is a bit complex, but we’ve created a full step-by-step guide on how to install and Set up WordPress Multisite Network.
What to do after installing WordPress
Now that you’ve successfully installed WordPress, here are a few things to get started with your new WordPress site.
Choose a Theme
Themes control the visual appearance of your WordPress-powered website. There are thousands of WordPress themes to choose from.With so many choices, it can get a bit confusing for beginners. That’s why we’ve put together a guide to choosing the perfect theme for WordPress.
We regularly post lists of WordPress themes we like in our showcase section. Below are some of our popular theme showcases.
- Best Free WordPress Blog Themes
- Best WordPress Business Themes
- Best Minimalist WordPress Themes for Authors
- Best WordPress Themes for Photographers
Installing and Using WordPress Plugins
The Real Strength of WordPress lies in the huge collection of plugins. They are like apps for your WordPress site that allow you to extend functionality and add new features to your site.
There are more than 59,000 free plugins available in the WordPress Plugins Directory alone. Additional plugins are available from third party sites as paid plugins.
If you’re wondering which plugins to install, take a look at our expert picks of essential WordPress plugins for any website. You might also want to check out the plugins we use on this site by checking out our WPBeginner blueprint.
We have a step-by-step guide for beginners on how to install WordPress plugins .
Get to know WordPress
WordPress is the easiest CMS to use on the market. Millions of people around the world use it every day. However, you may need a little help from time to time.
This is where WPBeginner can help. We’re the largest free WordPress resource site in the world, and we regularly publish tutorials and guides written specifically for bloggers and small businesses.
Here are some of the useful resources you’ll find on WPBeginner (all are totally free).
- WPBeginner Blog – The central location for all of our WordPress tutorials and guides.
- WPBeginner Dictionary – Our WordPress glossary is the best place to start with familiarize yourself with the WordPress lingo
- WPBeginner Videos – New WordPress users can start mastering WordPress with these 23 videos.
- WPBeginner on YouTube – Need more how-to videos? Subscribe to our YouTube channel with over 283,000 subscribers and over 43 million views.
- WPBeginner Blueprint – Check out plugins, tools and services we use on WPBeginner.
- WPBeginner Deals – Exclusive discounts on WordPress products and services for WPBeginner users.
- WPBeginner Engage – a free Facebook group with over 90,000 other like-minded WordPress users and experts from our team.
Conclusion
We hope this WordPress installation tutorial helped you learn how to install WordPress easily. You might want to check out our list of these 40 useful tools to help you manage and grow your WordPress site.
If you enjoyed this article, please subscribe to our WordPress Video YouTube channel -Tutorials. You can also find us on Twitter and Facebook.
See also: Build an online bakery website in these 7 super fast steps
.