Whether you’re an established bakery owner or just starting out, an online bakery website is a great way to reach new customers. And as you’ll learn in this post, getting started is easier than ever.
In this article, we’ll show you how to create an online bakery website in just seven super-fast steps.
Reading: How to create a bakery website
Before we get to the tutorial, let’s briefly discuss why creating a bakery website is a fantastic idea.
Why your bakery business needs a website
There are several reasons why your bakery needs a website.
A website gives you the opportunity to present your products and services in a professional manner. Since potential customers can see your website 24/7, it’s a great way to promote your business 24/7.
A bakery website also allows you to reach a wider audience.
Not only can people in your local community see your website, but people from all over the world can learn about your business and place orders online.
Finally, a bakery website can help increase sales and grow your business.
An online ordering system makes it easy for customers to buy your products without having to visit your bakery in person.
How to sell baked goods online
So you’re convinced that starting a bakery website is a good idea – great!
But you should know that starting a food business can be a bit difficult, especially if you deal with it without knowing the laws and regulations currently surrounding the industry.
To get started, here are a few things you need to do to start selling baked goods online:
- Check with your local Ci first to see if there are any restrictions on selling groceries online. In the United States, for example, there are grocery laws that allow people to sell certain types of food from the comfort of their own home without having to obtain a commercial kitchen license, but this varies greatly from region to region.
- Next you need to decide what kind of baked goods you want to sell online. If you plan to ship products, prioritize those that have a shelf life. If you only book services online but offer local delivery or collection, this is not a problem.
- Make sure you have the necessary permits and licenses before you start operations. This applies to any type of business setup, so find out about permitting and licensing requirements before you start.
- Once you’ve received the green light from your local authorities, it’s time to start thinking about packaging and shipping . When shipping groceries, it’s important to use a reliable and isolated shipping method to ensure items arrive fresh and in one piece.
- Storage is also a necessity. Again, if you’re shipping products, you’ll need adequate refrigerated space to keep your ingredients fresh, as well as shelving, racking, and bins to store shipping and packaging materials.
Finish those prep steps along the way, it’s time to get down to creating a bakery website.
How to create a bakery website
Creating a bakery website has never been so easy, with direct access to bakery website builders and a variety of easy-to-use tools.
Step 1: Choose web hosting and set up WordPress
The first step in creating your Bakery website consists of choosing web hosting and setting up WordPress.
For those unfamiliar with web hosting, it is a service that stores all the files and data related to your website and people on the all over the world via the Internet.
There are many different web hosting companies to choose from, but we recommend using SiteGround or Cloudways.
These are bot h reputable companies that offer great features and customer support.

Once you’ve decided on a web host WordPress setup is a breeze.
Most web hosting providers offer a one-click installation option. This makes the process as simple as literally clicking “Install” and sitting back while WordPress is automatically installed on your server.
Step 2: Install a WordPress theme
The next step is to install a WordPress theme. A WordPress theme is a ready-made template that you can use to change the look and feel of your website in just a few clicks.
There are thousands of WordPress themes to choose from, both free and premium.
For bakery websites, we recommend using the Astra WordPress theme, which offers a variety of options for creating a beautiful and functional bakery website.

You can get an even better start by adding You choose a bakery website template.This will give your website the structure and layout of a bakery website or online store without any design work on your part.
Astra Recommended Templates:
- Bakery Website Templates
- Confectionery Website Templates
- Food Ordering Website Templates
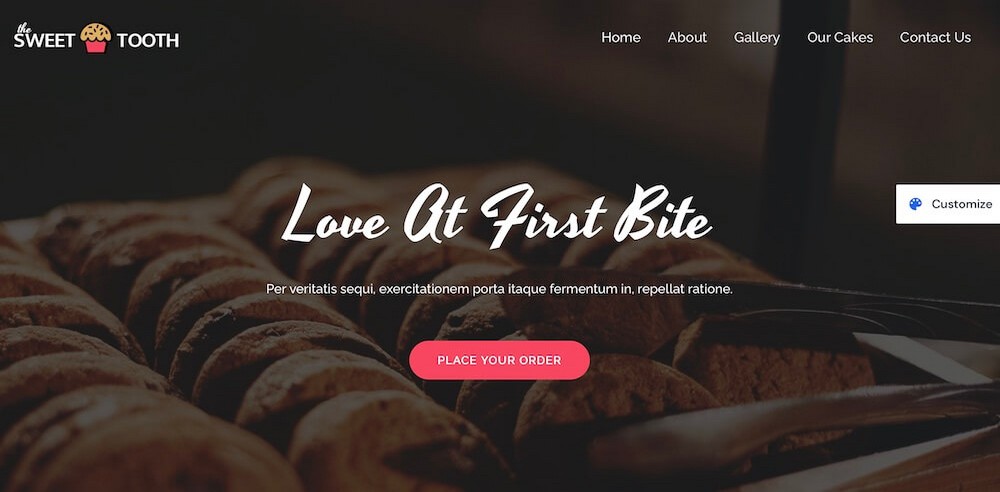
Confectionery is a nice option with full width sliders, drag quotes and bold images.

Or you might want to go with Sweet Shop, which offers a solid combination of visually pleasing designs and ecommerce-ready features .
To get started If you use Astra, buy and download the WordPress theme, then log into your WordPress dashboard.
Hover your cursor over Appearance on the left side of the screen, and then click on Themes. Click Add New at the top of the next page.
Click Upload Design and then Choose File. p>
Select the downloaded ZIP file, then click Install Now.
See also: How to Make Your Wedding Website Private
Finally, click Activate to enable Astra on your website.
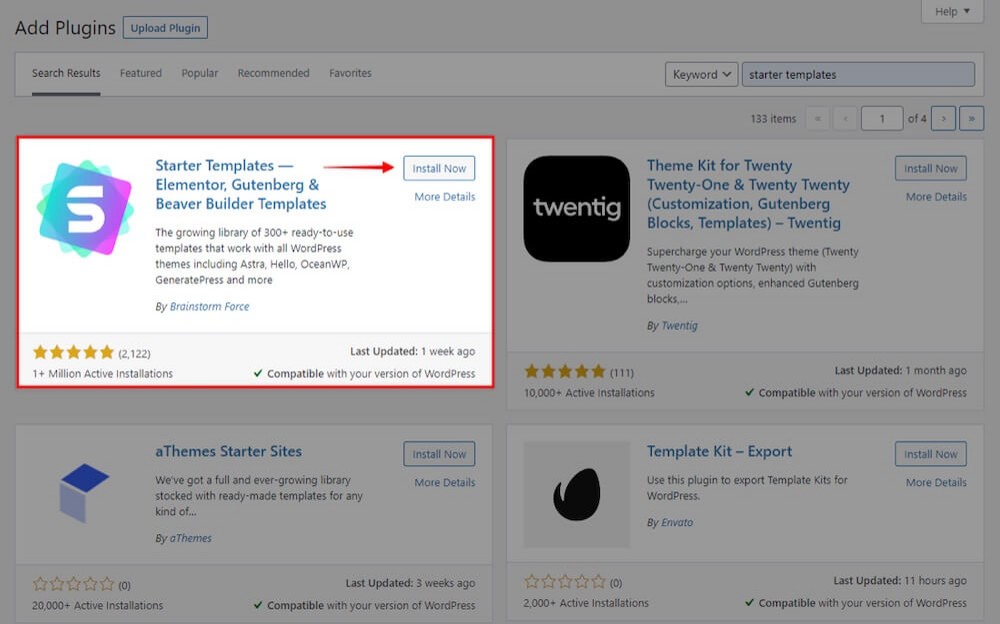
To use a starter template, you need to install the starter template plugin.
To do this, go to Plugins > Add New Search for “Starter Templates”.
Once you find the plugin, click Install and then click Enable.
Once enabled, go to Figure> Starter Templates.
This will give you access to all the free starter templates that Astra currently provides and you can import them directly into your website this way.

The aforementioned starter templates (Cake Shop and Sweet Shop) are premium starter templates.
To access these, you must purchase the Essential Bundle or the Growth Bundle, which includes Astra Pro plus premium starter templates plus additional plugins and premium support.
After purchase, you can access the Premium Starter Templates Plugin in the Brainstorm Force Store and then go to Account > Downloads and download the plugin as a ZIP file.

Upload the plugin to WordPress as usual, then go to Account > Licenses the Brainstorm Force Store and copy your plugin license.
Back in WordPress, navigate to Plugins and find the Premium Starter Templates plugin in the list of installed plugins.
Click on the green Activate License Link and paste your copied plugin license.

After that, you can use the same process as for the free Starter Templates plugin to find and install a template that you want to use.
Step 3: Use WooCommerce to sell baked goods
Now that you have a WordPress theme installed, it’s time to think about how you want to sell baked goods online.
The easiest way to do this is to use the WooCommerce plugin.

WooCommerce is a WordPress plugin that turns any WordPress website into a fully functional online store. It’s free to use and offers a variety of features, making it the perfect solution for selling baked goods online.
Some of WooCommerce’s key features are:
- The ability to physically he and digital products to sell
- Integrated payment gateways
- Automatic tax calculations
- Shipping options
- Inventory management
To install WooCommerce, go to the Plugins section of your WordPress dashboard and search for “WooCommerce”.
Once you find it, click on it Install and then Activate.

You can then create custom product listings for your online store by going to Products > Add New in your WordPress dashboard.
Here you can add a product name, description, price, images and other relevant information.

If you are happy with your product listing, just click Publish it on your website.
Step 4: Set up CartFlows to create sales funnels
If you’re looking to sell baked goods online, you might want to create one to create a sales funnel. A sales funnel is a journey that takes a potential customer from awareness to purchase.
The best way to create a sales funnel is by using the CartFlows plugin.
Cartflows is a WordPress plugin that allows you to easily create sales funnels and checkout pages.

Some of the main features of CartFlows are:
- The ability to create upsells and downsells in one click
- A wide range of templates and themes
- Integration with popular payment gateways
- A/B testing function
Um To install CartFlows, head Go to the Plugins section of your WordPress dashboard and search for “Cartflows”.
Once you’ve found it, click Install and then Activate.
You can then create your first sales funnel by going to CartFlows > Add New in your WordPress dashboard.
Here you can name your sales funnel, choose a template, and then start adding each of the steps that make up your funnel.
For example: if you want to create a template for a free bakery order form, You can do this by using a “flow” for the till.
See also: How to Integrate Motion Into Your Website Design
A flow is CartFlows’ name for a sales funnel.

You can customize the steps presented here to suit your business.
If you need to gather details about what the customer would like to see on a custom cake, you can create a flow that collects that info requests information without overwhelming potential customers.
Once you’re happy with your sales funnel, you can integrate it directly into your WooCommerce store to streamline the checkout process.
Step 5: Create Bakery Pages
Now that you have a WordPress theme and plugins inst all, WooCommerce installed and configured and CartFlows ready to go, it’s time to create the basic pages of your bakery website create.
To create a new page, just go to Pages > Add New. strong> in your WordPress dashboard.

You can then give your page a title, add content, and include images and other media. Most bakery websites should contain the following pages:
Home Page
A home page is the first page that visitors see when they arrive at your bakery website. It should give visitors an overview of your bakery, what you sell and how to order baked goods.
It should also include:
- Your opening times (including relevant holidays). information)
- The number of days required to book your services in advance
- A highlight of the locations you serve or a radius you serve
As a local business it is important that you make it clear in advance which areas your bakery will be serving/delivering and when you will be available.
About us
An About Us page is a great way to introduce yourself, your bakery and your team. This is an opportunity to share your story, describe your process, and highlight any awards or accolades you’ve received.
It’s also a great place to showcase your press coverage.
Product Page/Menu
A bakery menu page should list all of the products you offer along with pricing information. If you offer custom cakes or other baked goods, you can use this page to showcase some of your past work.
Services Page
This page should provide some examples of custom services you provide ( if applicable) e.g. For example, made-to-order cakes are available for events or weddings.
Contact page
A bakery contact page should include your bakery’s phone number, email address, and physical address ( if available).
It should also include a contact form so that potential clients can easily contact you.
It’s also a good idea to repeat some of those mentioned here on the homepage Information such as your hours of operation, the number of days you can book in advance, and the catchment radius you serve. Here are some contact form plugins that you can use to create a form on your online bakery website.
Policy Page
A bakery policy page should contain your refund policy, terms and conditions, and any other important information that potential customers need to know.
Privacy Policy
You should also have a separate privacy policy that describes how you collect, store and use customer data.
Blog
A bakery blog is a great way to share recipes, baking tips and others share relevant information with your audience. It can also help you attract new customers and drive traffic to your bakery website.
Putting out new search engine optimized content regularly can help improve your website’s rankings, so it’s worth it definitely.
Step 6: Install Helpful Bakery Plugins
In addition to the WordPress Bakery themes and plugins we’ve already mentioned, there are a few other types of Plugins that can add more functionality to your site.
Here are some types of plugins to consider (along with a handful of suggestions for each):
- Page Builder: We mentioned Astra as an excellent WordPress theme to use, but you need a page builder to get the most out of it. Astra works with Elementor, Beaver Builder as well as Gutenberg WordPress built-in block editor.
- Form Builder: To take orders online you need a form builder plugin to help you Assist in creating order forms and other types of forms for your bakery website. We recommend WPForms or Gravity Forms. CartFlows can also help to add WooCommerce integrated forms.
- Gallery/Portfolio Plugins: If you plan to feature bakery photos or other types of images on your website, you will You need a gallery plugin to create image galleries or portfolios. We recommend the WP Portfolio plugin for the best display of your items.
- SEO Plugins: To improve the search engine optimization (SEO) of your bakery website, we recommend the plugins SEOPress and Scheme Pro.
- eCommerce Plugins: Besides WooCommerce, it’s also a good idea to use additional eCommerce-focused plugins to extend the functionality available to you. If you want to sell baked goods online, Variation Swatches for WooCommerce can help you create product variations and present them in a visually appealing way.

Once you’ve added the plugins you want to use, it’s time to move on Focus on building greater awareness for your bakery.
Step 7: Market your bakery
Once your bakery website is up and running, it’s time to start marketing of your bakery and driving traffic to your website.
There are a number of ways you can market your bakery online. Here are just a few ideas to get you started:
- Create a blog and share recipes, baking tips, and other relevant information.
- Use social media to share photos of to share your baked goods and drive traffic to your website.
- Use email marketing to promote special offers and drive traffic to your website.
- Create compose a newsletter and share it with your customers and potential customers.
- Use SEO to ensure your bakery website appears in search engine results pages (SERPs).
- Use Google AdWords or other pay-per-click (PPC) advertising to increase your website traffic.
- Set up a Google Business Profile and encourage customers to leave reviews .
- Give free samples of your baked goods to those who pass by to encourage them to buy .
- p sponsor a local event or bake sale to get your bakery’s name out there.
- Give customers who mention a secret code word you share on social media a percentage discount when they m Shop in store.
- Participate in local fairs or festivals to sell your baked goods.
By following these steps, you can become a professional bakery -Create a website that will help you sell more baked goods and get new customers.
Frequently Asked Questions
Now that we’ve gone through the entire tutorial, let’s do some common answer questions asked about bakery websites.
Closing
Creating a bakery website is a great way to sell more baked goods and attract new customers. By following these seven super-fast steps, you’ll have a professional bakery website up and running in no time!
And don’t forget, starter templates for Astra are the perfect combination to get your website off the ground. Good luck!
Have you recently created a bakery website? Do you have tips to share to help others? Tell us your story below!
See also: 7 Ways to Write Better Recipes as a Food Blogger
.