Often creating a website can be overwhelming. In this article, I’ll show you how to create a website from scratch…
Just a note…
This article is more about walking you through the process of creating of a website, rather than the technical side of things. If you’re coming here because you want to learn how to code websites, check out Learning Web Development or my series on Learning HTML.
Reading: How to create a simple website with html and css
The End Product
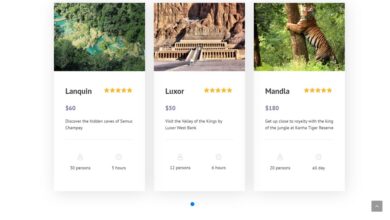
Here is the end product of the Website I’m going to create today. Check it out and keep this in mind as we go through the tutorial.
It will be a fictional page about Boberick the Llama (sometimes I have the strangest ideas…)
1. Plan your layout
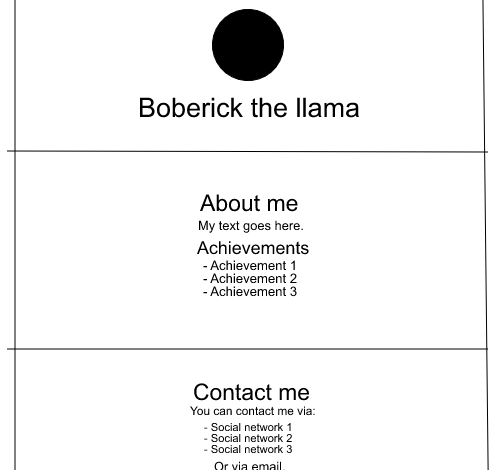
The first step in any website is always to know what you want on it and (roughly) how you want it to look. So the first step is to make a rough sketch – either on paper or on the computer, whichever is easier for you.
Remember, it doesn’t have to look good.
strong> Here’s mine: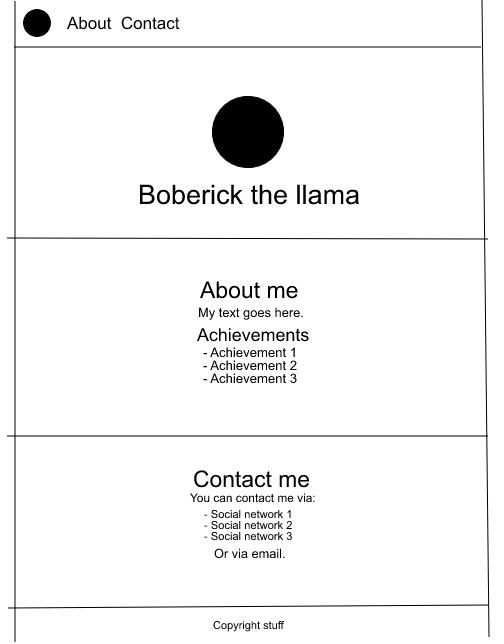
See also: Building Your First Site? How to Create a Blog From Scratch
As you can see, it’s very rough. The lines aren’t straight and nothing is even, but I can still see how the page will look and what sections I need to have.
In this layout I have a header (navigation bar), three sections and a footer.
2. Set up the “boilerplate code”
Now it’s time to get the basic code that you have at the top of every website (this is commonly referred to as the boilerplate).
Do it like this:
- Create a new folder on your computer for the website
- Create new empty index.html and style.css files in it
- Add the basic ‘boilerplate code’ to your index.html file:
jpeg’); } #about { background-image: linear-gradient(rgba(255,255,255,0.75),rgba(255,255,255,0.75)), url(‘https://codetheweb.blog/assets/img/posts/steps-to-creating- a-website/strand.jpg’); } #contact { background-image: linear-gradient(rgba(255,255,255,0.75),rgba(255,255,255,0.75)), url(‘https://codetheweb.blog/assets/img/posts/steps-to-creating- a-website/canyon.jpg’); }
As you can see, we added some common background styles to the section elements and added a background image to each section individually.
The reason for the linear gradient( rgba(255,255,255,0.75),rgba(255,255,255, 0.75)) before the URL(‘image.jpg’) because otherwise the text is hard to read – so we add a semi-transparent white overlay on top. I wrote a bit more about this in my article on how to create a full-page hero image.

8. Celebrate! 🎉
See also: How to Get a Free Domain Name in 6 Simple Steps
Wow! Finally your website is ready! Now, show it to your friends, family, and the whole internet 😉
Further reading
If you want to know more about a specific section of what I showed today, take a look out:
- How to create a full page hero image
- How to style a navigation bar with CSS
Conclusion
Well, I hope you’ve enjoyed this article and I hope you’ve learned something from it!
I did something a little different today than usual, so let me know what you think. Keep in mind that this article is less about showing you the actual technical aspects of creating a website and more about walking you through the thought process of creating a website.
If you liked this article, please be a great person and share or sign up for the newsletter, I’ll give you a free taco 🌮 (not really 😜 )
Have fun, keep coding and see you next time ‘Where’ I’m going to talk about how to style a navigation bar (header) with CSS – and walk you through the navigation bar we created today, but in more detail. See you then!
This article was suggested by Alisa Dubik-Wilson – thanks! If you also want to suggest an article, you can contact me or let me know in the comments.
See also: Website Marketing for Small Businesses: The Ultimate Guide
.