It’s important to keep communities together so they can thrive. However, in the current climate, people are more disengaged than ever. Unfortunately, this can be disastrous for organizations and creators.
Fortunately, you can help bring people back together by bringing your organization online or adding a community to your monetized site. Membership plugins offer a unique solution for creators looking to engage their members and customers.
Reading: How to create a community wordpress website
In this post, we look at what a website monetization plugin can do and we see us how it can benefit your organization or business. We also explain how to start a community on your website in 5 easy steps using the MemberPress plugin. Let’s get to work!
The advantages of online communities
A member community requires users to register in order to access certain content. Some sites charge a fee for members-only content, while others offer free access upon registration.
However structured, online communities are useful tools for businesses and groups.
Community websites can be useful for churches, housing associations, local parent groups, non-profit organizations, councils and even online shops and educational sites.
For example, the Corporate Volunteer Council of Atlanta (above) has a website to organize volunteer projects in the Atlanta area.
MemberPress Community Site Examples
Tons of online businesses and organizations use MemberPress WordPress monetization plugin to create and manage VIP communities on their websites.
Nomadic Matt is an example. The VIP community on this New York Times bestselling author’s blog is on MemberPress.

Brick and mortar companies often run online communities as well.
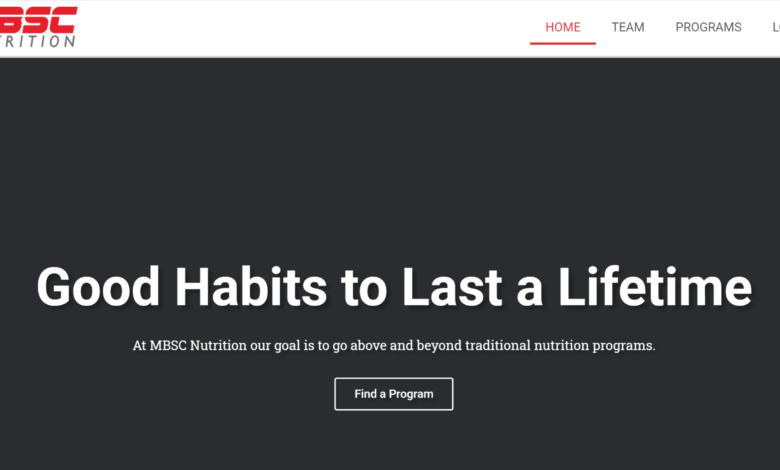
For example, Mike Boyle Strength and Conditioning (MBSC) is a nationally recognized gym. The site uses MemberPress to administer an online program that includes access to webinars, coaching sessions, and (you guessed it) a VIP community.

4 advantages of Adding an Online Community Membership to Your Website
1. They provide you with an easy way to share information
Having a place for local groups to share information can have a positive impact on your bottom line.
If community members can update and contribute to a site, they are more likely to stick with it. A community also provides access for those who may have difficulty leaving home.
2. You Make Fundraising Easier
Fundraising for community events can be a daunting task for organizers. A membership site built with a monetization plugin is a safe way to raise money and donations online. It makes life easier for your accountant and your group members.
3. They offer privacy
See also: How to create a blog in Magento 2?
Groups like parent and church organizations may need to share sensitive information – the kind you don’t want to be available to all Internet users . With online communities, you can rest assured that this data is only available to registered members.
4. You increase customer retention and data capture
When a business offers access to premium content, special offers and other VIP benefits through an online community, it increases customer retention. At the same time, these companies get exclusive and unique access to customers, which allows them to do things like surveys.
It’s easy to see that membership plugins can be a useful tool for group organizers and online businesses.
Now let’s see how you can use the MemberPress plugin to start a community on your website.
How to start a community website or add one to yours (In 5 Easy Steps)
The MemberPress WordPress monetization plugin makes setting up community memberships easy, even for beginners. By following these 5 simple steps, you can have your own organization’s website up and running in no time.
Step 1: Install the MemberPress plugin on your WordPress site
If you don’t already have one, you need to create a basic WordPress website first. The platform is highly customizable and doesn’t require much technical know-how.
Once your WordPress site is up and running, you can install the MemberPress plugin.
First, visit the MemberPress website and choose a pricing plan that suits your needs. Once you sign up for a plan, you will be prompted to download a zip file containing the plugin.
Then go to WordPress and log into your site’s dashboard.To upload the plugin, click Plugins > Add New > Upload Plugin > Choose File:
Once you have uploaded the .zip file, you can click Install Now and then Activate Plugin.
Step 2: Customize your membership plans
The next step is to create your membership plans. These offer users different options to log into your website. Depending on your needs, you can create a plan or set of options with different access levels aimed at different groups within your community.
To set up a new membership plan, navigate to the MemberPress plugin in the WordPress Dashboard and click on Memberships. Then select Add new at the top of the page. You will then see the Add New Membership page:
On this page you can name your membership plan and customize a variety of other elements. You can set parameters like pricing plans, billing types, and access levels.
You can also scroll down this page to customize settings like payment methods, button text, thank you messages, and more :
Once you start using finished customizing your membership plans, click Publish to save your changes. If you need to change your plans in the future as your community grows, you can always go back and make changes.
Step 3: Create a registration page for your community
See also: Create a Clean and Professional Web Design in Photoshop
In order for users to register for the community, they need a registration form. Fortunately, setting up these forms is straightforward with MemberPress.
First, select “Appearance” from the menu on the left side of your WordPress dashboard. Then click Menus > Manage with Live Preview:
This will take you to the Customizer. Click Main Menu > Add Items > Memberships. You can then select the menus you want to add by clicking the plus icon. This will add your membership options to the site and allow community members to register.
Step 4: Set up your site’s rules and permissions
If you have more than one membership plan, you may want to give different groups access to different content. For example, if your community group caters to local families, you may have separate pages for children and adults.
To ensure each group has access to the correct information on your site, you can use the MemberPress Use rules feature.
To create rules, go to the MemberPress plugin in your WordPress dashboard and click on Rules. Then select Add new:
On this page you can customize who can access what content by setting access conditions. When you’re done setting up your rules, click Save Rule.
Step 5: Create a community login page
The final step in this process is to create a login page to allow users to log into the site and access member content. To do this, go to MemberPress > Settings > Pages. Then select “Auto-create new page” from the MemberPress login page drop-down menu:
You can then click “Edit” to customize the page and ensure it contains all the fields you required to register your members. After this step is complete, you are ready to welcome visitors to your new online community!
Bonus – Adding a Community Forum
Although optional, adding a forum to your Website online community is a great idea. It provides members with a place to exchange ideas and information. And it can significantly increase engagement.
Conclusion
Keeping a tight-knit community isn’t always easy. However, a WordPress monetization plugin like MemberPress can give people another point of contact that will help them stay connected.
Fortunately, creating a members-only community is easy with MemberPress, allowing any organization to take advantage of one.
Here is a summary of how to create a community website in 5 start Steps:
- Install the MemberPress plugin on your WordPress site.
- Customize your membership plans.
- Create a registration page for Your community.
- Create a registration page for your community.
- li>
- Set your website’s rules and permissions.
- Create one Community login page.
Have questions about how to start a community website? (or add one to your existing site)? Let us know in the comments section below!
If you enjoyed this article, don’t forget to subscribe to the MemberPress Blog ! strong >
See also: How to Make a Website Like Yelp
.