Are you trying to create a new post in WordPress? Want to learn more about all the WordPress post features you see on your screen?
While some may think that adding a new WordPress post is pretty self-explanatory, many newbies find the interface a bit overwhelming. Not to mention that even more savvy users are sometimes surprised to find the hidden gems on the edit post screen.
Reading: How to create a new wordpress blog
In this beginner’s guide, we will walk you through all the features on the add new post screen. and how you can use them to create better content.

We’ve divided this guide into three sections for your easy reference , what you need are looking for:
Ready, let’s go.
Creating a new post in WordPress with the default editor
In December 2018, WordPress introduced a new a modern block-based editor, also known as Gutenberg. It’s clean and simple, but don’t let the looks fool you.
Its clean interface hides tons of powerful features. We’ll explain them all and help you unlock their true potential.
Adding Title and Content Blocks
The WordPress block editor has a clean writing interface. Above, enter the title of your post.

To add content you must add a block.
There are several add block buttons on the screen that you can click to select and add a block.

If you don’t want to use a mouse to click the button , then you can use a keyboard shortcut.
Just type / to find and add a block.

All content items will be wrapped in a block. WordPress includes blocks for all popular content elements including paragraphs, columns, images, galleries, embeds, shortcodes, widgets and more.
Some WordPress plugins can also add their own blocks to enable other features such as contact forms, SEO etc. (more on that later in the article).
Add images, videos and other media
You can add images by simply adding the image block and then uploading or selecting the image that you want to add.

If you want to place text and image next to each other, you can use the “Media & Text” block.
This block helps you to wrap text around the image in WordPress.

The WordPress editor also includes a gallery block that allows you to display images in rows and columns with a grid layout.
Just add the gallery block and then upload or select the images from your WordPress media library.

Although the gallery block is powerful, you may need other advanced ones Gallery features like albums, image sorting, etc. In this case, we recommend using one of these WordPress gallery plugins.
Want to embed a video in your content? No problem.
The default WordPress editor includes embed blocks for all major providers.

You can also just copy and paste the video URL into a paragraph block.
WordPress will automatically convert it to a video embed block.

While using the video block to upload videos directly to your site, we do not recommend it as it will slow down your site and can even crash your WordPress hosting server.
Instead, we recommend uploading your videos to a service like YouTube or Vimeo, and then embedding them in your WordPress posts.
For more details, see our guide to why you should never upload videos to your WordPress site.
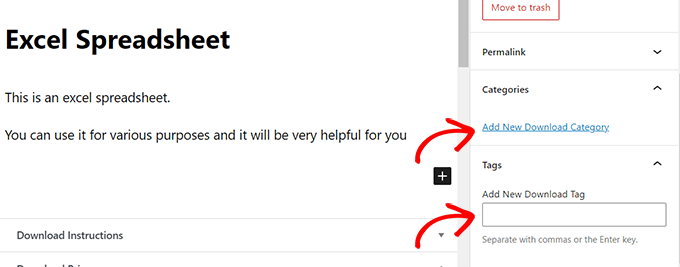
Adding Categories and Tags
WordPress lets you organize your posts into categories and sort tags. These taxonomies help you organize your content into sections and topics.
They also help with WordPress SEO and make it easier for your users to find the content they are looking for.
The categories and tags -Meta folders are in the right column.
Add a featured image
A featured image (aka post-thumbnail) is the main article image that encapsulates the content . They will be prominently displayed on your website in individual posts, blog archive pages, as well as on the homepage of news, magazine and blog websites.
Almost all WordPress themes support featured image functionality. In the right column you will find the option to add a featured image to your post.

Just click the Set Feature Image button and then select the image that you want to use as a featured image or upload it.
It’s important not to confuse featured images with cover images, which is a new feature. For more information, see our article Cover Photo vs Feature Photo.
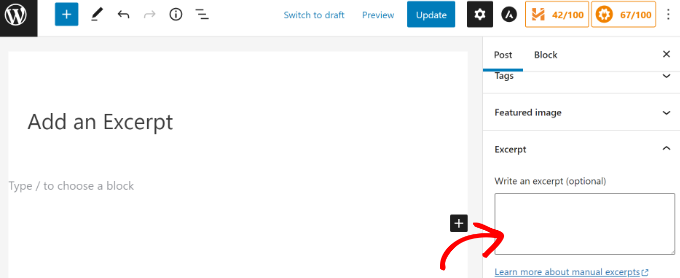
Adding excerpts (article summary)
Excerpts are the summary of a blog post or article. Most WordPress themes can auto-generate the excerpt from the first few lines of your post.
However, this auto-extract may not always be meaningful or memorable. In this case, you may want to add an excerpt manually.
You can do this by adding it to the excerpt box, located on the right under the “Settings” column.
Change Post URL Slug or Permalink
By default, WordPress uses SEO-friendly URLs for your blog posts. It automatically uses your post’s title as the permalink.
However, some users may want to change it to be SEO and user friendly. There are two ways to do this.
You can click on the post title and you will notice the option to change the permalink above the title field. Alternatively, you can change it in the “Permalink” tab in the “Settings” column.

Change Author
If you are running a WordPress site with multiple authors, you can also change the author change a post and assign it to a different author on your site.
You can find the option to change the author under Settings in the right column.

Toggle comments
WordPress has a built-in commenting system that allows users to leave comments on your post.
You can disable comments for individual posts in the Discussion tab. Just uncheck the “Allow Comments” option.

You will also see the option to allow pingbacks and trackbacks. These allow you and other blogs to notify each other when they link to an article.
See also: Better together: 5 simple steps to build Gmail groups
However, it is primarily used for spam, so we recommend disabling pingbacks and trackbacks entirely.
Options added by WordPress plugins
Most popular WordPress plugins also add their own options to the post editing screen. Some will be available as blocks, while others will be available as metaboxes.
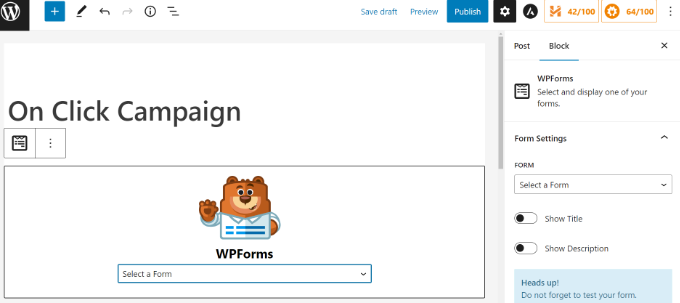
For example, WPForms, the best WordPress contact form plugin, adds a block to insert contact forms into your posts and pages.
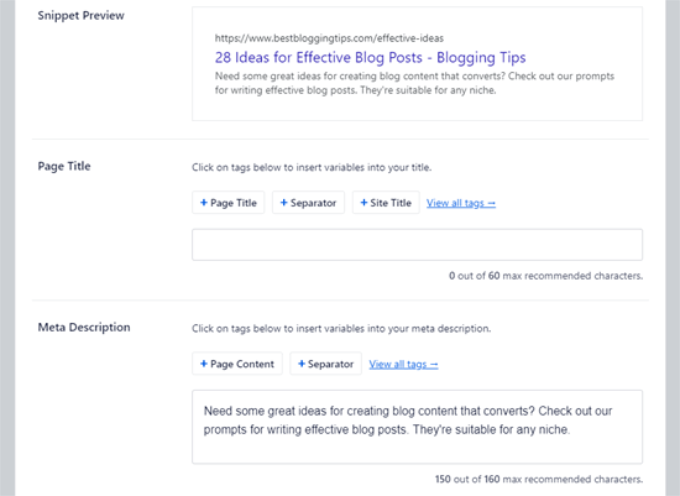
Another great example would be All in One SEO (AIOSEO). You’ll add a meta field under the SEO settings editor and another in the top toolbar.
You can read our full guide on setting up all-in-one SEO for WordPress for more details .
Publish Options
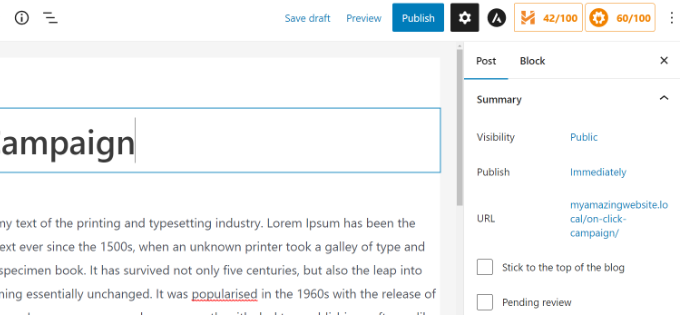
The default WordPress edit screen is divided into two columns. In the left column you write content and in the right column you will find all the post settings, including publish options.
Let’s take a look at the publish options in the right column.
- The Save button is a quick way to save changes you’ve made to a WordPress post. The editor also automatically saves your changes as you write.
- The preview button opens a live preview of your post or page in a new browser tab.
- Once you’re done editing your post, you can click the publish button to make your post live.
- WordPress gives you a few options to control visibility to control your contribution. The default option is “Public”, but clicking it will give you options to make a post private or password protected.

- WordPress also lets you control when a post is published. The default option is publish immediately, but you can also schedule your posts to be published later or even select a past date.

- Tag Checking the box next to ‘Stay on Front Page’ makes a post sticky or featured. This will make the specific post appear on top of other posts.
- The Pending Review option adds a custom Pending Review status next to your post. This feature is especially useful on multi-author blogs where contributors can only save posts and cannot publish.
- If you want to delete a post, you can click the “Move to Trash” button. WordPress moves the post to the trash. Deleted posts remain in the trash for up to 30 days. After that they will be permanently deleted.

Edit Screen Options
WordPress allows you to show and hide panels on the edit screen.
To do this, click the three-dot menu in the top-right corner of the screen, then click the Options button.

This will open a popup.
Here you can enable or disable the panels you want to show.

Other options for post-edit screen
There are many other options on the post-process screen. Most of them relate to the appearance of the post-edit screen and the editor itself.
Let’s explore them.
If you click the three-dot menu icon in the top right In the corner of the screen you will see options to move the block toolbar up, spotlight mode, full screen mode, switch between visual editor or code editor, manage reusable blocks and keyboard shortcuts.

Behind this you will see a button with the gear icon.
Clicking on this will show/hide the block settings column.

There are some more buttons in the upper left corner of the screen.
First, from the right, you’ll see the block navigation button that allows you to quickly jump to a block in your post.

Next you will see the information icon.
Clicking this will show you post stats like word count, paragraph count, heading count, and block count.

After that you have Undo and Redo buttons
They allow you to undo changes you’ve made to your posts before saving or publishing them.

Finally, you have the Add Block button, with which allows you to insert blocks into the post editor.
The default WordPress editor is quite powerful.
We recommend exploring it for yourself when writing blog posts and refer to the individual block settings. Each block has different settings, and you will discover many neat tricks there.
Create a new post in WordPress with the classic editor
If you still use the old classic WordPress editor, then this section is for you.
The classic editor will be supported until the end of 2021 and we strongly encourage all users to create a plan to switch to the new WordPress editor.
Title and Content Fields
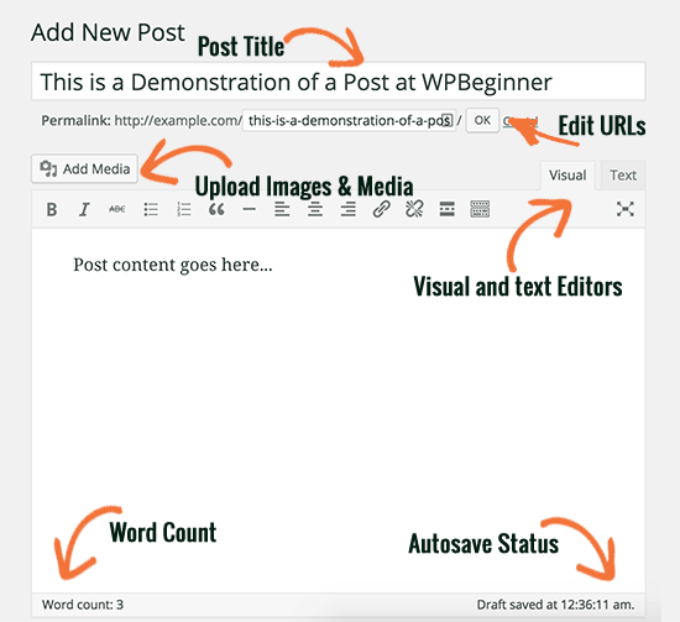
In the classic editor, the title and content fields are the most prominent areas on the Add New Post screen (see screenshot below).
Yours may look slightly different depending on whether you use the visual or text editor.
You can switch between visual and a text editor while writing a post, but we don’t recommend switching as it may mess up your post’s formatting.
Visual Editor is a beginner-friendly text editor with formatting buttons and a nice visual Layout for the content area On the other hand, the text editor is a simple text editor where you can actually see the HTML or write your own.
In the first text area above, add the post title.If If you are using SEO-friendly URL structure, WordPress will automatically generate the post URL based on your title. You can edit the URL by clicking the edit button.
In the content b area you are in will write your post. You can use the formatting options from the toolbar or use one of the many keyboard shortcuts available that will speed up your typing ocess.
If you use the visual editor, check out these tips for mastering the WordPress visual editor.
In the footer area of the content editor, WordPress shows you the word count for your post. This is especially useful when you’re writing a guest post or an article that needs to be a certain number of words.
As you write, WordPress automatically saves a draft of your post. This auto-save is temporarily stored in your WordPress database.
As soon as you save your draft or write more content, WordPress will clean up your auto-saved temporary draft and replace it with a new one. This process ensures that you don’t lose your content due to an internet connection or hardware failure. Check out our guide on how to undo changes in WordPress with post revisions.
The post editor will show your current draft and autosave status in the footer next to the word count.
Add Images and Media
Between the title and content fields is a large “Add Media” button. You must click on it if you want to upload an image or other media to your WordPress post. This will start the media uploader in a popup window.

Just click the “Choose Files” button to upload images or other media to your WordPress site. You can also create image galleries from uploaded files.
WordPress includes some basic image editing tools. Check out our tutorial on editing, flipping, rotating and cropping images in WordPress.
Publish Options
The WordPress post-edit screen is divided into two columns. The column on the left contains the post title and content editor. On the right side you have different meta fields for configuring post settings.
The top meta field in this column is labeled “Publish”. All publishing options for your posts are managed here.

1. The Save Draft button saves a draft of the post or page you are currently working on. WordPress also automatically saves your posts as you write them.
2. The preview button shows a live preview of your post. You can use it to see what your post will look like once published.
See also: SharePoint and Zip Files in Office 365: Do they get a long?
3. Status allows you to set a status for your post. WordPress automatically handles post status for draft and published posts. If you’re not using a plugin to add custom statuses, don’t worry about this option.
4. Click the Edit link next to Visibility to change it to expand. The first option under Visibility allows you to make your post sticky on the front page. Sticky posts in WordPress are like featured content that appears on top of all other posts.
5. The next option allows you to password protect a post in WordPress .
6. The third option under Visibility is marked as private. This allows you to publish a post privately on your WordPress site. The private posts will be visible to users who have edit rights on your site.
7. Click the edit link next to Publish and WordPress will display the time and date options. You can use this option to schedule posts or create backdated posts in WordPress.
8. Move to Trash allows you to delete a WordPress post. Deleted posts remain in the recycle bin and you can restore them for up to 30 days if needed.
9. Finally, the “Publish” button makes your WordPress post public. Remember, once you have a post scheduled, it will appear on your site at the scheduled date and time.
Adding Categories and Tags
You can organize your posts into categories and sort tags.The Categories and Tags meta folders usually appear in the right column under the Release meta folder.

Categories and tags help you organize your content in a meaningful and searchable format .
Not only does it help users find your content easily, but it also improves your website’s SEO. Check out our guide on the difference between categories and tags and how to use them to sort your content.
Featured Image (Post Thumbnails)
Most WordPress themes support featured Images or post thumbnails for articles. Usually this is the last field in the right column on your post editing screen.

Just click on the link to set the featured image, and the media uploader popup is displayed. You can select an image from your previous uploads or upload a new image from your computer.
For more detailed instructions, see our guide to adding featured images or posting thumbnails in WordPress.
Screen Options
Some of the options on the post-processing screen are hidden by default to provide a cleaner and easier editing experience. These options are not commonly used by beginners. However, you may need them later.
Just click the “Screen Options” button in the top right corner of the page. This displays a menu of checkboxes next to the option names.

As you can see, some of the options are already enabled. For the others, you can view them by clicking the checkbox next to an option name and it will appear on your post edit page.
Let’s take a look at some of these options and what they do.
Excerpts
Checking this box will add a meta field under your content editor. You can use this field to add a short summary or excerpt to your post.

Ideally, you should have an abstract or excerpt for your posts on the front page and archive of your site to sue . The full content should only be displayed on the single page of the post.
Learn more about this in our full post vs. summary (extract) guide on your WordPress archive pages.
Send Trackbacks
h4>
You can use the Send Trackbacks option to let other blog owners know that you are linked to their content.

If the other blog owner is running WordPress, you don’t have to send them trackbacks. Your WordPress site will automatically ping them when you publish the post.
The trackback feature is so abused by spammers that many site owners simply disable it. We have an article on how to deal with trackback spam in WordPress.
Custom Fields
This option displays a custom fields UI below your post editor. You can use it to manually enter custom information into your posts. For more information, see our 101 Beginner’s Guide to WordPress Custom Fields.

Discussion
While comments are a great way to engage your audience, you might want to that may sometimes not have comments on a specific post or page.
The discussion option displays a meta box under the post editor to toggle comments and pingbacks on/off for your post.
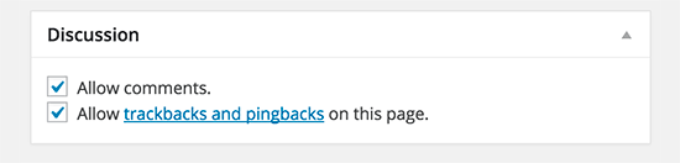
Because pages are similar intended to be static pages, most users want to disable comments on them. You can do this by editing each page, or you can check out this tutorial on how to disable/disable comments on WordPress pages.
Once your WordPress site gains some reputation, you will become one Received an increase in comment spam. Instead of disabling comments, you might want to try these tips and tools to combat comment spam in WordPress.
Slug
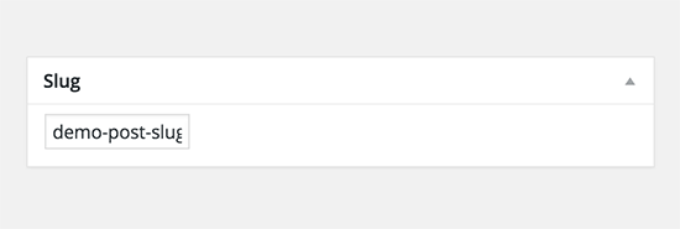
A slug is a cleaner title used in URLs can.
WordPress automatically generates a post slug and displays it as a post URL just below the post title. You can edit the URL slug by clicking the edit link under the post title.
You can also enable the slug option in the onscreen options and edit your post slug there.
p>
Author
WordPress automatically assigns you as the post author when you create a post.
Sometimes, however, you may want to show another user as the author on your WordPress site.If you check the “Author” box, you can do this from the post edit screen.

Bonus tips for creating better ones Blog Posts
The reason WordPress is the most popular blogging platform is because it comes with a great set of tools right out of the box to help you create new content.
However, there are many more tools and tips that you can use to improve your blog content.
The first tip we give to everyone who is just starting out starting a blog is consistency. Make sure you blog post regularly on the editorial calendar and then stick to it.
We recommend starting with 1-2 posts per week and then gradually increasing the pace.
Often new users have trouble finding post ideas for their blog. Here’s a huge list of blog post ideas to get you started.
You also need to learn how to promote your posts and keep track of them. Our team has selected the best content marketing tools to help you grow your blog.
Last but not least, you can optimize your website for search engines like Google. This is where AIOSEO comes in, as it helps with search engine optimization (SEO) without any prior technical knowledge. You can rank for different keywords and drive organic traffic to your blog.
Often users ask us what is the difference between posts and pages and which is better for SEO. The simple answer is that it matters. Posts are fresh content organized in reverse chronological order, which is why they are called blog posts.
Pages, on the other hand, are static content such as your about page, contact page, etc. The process of adding a new post or page in WordPress is exactly the same.
See our guide to posts and pages in WordPress for more details.
We hope this article has helped you learn how to add a new post in WordPress like a pro. You may also want to see our basic WordPress SEO guide and the best email marketing services for small businesses.
If you enjoyed this article, please subscribe to our YouTube channel for WordPress video tutorials. You can also find us on Twitter and Facebook.
See also: How to Make Your Own App Icon
.