Drupal is a great system when you need to set up a website quickly. Instead of trying to learn to code or paying a third party to build a website for you, Drupal provides all the elements for an online presence. Whether you want to create an attractive website for the company or just need a personal blog, everything is possible with this open source content management system.
After installing Drupal, it’s time to start Time to start creating. In this tutorial I will go through the initial stages of creating a website using the system. Before long you’ll have a piece of internet property that looks amazing and is ready for traffic.
Reading: How to create a free website using drupal
Setting up Drupal with basic elements
The first step is website hosting, the Drupal supports. There are some requirements that you must meet, e.g. B. Make sure you have the correct PHP version. Not all hosting platforms use the same software.
In previous versions of Drupal, the WYSIWYG editor had to be installed separately from the system. However, Drupal 8 includes the most popular text editor module as well as the image uploader. If you are using an older version of Drupal, I would suggest either updating or installing the TinyMCE module and making configuration changes.
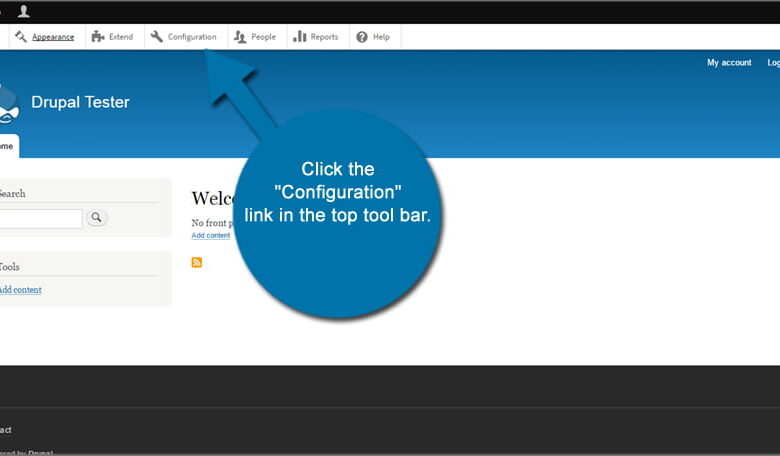
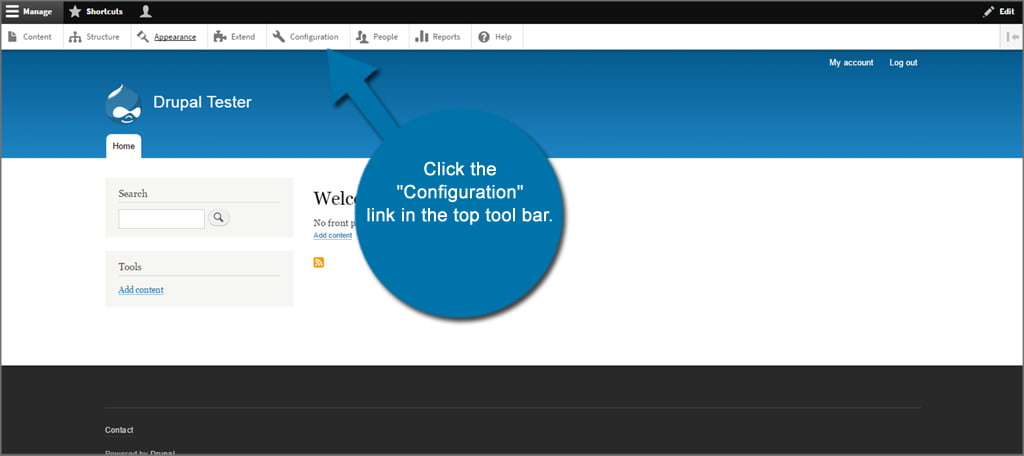
To edit Drupal’s text editor settings, click the link ” Configuration” in the top toolbar.
In the configuration screen, locate and click the Text Formats and Editors control.

This next screen lets you control how others edit the content on the site while you Set roles for the preferred text editor. By default, Drupal provides you with basic HTML controls and tools when writing text. This can be changed on the Text Formats and Editors screen. It uses a drag-and-drop interface to set which editor to use primarily.
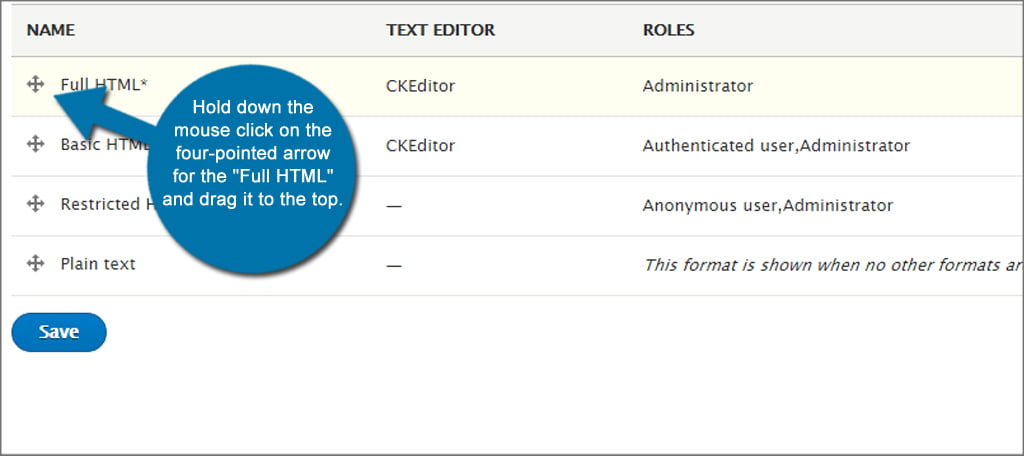
For now, you only want to configure the admin control. Hold down the mouse and click on the four-pointed arrow for the “Full HTML” and drag it up. Click the “Save” button on the bottom left.
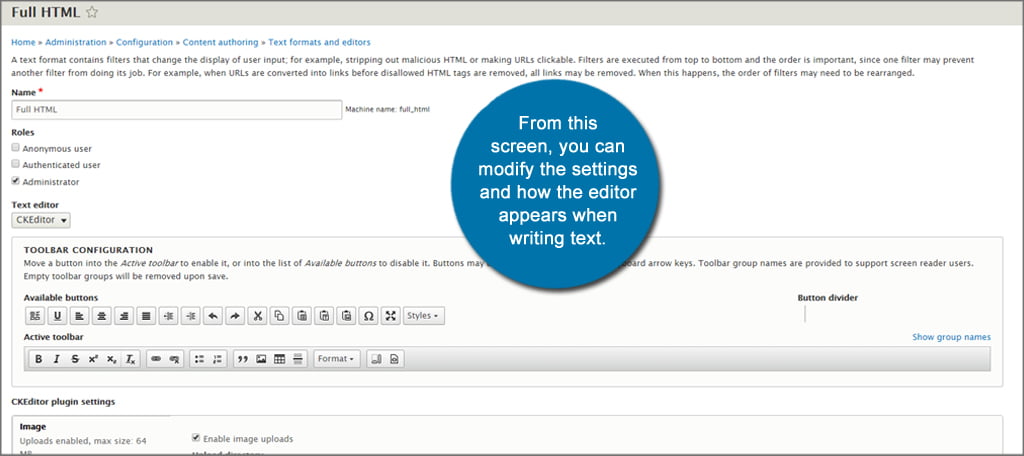
Next, click the Configure button of the full HTML editor. This will open a window where you can refine your settings even further.

On this screen you can change the settings and appearance of the editor when writing text. You can:
- Set user roles: This is based on the permissions you want to give to other people who write on your site.
- Determine which text editor you want to use : If you install another text editing module, you can change it using the drop-down menu.
- Drag-and-drop toolbar configuration: drag editing tools that you want to use and remove those you don’t need.
- Change image upload settings: Directory, file sizes and maximum dimensions can be changed here.
- Activate filters: Use checkboxes to specify how the editor works behaves like Automatically converting URLs to links or images.
- Change filter processing order: Drag-and-drop to change the way Drupal fulfills your orders.
Click the “Save Configuration” button. below when finished.

Now your website is ready for content with a custom text editor. There are many editing systems you can find on the web if you don’t like the default CKEditor in Drupal 8. However, this is one of the better platforms and runs stably.
Choosing a layout and theme
The next step is to decide on a layout and theme for the website. This is where some of the more fun parts begin.
The look and feel of your website will play a crucial role in how visitors respond. This can improve business relationships and increase the time a person stays on your site reading content.
Click the Appearance link at the top of the admin toolbar.

From This screen allows you to edit any theme by clicking the Settings button of an installed theme. The customizations available may differ for each theme as developers provide different components. However, most allow great customization of colors as well as changes to page elements.
In this tutorial I will only show you how to install a new theme. We will make adjustments at a later date. First, click the Install New Theme button above your list of themes.

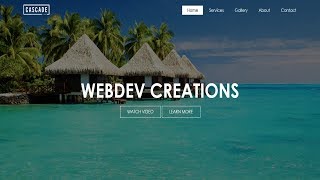
In this new window you can install a theme directly from a website URL or upload one directly from your computer. Drupal supports files in ZIP, TAR, TGZ, GZ, and BZ2 formats. After selecting the new theme, click the Install button in the bottom left.
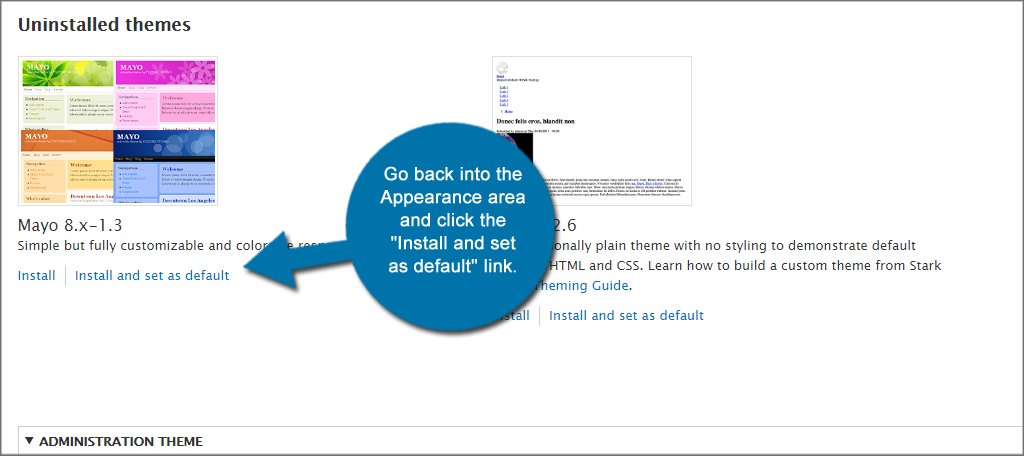
After uploading the theme, return to the viewport and click the Install and set as default link.
p>
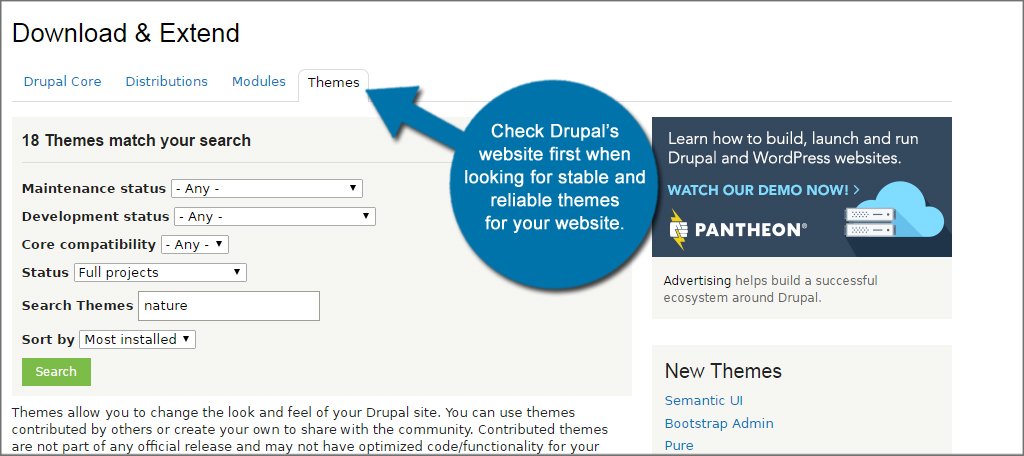
You can find topics in many areas of the web, but I would suggest checking out Drupal’s website first. These have the greatest chance of stability with less risk of security issues.
NOTE: Some older themes cannot be ported to Drupal 8 because certain files are required for the latest version .
Once the theme has been installed, you can now go into its settings and make your custom changes.

Developing the homepage
The homepage is the first thing people see when you visit your domain. In this Drupal website building tutorial, I’ll show you how to set up a static page that acts as a frontrunner. This is one of the easiest ways to get the site ready for traffic right away.
First you need to create a static page. Click the “Content” link in the top admin toolbar.
See also: How to Create a Fanfiction Archive and Build a Fanfiction Community in WordPress

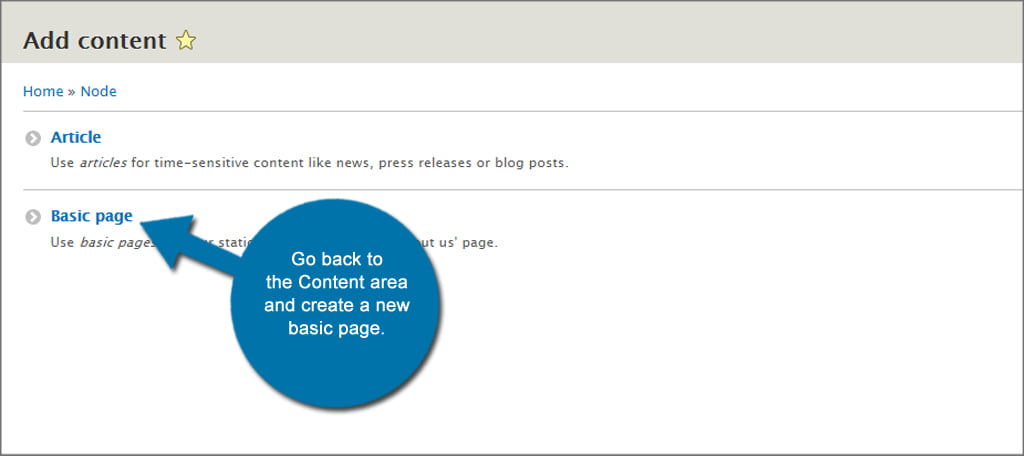
Next you will see a button to “Add content“. Click on it and then select the option to create a “Base Page“.
Add a title to the article and fill in the body with the text you found on the want to display front page . Once your content has been added, click on “Advertising Options” on the right to expand the window. Check the box next to Promoted to Front Page.
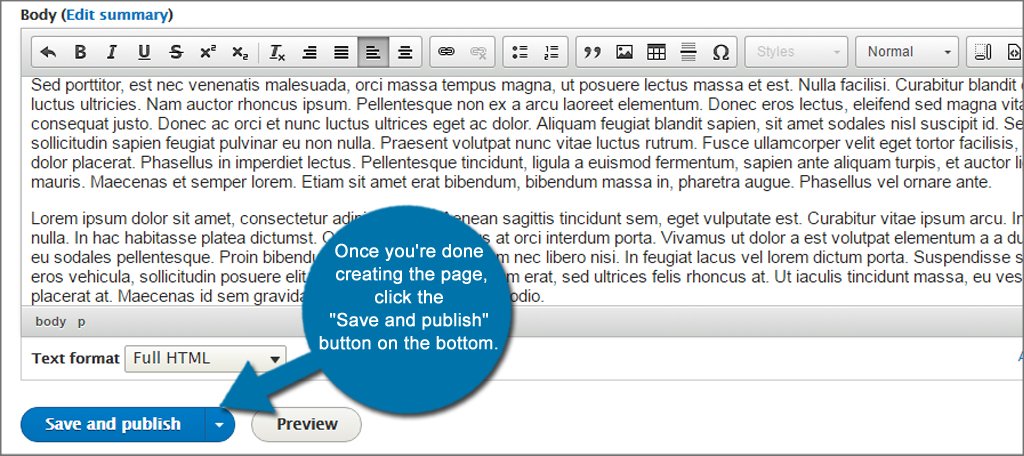
When you’re done, click the Save and Publish button on the left below the text editor screen.

After saving the Content, note the URL of the page in the browser address bar. You will need these for the next part. For example, my URL shows the domain and “/node/1”. This is a part to remember.
Go back to the configuration menu in the top admin bar and click on “Basic site settings” in the system window.
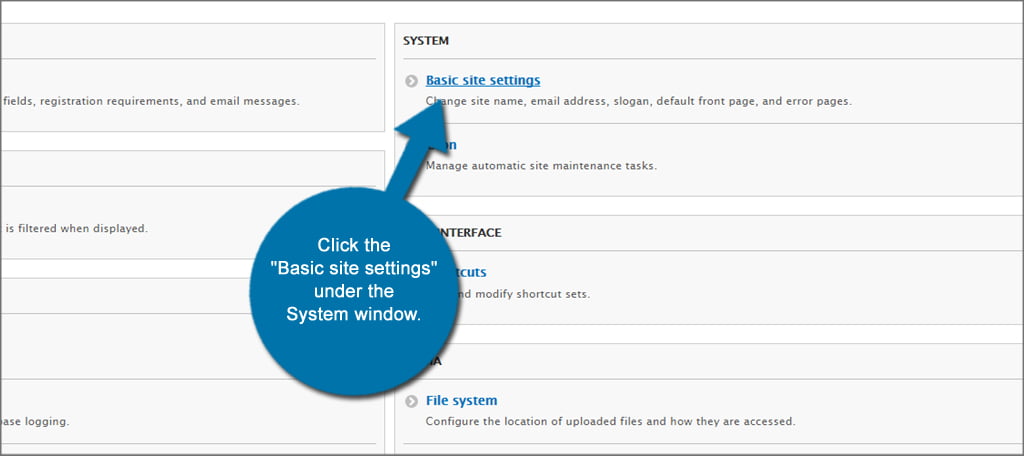
Enter the URL, you created for the homepage and click the “Save Configuration” button.

Now you have a finished homepage and are waiting for visitors.
Adding informative pages
The Next step to building a website with Drupal is setting up your static pages. Things like “About Us” or describing the services you offer provide information for curious visitors and help engage.
To get started, go back to the content area and create a new basic page as above .
In this example, I am creating an About Us page. On the right side of Drupal, look for the URL path settings option and click on it. This will expand the window to show the URL alias. I will change the alias to “/about“. You want this alias to have something to do with what you are creating. For example, you could use “/service” for a service page.

This alias will be important later. Make a note of this by writing the alias in a place where you won’t lose the name.
When you’re done creating the page, click the “Save and Save” button at the bottom publish”.
Adding a blog to the website
A blog is one of the most important parts to increase traffic and content marketing.It plays such an important role that most companies host it when building a Drupal website.
In previous versions of Drupal, the blog was part of the core. However, developers have since removed this ability to improve the overall functionality of the core. Fortunately, this module can be found in Drupal and installed on the website. I suggest looking around for a good module to add blog to website.
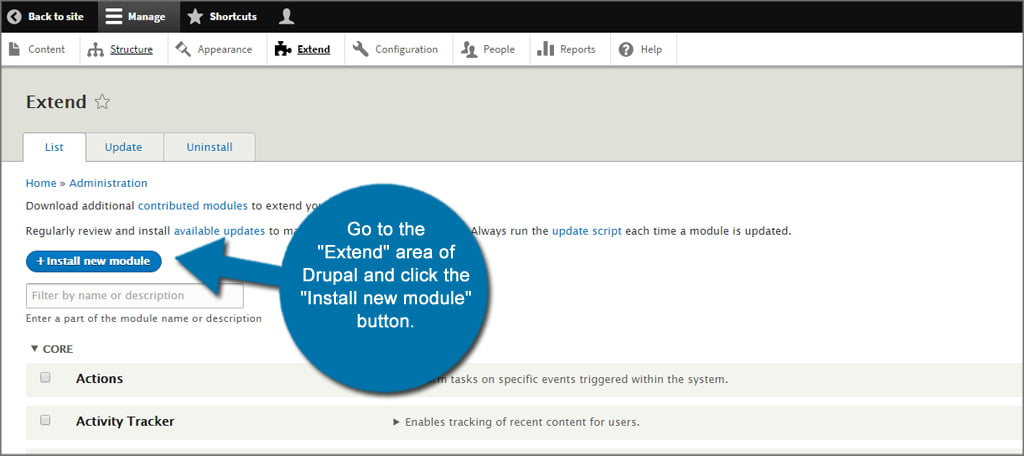
To install blog module, go to Drupal’s “Extending” section and click the “New Module” button install”.
p>
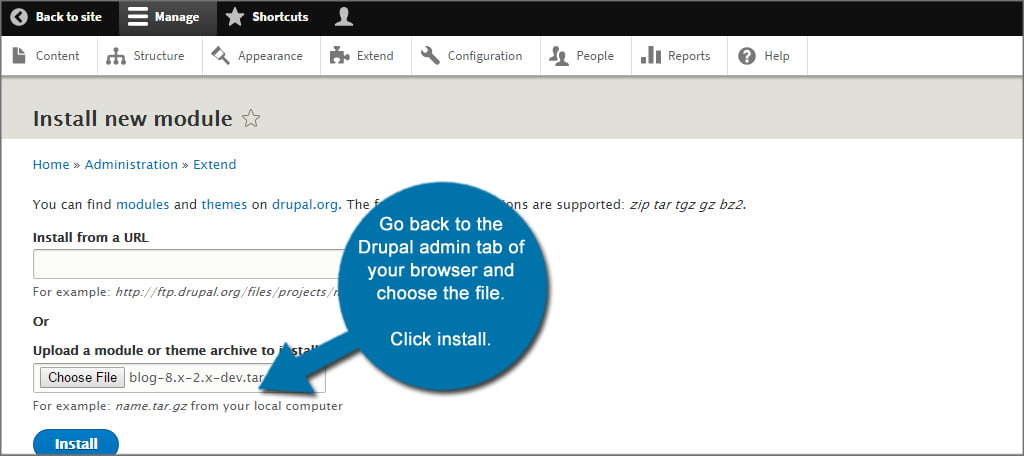
Open a new tab and download the blog module from the Drupal website. It may be easier to save it on your desktop. Once you’ve downloaded the file, go back to your browser’s Drupal admin tab and select the file. Click Install.
Go back to the Extend section of Drupal and scroll down until you see the Blog module in the Other category. Check the box next to Blog and click Install.

Go to the “Contents” section of Drupal. You will see a new type called “Blog Post”. Create your first blog post and click the “Save & Publish” button. In this tutorial I’ll create a simple post and add a blog tag.

Now that you have a blog post ready, it’s time to associate the blog with the menu. Go to Drupal’s “Structure” section and click “Menus”.

Click the Main Navigation dropdown menu and select Add Link.

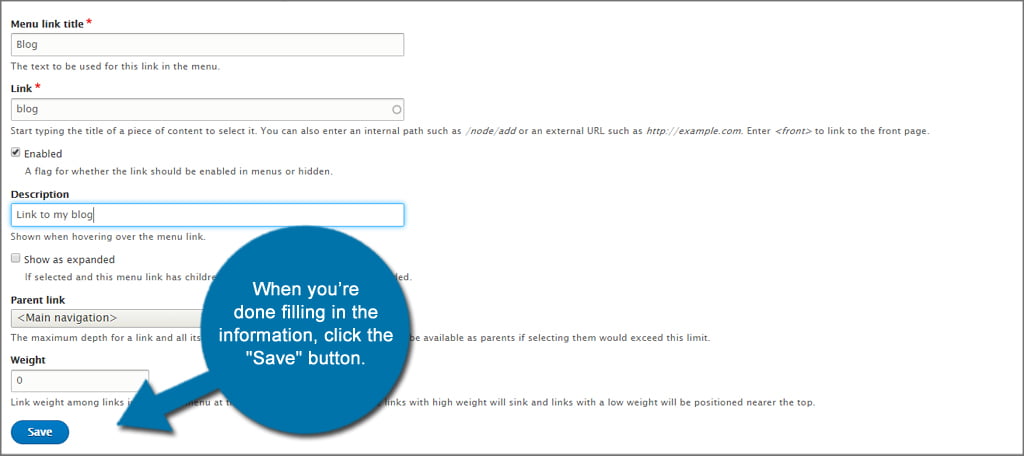
Give up this screen “Blog” as a title of the menu link and “Blog” as the link. You can add a description of the link that will appear when you hover over it.
When you’re done filling out the information, click the “Save” button.
Adding a “Contact Us” Page
A contact page gives your visitors the opportunity to get in touch with you. It’s a great addition if the website is for a business or simply to add interaction.
Drupal 8 comes with a contacts module already installed, ready to use. However, it can be found in the Extend section if you want to make sure the module is enabled.
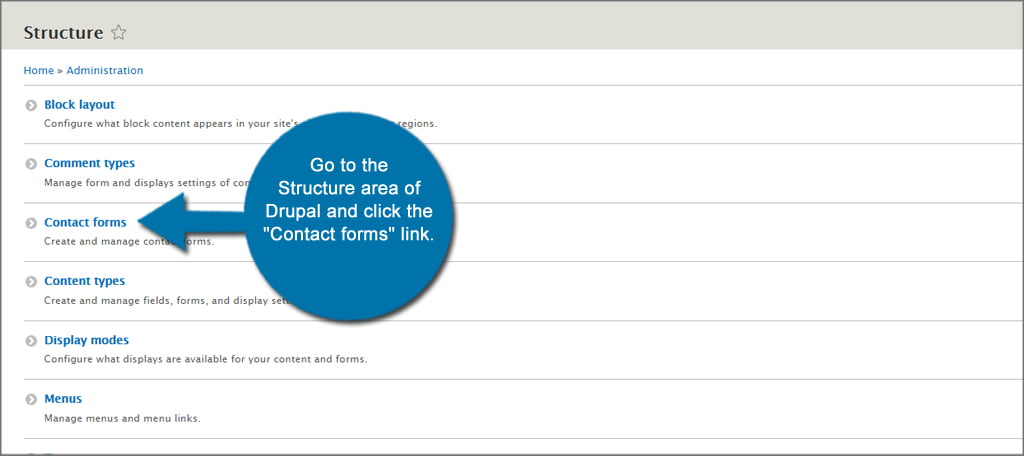
To create a contact form, go to the Drupal structure pane and click the “Contact Forms” link.
Click the Add Contact Form button to create a new form. Fill out the information and click the save button below.

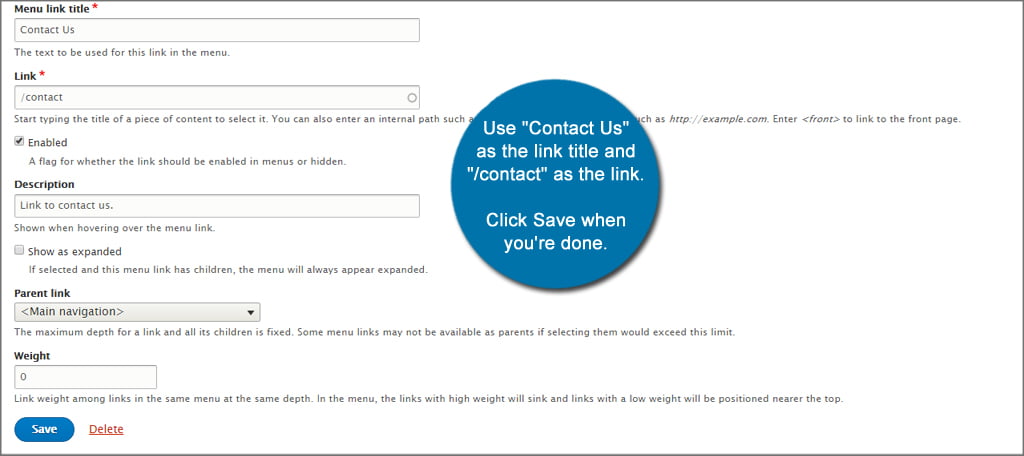
Once the form is complete, go to the Drupal 8 Structure pane and click Menus. Again, change the main navigation dropdown menu to add a link. Fill out the information, but this time use “Contact” as the link title and “/contact” as the link. Click Save when finished.
Now it’s time to make sure the permissions are set up for your visitors. Go back to the Drupal Expand section and expand the Contact control by clicking on its description. Here you can change permission settings for various aspects of Drupal.
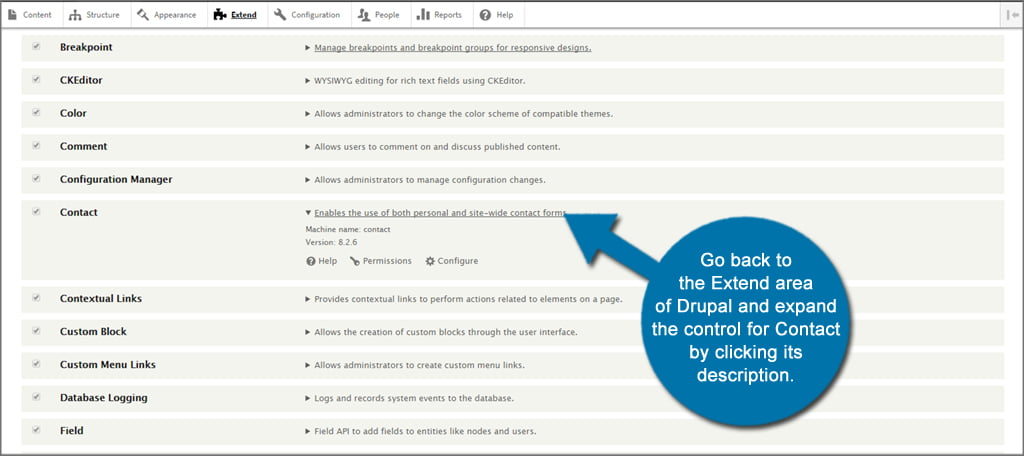
The system should have the Anonymous user checkbox checked for “Use the site-wide contact form”. If not, check the “Anonymous user” column to use the site-wide contact form and click “Save permissions” at the bottom.

Main Menu Development
Set up Good navigation menus help visitors find content. It will play a prominent role in how others will use your site. After you’ve created the Drupal website using the steps above, it’s time to create this layout.
First, you need to go to the “Structure” section of Drupal and click the “Menus” link click. In this tutorial, I will simply edit the main navigation that already exists.To do this, click the “Edit Menu” button to the right of “Main Navigation”.

On this next screen you will see that most of the files created above are already available. The only thing missing is the About Us page. Click the Add Link button above. Enter the information for the menu link, including the link name.
Remember when I said write this part down? In this example, I’ll add my link title “About Us” and the “/about” to the link. After filling out the link information, click the “Save” button.

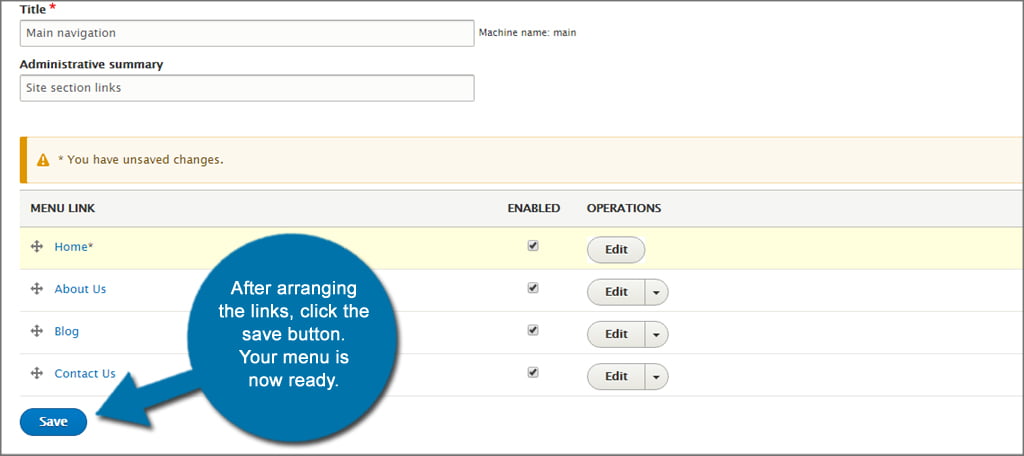
Once you have all your links available, you can drag and drop them to arrange them however you like. For example, I’m dragging “Home” up because I want it to appear first.
After arranging the links, click the Save button. Your menu is now complete.
Linking to social media
Many themes offer the possibility to link social media to the website. In this tutorial, I will demonstrate where this feature is located in the Business Responsive Theme from the Drupal website.
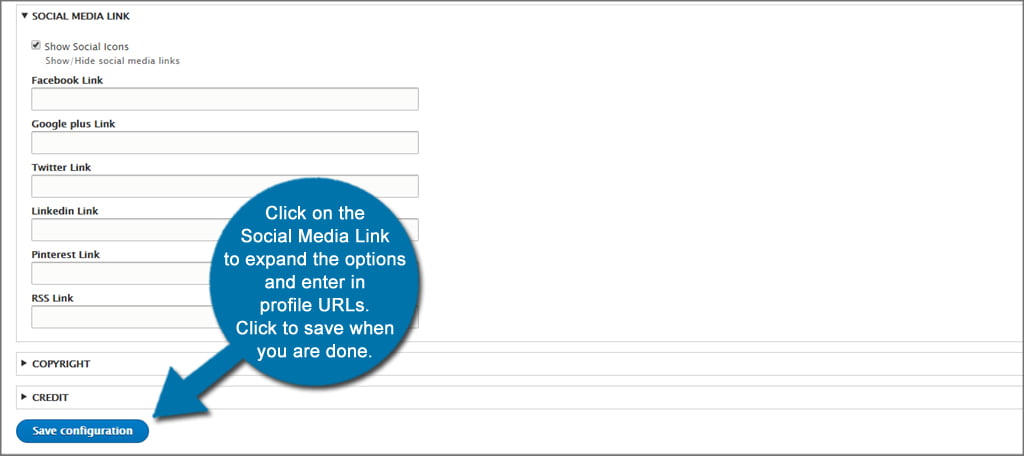
In the Drupal admin dashboard, go to Appearance. Find your theme and click the Settings link. Scroll down until you find the Social Media or similar options. Every developer is different and the social links can be described as something different. In this example, I’ll click the social media link to expand the options and enter profile URLs.
Then click the Save Configuration button at the bottom.
What about adding a feed from Twitter or another social site? You can add a feed from your social media by adding a block and pasting the code directly into it. How to implement these feeds on your website.
Get the code from Twitter or Facebook to display your feed. To do this, go directly to these websites and set up the account. Once you personalize the settings, the social site will provide you with a copy code.
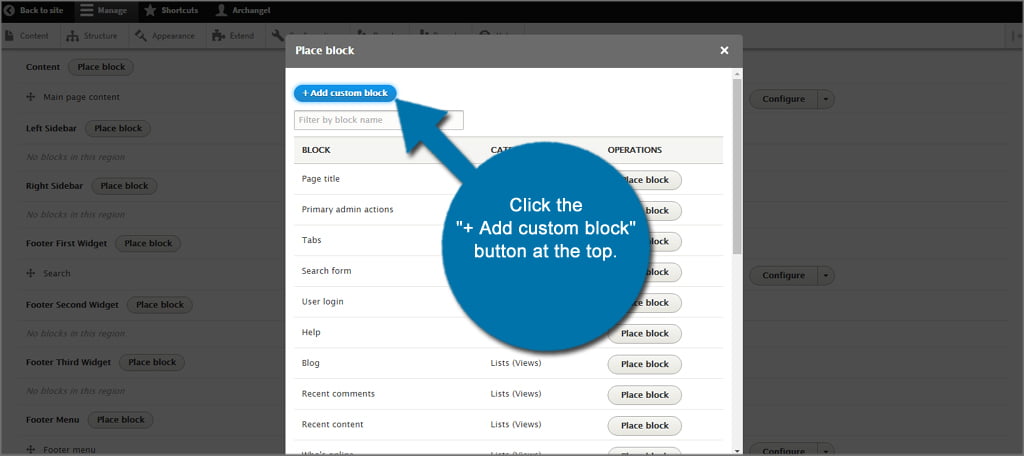
Go to the Drupal structure panel and click “Block layout”. Each theme has different blocks to choose from. In this case I will use a right sidebar for the feed. Click the “Place Block” button next to the “Right Sidebar” option.
This will open a pop-up window giving you multiple options for pre-made content. Click the Add Custom Block button above.
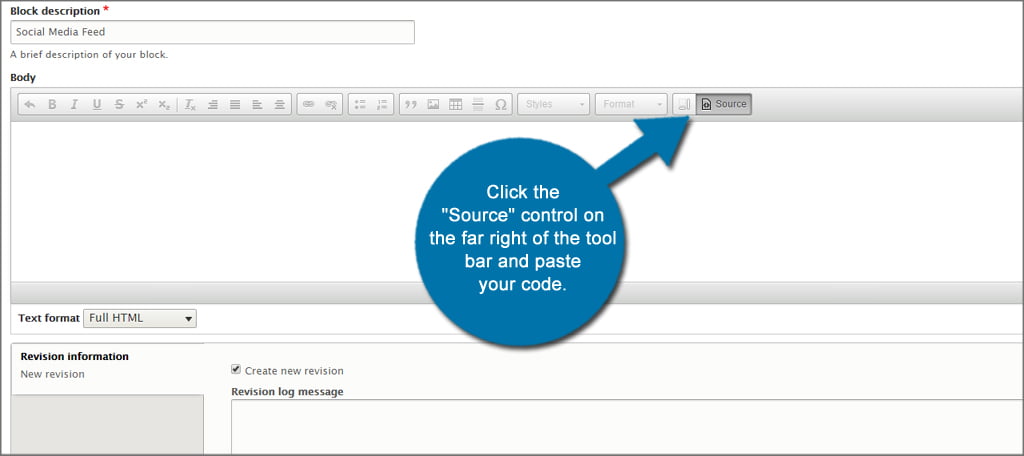
Give a description of the block. In this case I describe it as “social media feed”. Click the Source control on the far right of the toolbar and paste your code. Click the Save button.
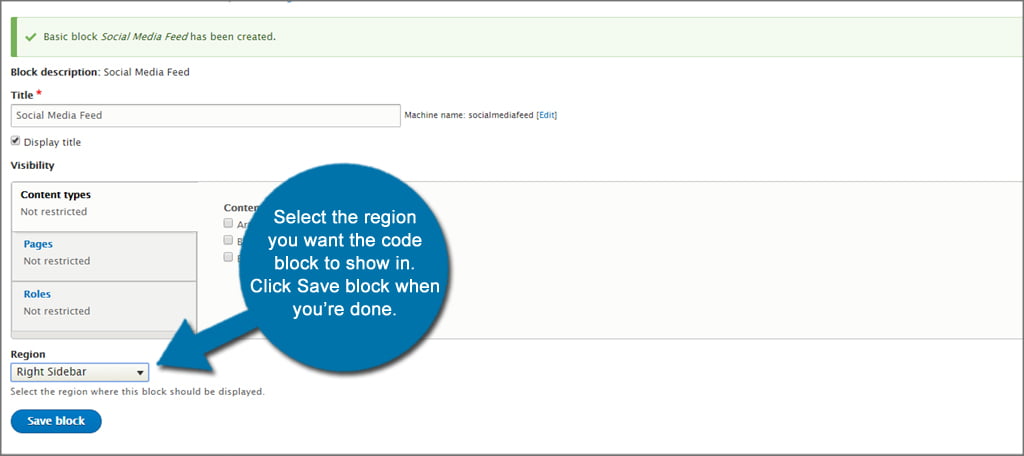
In the next window, select the region where you want the code block to appear. Keep in mind that this is topic specific. In this example, the right sidebar is available for my theme, so I’ll select that location. Click Save Block when finished.
And there you have it. This tutorial was all about creating a website with Drupal 8 and the different features you can use. However, this system can do much more. This was just a basic layout of the beginning steps. After that comes the fun part of developing content and adding features.
See also: Private Mortgage Insurance (PMI): What is it and how is it calculated?
.