
 by Chris Ching
After the Working on your app for days, weeks and months… it’s finally time to release it and release it to the world.
Reading: How to create an app for the apple app store
You will learn:
- How to get access to App Store Connect
- How to create your App Store listing
- How to take your screenshots
- How to submit your App via Xcode
Submit your app to the App Store
- Sign up for the Apple Developer Program
- Prepare your app for submission
- Create your App Store listing via App Store Connect
- Create your App Store screenshots
- Load your app with app Store Connect up Xcode
- Submit your app for review
To subscribe with apps in the App Store, you must be enrolled in the Apple Developer Program.

It costs $99/year, but it gives you access to a ton of different benefits, including:
- Access to submit apps to the app stores on all Apple platforms
- Ability to create Safari extensions and list them in the extensions gallery
- Access to beta versions of Apple software
- Testing tools like TestFlight
- App analytics and advanced app features
If you plan to develop apps for the App Store, then it’s worth signing up!
Remember that your apps will be removed from the App Store en if you don’t renew your membership next year.
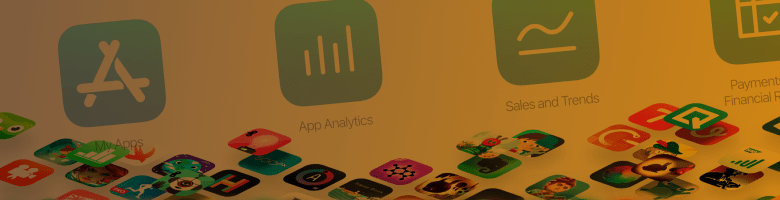
App Store Connect
App Store Connect is one of the sites that you can access later or you sign up. It’s your portal to manage everything related to the App Store.
This is what the App Store Connect dashboard looks like:

Before you’re ready to submit your app, let’s check a few more things…
Make sure your app is compliant with the App Store’s guidelines
Before your app is available in the Apple App Store, it must go through an app certification process. It sounds scary, but it’s basically just one person testing your app and making sure it meets App Store guidelines before releasing it for release to the App Store.

So before you submit your app I would recommend you go through this document as the reviewer will use it to evaluate your app.
Test your app and fix all bugs
Apart from following the guidelines, you should make sure that your app is bug-free and crash-free. If the verifier manages to reliably crash your app, it will fail you.
When you test, don’t just test it under normal conditions. Try low network connectivity conditions, low memory conditions, test it on older devices, etc.
Your mindset should be like that of a hacker. Try actively to crack it!
You can test the app yourself or enlist the help of your friends and family. If you use your friends and family as beta testers, use TestFlight, which you can access as a member of the Apple Developer Program.
Okay! Now you can create your listing in the App Store.
First, log in to App Store Connect:

To publish an app, go to My Apps menu and select the “+” option to create a new app. If you want to submit an update for an existing app, the steps are similar, but instead of adding a new app, select an existing app instead.
App name and category
Enter the information about your app and use the “?” button if you’re not sure what Apple wants. The website is pretty basic too.
At this point you need to fill in all the information about your app. The name, description, category (to be placed in the App Store), minimum target audience age, as well as a privacy policy and support URL.
If your app is social media based and requires a log in you will need to provide a test account and password for the Apple reviewer.

App privacy policy
You must also provide a URL to a privacy policy . If you’re not sure how to write one, just google “app privacy policy” and you’ll see plenty of privacy policy examples and generators you can use.
You’ll find it too having to set a public URL. If you have your own website, post it there. If you’re not sure how to put it in a URL, you can use a Facebook page or website builder.
App Pricing
See also: Generating static sites from ASP.NET Core MVC apps
Go for your app’s Prices on this screen:

App release options
You can decide how your app will be released after it has passed the certification process.

- Manual: You need to go to App Store Connect and share it immediately
- ely: It will be published once it has passed the certification
- On a date: It will be published on a specific date (if it has passed the certification )
App Store Screenshots
Use this link to learn more about the screenshots required by App Store, especially if you need to cover multiple sizes, like iPad, Apple Watch, etc.

Take App Store screenshots
There are several ways to create your screenshots.
Technique 1: Raw Screenshots

The quickest and easiest way is to just start your app in the iOS simulator (for the required screen size), navigate to the screen, from you want to take a screenshot, and then press CMD+S on your keyboard.
This will drop a PNG image file on your desktop. You can just upload that to App Store Connect!
Technique 2: Use a model template

If you want For this route you need a few tools.
First you need some kind of graphic design software like:
- Figma
- Sketch
- Adobe Photoshop
I recommend Figma because it’s free. That’s what I’m using in the screenshot above.
Next you need the device models. Here are some places where you can get device mockups:
Mockuphone

Free to use! Just select your device, upload your screenshot and download the mockup in portrait and landscape mode. Then you can import that into your graphics program and add any text.
Rotato

A paid tool that allows you to control the camera on a 3D device model so that You can get the perfect angle. Then export the image and import it into your graphics program.
Angle

A paid collection of models in different angles and device frames. Import it into your favorite graphics program to use it! (Note: Although this collection consists of Sketch and AdobeXD files, I was able to import the Sketch files into Figma)
Technique 3: Use a screenshot generator from the App Store
If you don’t want to mess with graphics software and mockups, there are tools that make it a very smooth and easy process.
Here is one I would recommend: DaVinci Apps


All you have to do is choose a template, upload your screenshots (taken with the iOS simulator) and add your custom text. Then you can export all your screenshots at once.
Shotbot is another tool you can try.
Upload your screenshots from the App Store
Just go back to your app store listing and upload the screenshots you took.

First your app needs to run properly and error-free (the red warnings).
Secondly, you should have your signature and team information set up in Xcode.
Don’t forget that your app version is set to 1.0.0 should be when you release a new app (or remember to increase the build version when you release an update).

If you’re still having trouble with your Apple ID or cer tificates at this point, I’d recommend checking out this article. As a quick refresher, go to Xcode >> Settings >> Accounts.

Release:
See also: How to Create a Website with Membership and User Login
Publishing an app with Xcode 11 is really easy. Where it used to require multiple steps, certificates, profiles, etc., Xcode is now intelligent enough to enable or create all of these itself.
To create the full app archive, you must first create the Generic iOS device from the list of simulators.

Now go to Product >> Archive and get your app bundled. This can be quite a lengthy process depending on the size of your app.

Once this is done, the archive window will open and here you can manage all the archives generated by Xcode.
Every time you Selecting Archive from the menu Xcode will bundle a new archive for App Store Connect.
If you have duplicates or older ones, simply delete them from this list.

Now select the archive and select Distribute App. You will be prompted to select the distribution method:
Once you select iOS App Store, it will go through some checks and validations to ensure you are not uploading a broken app.
If something happens, there’s a big chance that Xcode will stop you here and you’ll have to go back to programming or add missing elements like icons.
If Xcode doesn’t find anything wrong with the archive, the upload process follows. Again, the upload time depends on the archive size and your internet connection.

Once you’re done, you’ll see a final window like this one. Congratulations! Your app is halfway to the iOS App Store.

Now it’s time to add the build exported from Xcode. The archive was sent via Xcode, but App Store Connect is taking some time to process it.
If you’ve already taken care of the app’s title, description, pricing, and screenshots, there’s a big chance that the build ready to choose.
In my case I was faster because I was releasing an app update and had to wait about 10 minutes. (Tip: You will also receive an email when your archive has been processed and is ready to use.)

THIS IS IT!
Select the “Save” button at the top right of your screen and the “Submit for review” button should appear spin blue.
You need to answer a few questions about your app:

After that, your app will be on the waiting list for Apple’s certification and verification team.
Your App should now have a yellow tag:

All you have to do now is wait.
In the past, the review process took anywhere from 1-2 weeks to 1 few years ago Tim Cook said they were working on improving the speed.
Then d The review process took almost 3 or 4 days, but I’m happy to say that my app update was reviewed and accepted 13 hours later! (App updates typically take less time to review than a brand new app.)
After your app has been approved, you’ll receive an email about it.
Your app is now in the App Store! Hello world!
If you published an app, please share it with us below!
I hope you enjoyed this tutorial and please share it with your friends and like-minded people who use the social network buttons below!
See also: How To Start an Online Store in 2023 (Step-by-Step Guide)
.