Recently I designed and animated a logo for my client – Periti Digital
So I’ll walk you through my logo animation process step by step cite this work as an example.
Reading: How to create an animated logo for a website
Watch this simple logo animation live on peritidigital.com – The animation plays on page load and only takes about 3 seconds.
Hovering the mouse pointer over the logo and then backing out will repeat the animation.
I think it’s a cool feature that brings these otherwise static logos to life.
A A simple logo animation like this can improve the quality of your website as well as the overall brand experience in general.
How to animate a logo:
- Create a storyboard
- Prepare logo files
- Animate your logo
- Export the animation
- Place them on your website
It’s a nice little gesture that will definitely impress your customers – if you make one are designers.
Or it will surely wow your website visitors – if you are a business owner yourself.
To animate logos I use Adobe After Effects with Bodymovin extension, and I build websites on Webflow.
However, you can successfully use my guide with other animation software like Cinema 4D or Blender.
You can create and host your website wherever you want, because ultimately the JSON file with your logo animation can be used on any website.
Alternatively, there is the old-school method from Use a GIF but they tend to be heavy to be, and the animation itself will not be so smooth.
On the other hand – Lottie Animations ( files with JSON extension) are very small and work on all devices.
They are also vector based so you don’t have to worry about quality.
You can customize your animation also export for other purposes, e.g. You can render an mp4 for your YouTube videos – intro or outro.
Lately we can do more and more see brands animating their logos to engage their audience and stay competitive.
That’s why learning how to a Brand logo animated. strong> to all graphic designers and especially to logo designers.
1. Make a Storyboard
First you need to come up with a creative idea of how to animate the logo.
Here I have sketch A simple storyboard of my logo animation.
Storyboard is simply a visual outline for your video that consists of a series of images , which convey what is happening in your animation – how elements are set in motion.
For example: the logo I designed for my client Periti is only one and a half Squares are a square/a semicircle.
Since my client is all about “digital transformation”, I tried to implement this idea in my logo animation.
An overview of my storyboard:
- First we have the purple square that slides in from below becomes and the orangefar Bener ball falling from above.
- Second we have the orange ball bouncing once on the ground and the purple square turns to the left.
- Third, we have the ball bouncing (again), this time off the purple square.
- Fourth, we have an orange square that slides in from the left and smashes into the orange sphere (transformation), thus forming the Periti symbol.
- Fifth, we have the icon that moves slightly to the left (to center the full logo).
- Sixth, we have the Name display effect and that’s it!
Pretty simple animation, but it looks totally iconic – doesn’t it?
The way Of course, how you animate your logo depends on the type of logo you have.
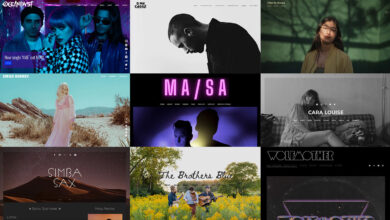
I suggest you look at some examples of logo animations. strong> to get some ideas what is possible, or rather what are common solutions or effects that can be used for logo animations.
See also: Easily Create and Edit a Google Sheet Drop Down List in 2023
Just search websites like Behance and Dribbble for “Logo animation” to get inspiration yourself.
You can easily create a moodboard. strong> and make notes about which motion effects you like and why.
Next, you can either sketch your idea on paper , or You can use Illustrator to create some scenes digitally.
2.Prepare logo files in Illustrator
Once you have sketched an idea for your logo animation, you need to prepare your logo files in Adobe Illustrator
Make sure you have your Logo in vector format and with each element on a separate layer…
This allows you to import the original logo into After Effects and animate its parts independently, each on a separate layer.
My client’s logo consists of just two geometric shapes: the purple square and the orange half Square / half a circle – so I put them on separate layers.
On the third layer I just have the name “Periti” which is animated on the end separately.
You should also make sure you are working with RGB colors since animations are digital in nature.
Finally, exterior It’s also important to make sure your artboard is roughly the same size as your final After Effects animation will be — typically 1920 x 1080 pixels.
So I just save this logo file as an .AI and then open it in After Effects.
When importing your file into After Effects Make sure you set the “Import Art” to “Composition”.
3. Animate your logo in After Effects
Once you’ve imported your logo with all its parts on separate layers, it’s basically just a matter of using transform properties and keyframes on one set timeline.
Keyframes are essentially markers that indicate when start and end states occur for your animation.
Since my logo animation is pretty simple, here I will (mostly) work with transformation attributes like: position, rotation and Opacity.
So here I am basically looking at my storyboard (from step one) and trying the different ones Animate elements of my logo in After Effects.
This way I can adjust the speed and duration of each scene and sync them later.
For example : In my first scene of the storyboard I assume that drop the orange ball from above and also drop the purple square from below.
To achieve this, I simply use the position property and I keyframe on a sphere and square change position timeline.
I do it the other way round – first I set the final state (since the logo will appear, not disappear) and then I change the properties and set the initial state.
I say After Effect It’s basically something like:
Later , I can also add an Opacity effect, and I can also Ease In some – and Ease out add effects to make the animation look smooth and realistic.
Now I won’t go into detail here how to Used After Effects – because that’s a topic for a whole new video.
I would just recommend you learn some basics (check out free tutorials on Adobe.com) and th By the way, you can learn as you work.
Remember the inspiration board from step one? – Now you can actually reverse animation that you liked.
You can either drag this GIF into Photoshop to see how it image for picture is taken.
See also: Create a drop-down list
Alternatively, you can capture the animation with Quicktime and then analyze it in slow motion.
4. Export the animation as a JSON file (Lottie)
Once you’re happy with your logo animation, it’s time to place it on your website.
Do it it’s best to use the Lottie animation technique instead of just a GIF.
Lottie is simply a framework that lets you create your After Effects can export animations and use them on your website.
To do this, you need to download and install the Bodymovin extension for After Effects.
Before we to actually use it, you need to duplicate your composition.
We’re doing this so you can resize the canvas to crop the logo itself so it’s on can be used on the website.
This allows you to keep the original animation on an artboard of 1920 x 1080 pixels, which is best for YouTube videos – for example yours Intro and outro.
So for the website we only need a cropped composition with very little to no border around the logo.
On the other hand, I also pay attention to that that I don’t cut anything that’s animated along the timeline.
So I just scroll through the animation timeline to make sure everything is still visible.
Finally, I’ll just go ahead and export this animation as a JSON file.
Just go to Windows>Extensions>Bodymovin and then select “cropped” Composition and choose the target and voila!
5. Place the animation on your website
The final step is to embed your logo animation (the JSON file) on the website.
Since I built my client’s website on Webflow – this part is pretty easy here – I’ll just replace the original logo with this .json file
Then I also replace that Set some animation triggers in the interaction area of Webflow.
For example: I want the animation on loading is played on the page, but also when you move your cursor over it and out it.
I want the website visitors and their Non-intrusive visitor experience.
Your logo animation should not loop, just like GIF – that would be too much!
It’s just a simple touch of a website – and my Customer loved it!
Customer was very excited to see their new logo in motion (it wasn’t part of o f the project scope).
I gave this logo animation to my client at the end of the project.
A tip for designers: remember to always under-promise and over-deliver ! – and animating the customer’s logo is a great way to do that.
I hope you learned something new today – let me know in the comment below.
If you search for Animate your logo – start your project here.
Resources
- Preparing logo files in Illustrator
- Using the Bodymovin extension
- Web animations with After Effects
PS. Don’t forget to watch the end result live on https://peritidigital.com
See also: How to Make Beautiful Blog Thumbnails Easily in Less Than 2 Minutes
.