Disclosure: Please note that some of the links below are affiliate links and I will earn a commission if you make a purchase at no additional cost to you. I would never recommend anything that I don’t personally use and the proceeds go towards keeping this site updated and free for everyone!
Reading: How to create a travel and lifestyle blog
See also: How do I create a multilingual website?
Forbes got me recently named one of the top 10 travel influencers, however, my journey is not an overnight success. I started my travel blog in 2012 and after a lot of hard work and countless miles traveled, I now run one of the best female travel blogs in the world, raking in over 7 figures a year and having a team of 6 amazing women.
Although you may not pursue travel blogging as a business or full-time career, there are some key strategies that will help your website perform better and reach a larger audience faster. That’s why I’m sharing all my tips for starting a travel blog with you.
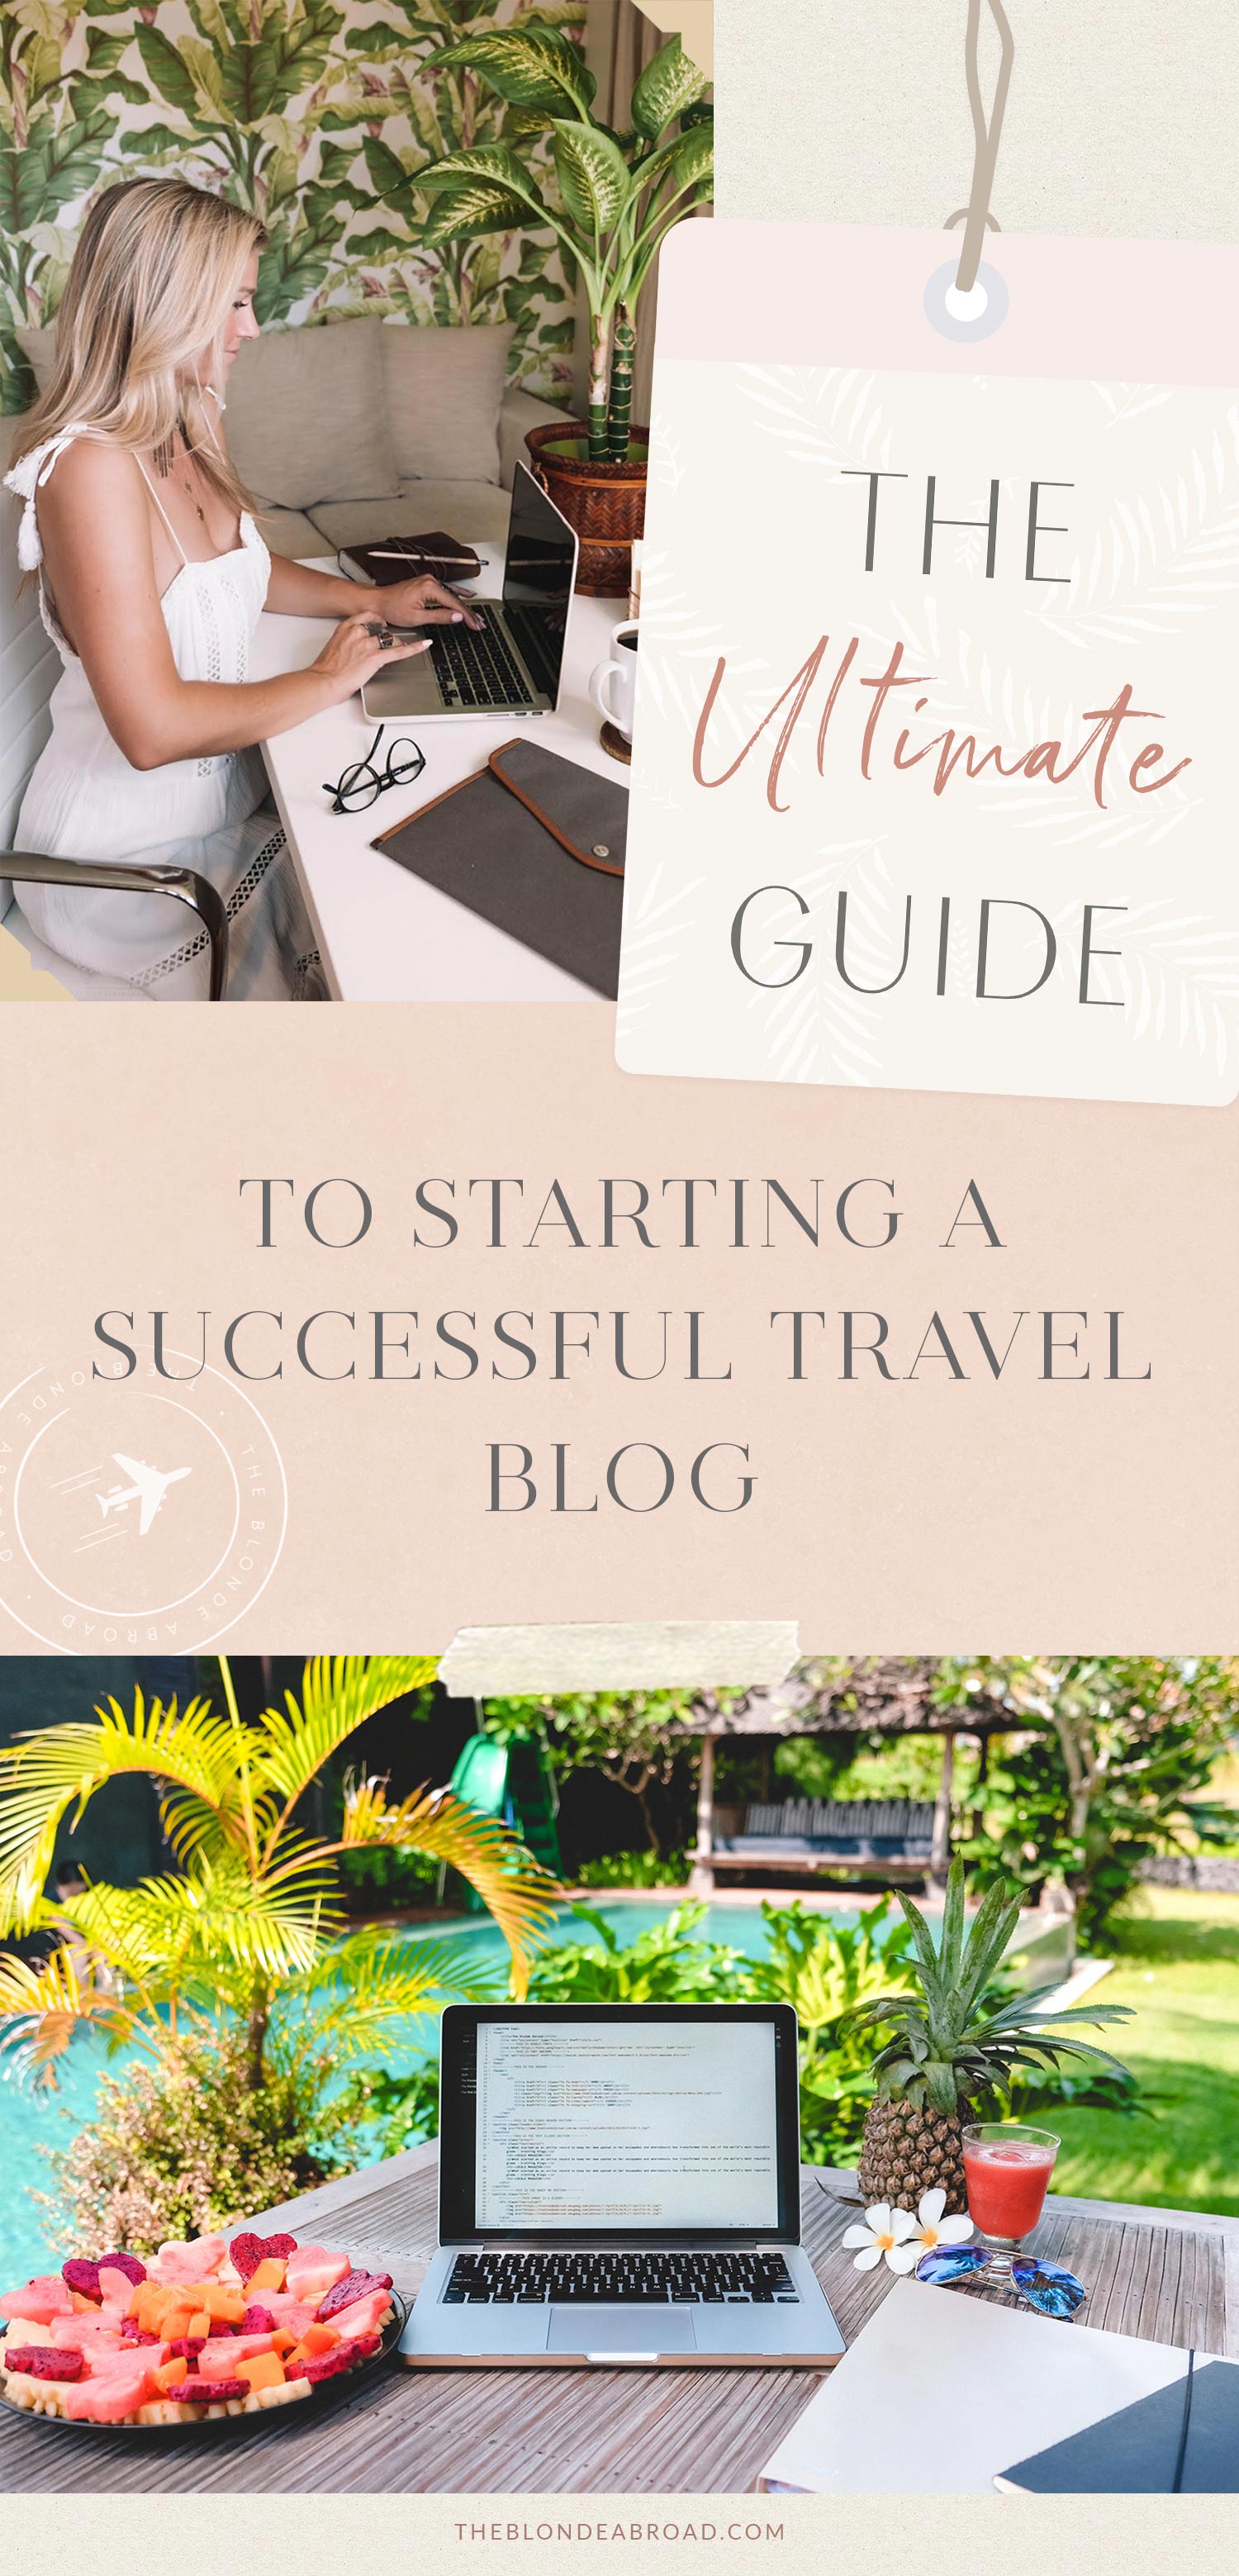
Here is my ultimate guide to starting a successful travel blog!
See also: How do I create a multilingual website?
- Build your audience (not a niche)
- Make your travel blog work
- A travel blog name
- Set up domain + hosting
- Set up blog on WordPress
- Connect Google Analytics
- Customize your website
- Branding + WordPress Themes
- Logo + Theme
- User Experience
- Essential Plugins for Travel Blogs
- Start creating content
- Set up your main pages
- Learn SEO basics
- Create schedule content
- Create beautiful images and graphics
- Take my blogging class
- B onus Step!

Step 1: Determine your audience (non-niche)
Before you can start a successful travel blog, you must determine if there is an audience for it. The biggest question you might have in your mind is, “Who is going to read my travel blog?” But if you’re trying to build a travel blog from scratch, with the potential to grow it into a business, you need to make a plan beforehand You begin.
- First things first: Determine what you are going to write about. Not just “travelling”. Think deeper. There is a strategy for well-rounded content. For me, it’s a mix of travel guides, destination-related content, photography tips, and fashion and lifestyle posts. I also intersperse parts of my personality with my love of Harry Potter, In N Out and Dive In.
- Next, determine how you will shape your content for your audience. Who is your target audience? For me, it’s 20-30 year old women with a passion for travel and unique experiences. While my audience will no doubt vary (I want everyone, including men, to read my blog!), it’s important to keep my audience in mind at all times so that I create content they’ll love.
- Then research if there is already someone writing about the same thing (niche, topic, etc.). If so, ask yourself how you can do it differently or better. There are many travel blogs out there, and you need to differentiate yourself.
When creating a travel blog, it’s important to think about your audience at every step and kick. Write for yourself, but don’t forget to write for your audience as well. Understanding this from the start will help you create quality content from day one.
I balance my writing with helpful guides (like this one) and travel tips for my audience, using photography-driven content and personal writing for me. I like to think that I excel at putting quality content first. This includes professional graphic design and epic photography as something my audience has and can always expect from me.
See also: How do I create a multilingual website?
Before you move on to Step 2, read my tips :
How to make your blog stand out from the crowd


Step 2: Get your travel blog up and running
Now I’ll walk you through the step-by-step guide to setting up a WordPress blog!
1. Think of a name
Think of names that can grow with you. If you name your travel blog “One Month in India” it may not be relevant in a year’s time.Remember that your name is part of your brand and you will likely stick with it for the life of your blog. Strive for something non-limiting and memorable.
Trust your gut and choose one after you’ve narrowed it down.
Quick tips for the Choosing a catchy name:
- Make it unique: There are countless travel blogs that already use common travel words like “adventurous”, “wanderlust” or “wandering”. . Think from a different perspective! Ask friends for help when you get stuck!
- Keep it easy to remember: Having a long name that you constantly have to spell and that readers misspell could is suicide. Avoid at all costs!
- Avoid confusing words and punctuation: Hyphens and anything other than .com can be confusing!
- Synergy:
- Think of the future: Do you always want tips on cheap travel? Or European adventures? If I had decided to change my hair color things might have been a little off brand 😉 Don’t settle for a niche brand if you expect your content to grow with you as a traveler.
strong> Avoid different names for your website and social accounts. If an account for the name you want isn’t available on a single platform, consider changing everything accordingly. They want to be easy to find!
Once you have a list of possible names, check that the domain is available (that’s your site’s URL) and that it’s available on all social platforms.
I’m putting mine Advice welcome Also, consider that choosing a niche brand could also be strategic. A Month in India could become a hugely successful blog if the content focuses exclusively on India forever. Understand the personal connection to your blog and whether you would like your content to reflect your personal journey, or if you would be okay with it remaining a niche brand that you operate as a resource.
No matter how a Name seems important, I don’t think it’s a big deal either. Your voice is stronger than your name. Branding has so many levels; The name is just the first layer, so it’s not necessarily the end of the world if you don’t pick the perfect one. The biggest mistake you can make is waiting to start a blog because you can’t choose a name.
Simple. Get started.
If you get stuck looking for a name, consider using your real name! Remember, YOU are a personal brand.
See also: How do I create a multilingual website?
2. Set up your domain and hosting
Know the difference between your domain and hosting!
If this is your first website, there are probably a few terms that you will be familiar with are not familiar must learn. You will want to know the difference between a domain and a hosting. Sometimes they are sold in pairs, but they are very different.
- A domain is the URL of your website. For example, my domain is TheBlondeAbroad.com. In order to claim your website, you have to pay an annual fee for your domain.
- When it comes to web hosting, we are talking about renting space on the internet where you want your website will live. Of course you need both.
I’m a fan of Bluehost. It is a reliable and easy-to-use web host with customer service to help you. They also throw in free domain name registration when you sign up for hosting, so it’s a win-win. If you haven’t started setting up your website yet, they also have a painless step-by-step registration process to guide you through the process.
EXCLUSIVE DEAL: If If you sign up for Bluehost through my blog, you only pay $2.95/month instead of $7.99!
Now I’ll walk you through the process! Go to Bluehost and click the green icon button that says “Get Started Now.”

If this is a brand new blog, I recommend the cheapest plan which is $2.95 per month. Until you start getting a significant number of visitors to your blog, the basic plan is fine. You can upgrade when you get more traffic!

Click SELECT on the basic plan and you will be taken to the next page:

If If you search to see if a domain is available, enter it in the LEFT box.
If you have already purchased a domain, enter your domain name in the right box Page and click Next. . Be sure to double-check the name for spelling mistakes! You don’t want to accidentally register the wrong domain.
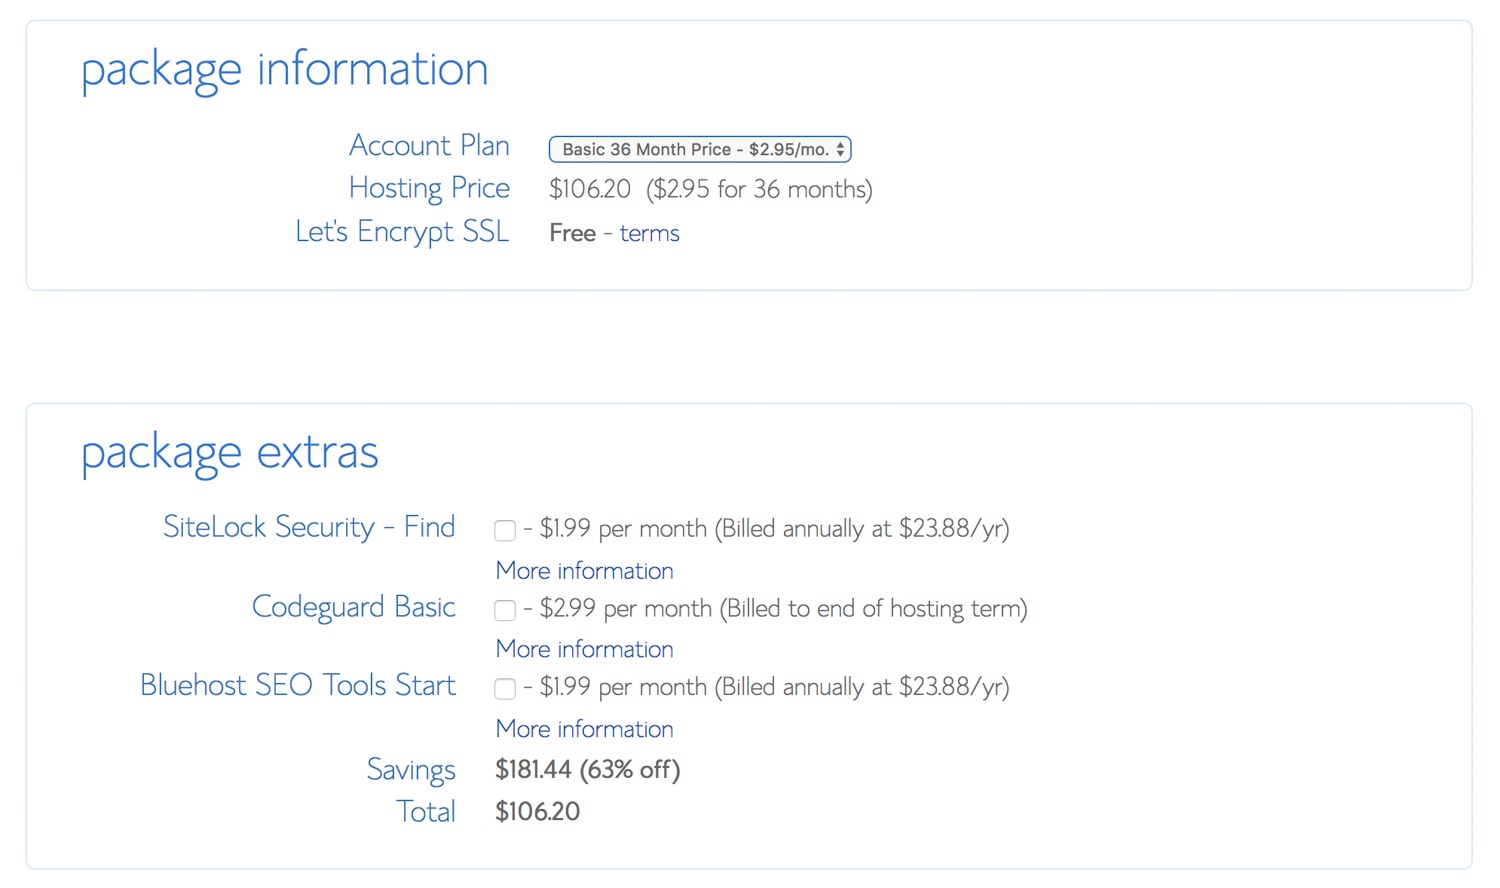
On the next screen, select your package information.You don’t need the bells and whistles, so be sure to uncheck these extra boxes:

I recommend starting with the 36-month basic plan. It’s $2.95 per month instead of $5.95 per month, saving you about $50 in the long run. Don’t worry – one of the best things about blogging is that there aren’t a ton of costs to set up your website! This is the biggest expense of setting up a blog (when you’re first starting out!), and it’s pretty reasonable.
You now have your hosting and domain furnished ! Pretty easy, right? Now let’s set up this website!

3. Set up your blog on WordPress
Now that you’ve set up your domain and hosting, it’s time to get your blog up and running.
WordPress. org is one of the most popular blogging platforms and I use and recommend it – just make sure it’s WordPress.org instead of WordPress.com as you want to self-host WordPress.com allows that not.
In general, WordPress is an excellent platform for beginners, and it also has tons of plugins and themes, so it’s something that can grow with you and your audience. There’s a bit of a learning curve, but it’s easy to find help and tips online, and there’s SO much you can do with this platform.
I wouldn’t recommend any other platform like Wix or Squarespace.
p>
Although they are easy and quick to set up, you end up paying a fee and are very limited in design flexibility. WordPress is free forever and has tons of themes and plugins to customize! I know quite a few bloggers who started out on one of these other platforms, and when they inevitably switched to WordPress, they had to give their converted site a thorough overhaul . It is not easy. And it doesn’t come cheap to hire a professional to do it. So I would recommend starting with WordPress from scratch.
Now let’s set up WordPress!
See also: Comprehensive Dreamweaver Tutorial
Once you’ve signed up for hosting on Bluehost, you’ll be asked for your password for WordPress:

You will then be prompted to log in and select a theme. Don’t worry too much about which one to choose – I’ll walk you through setting up a custom theme later. Consider this theme a placeholder and we’ll upload a better one later.

After selecting a theme, click START CREATING. Now let’s build!
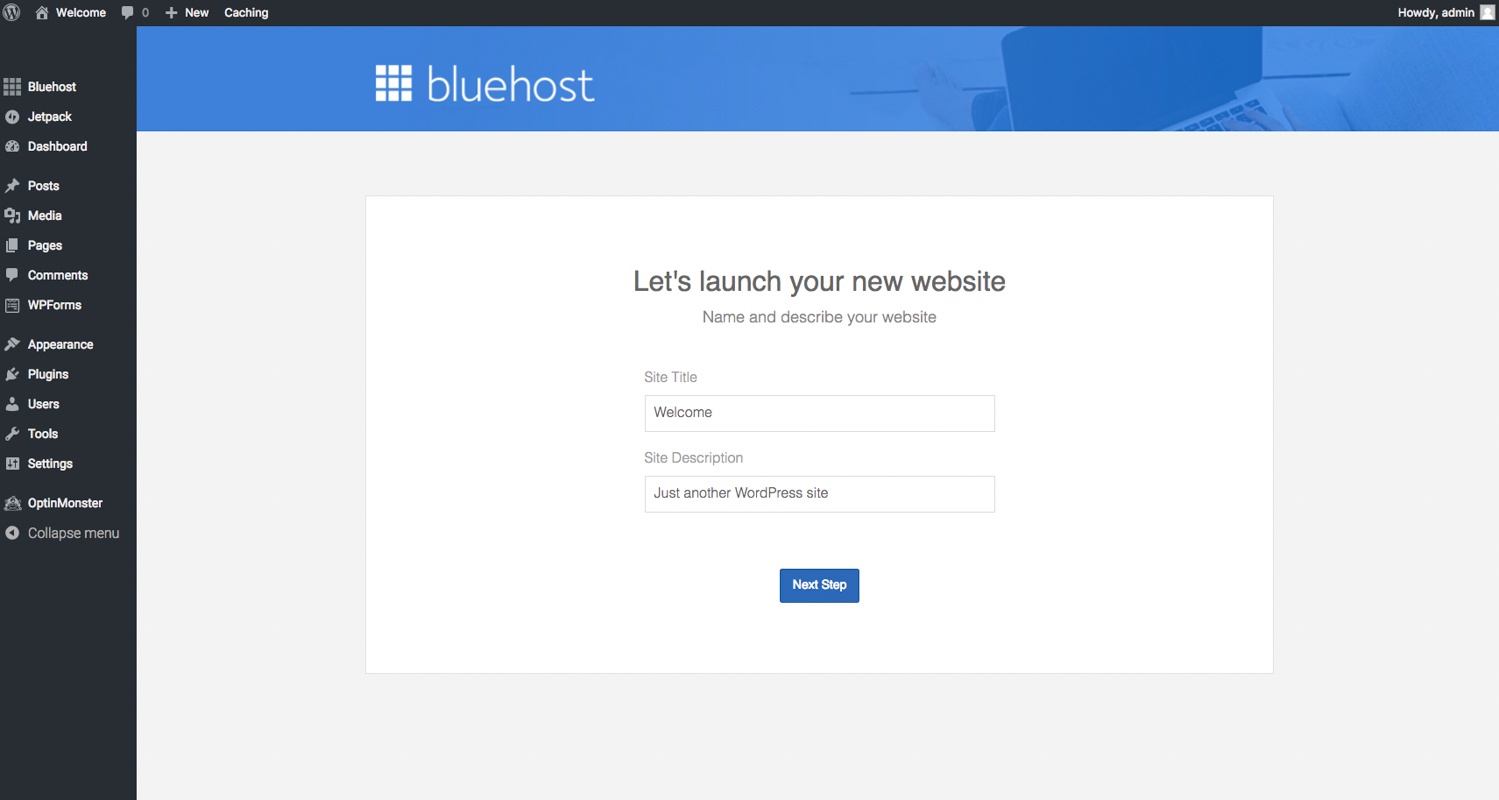
Next you will be asked if your website is business or personal. Go ahead and choose shop 😉 You go Glen Coco.

Enter your website name and description in the fields on the next screen. Again, don’t worry too much about the description. You should update it later, once you’ve had a chance to refresh your site’s SEO strategy and meta description (don’t worry if that’s too much for you – I’ll explain later!)
More notes on setting up the blog:
- Select “A static welcome page” here. What custom theme you choose later will determine the look of your site, but a static welcome page is what could be considered for my home page and more easily customized.
- On the next screen, click ‘Not now “. You don’t want the whole internet to know your address.
- Click Not Now when it comes to installing WooCommerce. WooCommerce is a WordPress platform that allows you to sell products (both digital and physical) on your website. You can skip this for now and add WooCommerce later when you’re ready to start selling.
And that’s it! You’re officially a travel blogger!
To log in to your website in the future, type http://yourdomainname.com/wp-admin into your browser and you will be do see this screen:

Enter your username and password and you will be logged in to your WordPress dashboard.
In the column on the left side of your dashboard you will see:
- Posts – this is where you will draft and publish your blog posts
- Pages – this is where you find and create static pages on your website, e.g. B. An About Me or Contact Us page
- Comments – where you can approve, spam, or reply to comments on your blog posts
- Appearance – here you can change the look and feel of your blog, from installing a new theme to adding graphics, changing fonts, editing your sidebars, etc.
- Plugins – this is for installing and updating plugins (additional features) for your blog
- Settings – here you can change your website settings, tagline, etc.

To get familiar with WordPress, you can find a tutorial for almost anything on WordPress for beginners.
4. Connect your blog to Google Analytics
Google Analytics gives you a detailed insight into your traffic and more information about your readers. You can see incredible details about your traffic, including the number of visitors to your site, the time they spend on your site, where they are from, their age range, etc.
The Google Find On Analytics site Step-by-step instructions for getting started! Monster Insights Google Analytics is also an easy tool to install on your website.


Step 3: Customize your website
Now that the blog is live , let’s get started make it pretty!
1. Branding + WordPress Themes
The most exciting part, in my opinion, is choosing your website theme! A WordPress theme includes page layouts, colors, formatting, and even fonts. Keep in mind that some themes use “shortcode” and switching themes after you’ve created a lot of content can break your site. While you CAN change your theme again later, it may require going through and updating the code throughout your site (which also means you may need professional help).
So it’s important to do this. Consider your long-term branding before choosing your first topic!
While I could talk for days about the importance of good branding, I’ll try to highlight a few important ones To summarize points:
- Branding is more than just the colors of your website. Consider all layers of your branding – from your website’s colors and fonts to the way it is designed how you deliver your message.
- What is your brand ethos? Are you “the girl next door” or “tell it like it is?” What do you want your audience to be feel when it thinks of your blog? Try to find keywords like friendly, tastemaker, expert, funny, controversial, etc. A successful brand does not mean that it is suitable for everyone. Sometimes it’s about staying true to yourself AND standing out from others. It’s not always about targeting an audience of 1 million people.
- It’s good to have a rough idea at the beginning. From there, it’s important to be authentic and engage the concept and be consistent.
To get your ideas down on paper, create a Pinterest board and gather your favorite colors, fonts and layouts!
Here is my blog redesign inspo board:

Let’s find the perfect theme now:
You can use WordPress themes all over the web from marketplaces to individual graphic designers.
- Creative Market has a ton of beautiful themes from designers and you can read reviews before buying.
- Envato (formerly known as ThemeForest) is one of the largest, highest quality WordPress theme marketplaces I’ve seen. I built my old website using the Avada theme (the #1 rated theme).
- Elegant Themes is also an excellent resource for creative and unique themes.
There are thousands to choose from and most range in price from $30-$60. Although there are free themes for WordPress, I would highly recommend investing in a premium theme. It’s a small price to pay for an attractive website that will grow with you over the years.
You should make sure the theme you choose is for WordPress and that it is mobile friendly. responsive and provides customer support.
Once you’ve purchased a theme, it’s time to install it on your site.
Themes usually come with installation instructions, but the following steps are likely to be required:
- You downloaded the .zip file (do not unzip the file)
- Log in to WordPress
- Click Appearance > Themes > Upload
- Upload the .zip file you just downloaded, then follow your Customization design instructions !
See also: How do I create a multilingual website?
2. Logo + Design
Some WordPress themes have a built-in “logo” which means they can display your blog name in the header, and that might be fine when you’re first starting out. If you’re interested in getting a custom logo or graphics for your blog, there are a few ways to do it.
First, you can teach yourself the basics of Adobe Photoshop and create a logo and graphics to use your brand colors and fonts. However, this can be a time-consuming way. For absolute beginners, I recommend Canva Pro – it’s a great resource for designing brand assets and graphics! They have thousands of templates, stock photos, and ready-made graphics for almost anything and are very easy to customize.
Creative Market has many pre-made logo templates, fonts, patterns, and textures you can add to your website and Integrate your branding – it’s heaven to enhance your aesthetic!

Another option is to hire a freelance graphic designer to develop your logo and/or graphics, which I recommend , if you have some budget for design. You can find great freelancers on Upwork and Fiverr (get 20% off your first order!), and you can easily pay per job! Always make sure your freelancer has good reviews and a portfolio of designs that match your vision.

3. User Experience
Take small steps and know that everything doesn’t have to be perfect in the beginning.
Once you have your theme installed, it’s important to set up your website to be user-friendly as possible. The way someone navigates through your website is called the “user experience”.
Look at your favorite websites and see how they organize their information. Do they have drop down menus or do they showcase their top content on their homepage? Make notes of what you prefer.
Take your time to create a clean and fresh-looking website that’s easy to navigate, but don’t pay too much attention to every detail. Create an overall aesthetic, and you can refine and change sections of your site as you create more content.
- Set up the menu bar: One of the most important things you The first thing you need to set up is your menu bar so your readers can easily access information. From your dashboard, click Appearance > Menus to customize them. It’s helpful to watch a tutorial on how to customize your menu, as it can be confusing!
- Design the layout of your home page: I find designing a home page super helpful to draw on paper with mock up content boxes (which are available within the theme). If everything makes sense, I’ll build it.
Consider user experience when customizing your website design, then turn to plugins to boost performance and keep your blog going to adjust.
See also: How do I create a multilingual website?
4. Must-have plugins for travel blogs
WordPress has easy-to-use plugins like Yoast SEO, which can help you optimize your website and blog posts for Google searches, and others like Askimet, which manages spam comments. You’ll also find that no single WordPress theme can do everything, so you may need to turn to plugins to customize them with things like image sliders, social icons, etc.
Here are my favorite Plugins for WordPress :
Akismet Anti Spam: Websites are attacked with spam comments every minute. Akismet automatically captures and deletes them so you don’t even see them.
Yoast SEO: Yoast SEO makes it so easy to improve your blog posts and page rankings in Google Search and is the go-to SEO plugin for WordPress. You also have tons of resources if you’re just learning to integrate SEO throughout your blog. You can also verify your Pinterest account through the plugin.
Google Analytics: This is the industry standard analytics program and gives you so much vital information about your posts, pages, and audience.
See also: How to Make Your Wedding Website Private
Social Warfare: A great social sharing plugin.
BackWPup: Always, always backup your website!
Grammarly: Although Grammarly is not a plugin, I STRONGLY recommend that you install the Chrome extension for it on your computer.Grammarly can save you from a lot of embarrassing typos – this extension automatically highlights the mistakes and offers recommendations – proofreading your WordPress blog drafts, your emails, your social posts, etc. You can also upload documents to the site and use the proofreader that way. It’s a big help!

Step 4: Start creating content
You’re almost done! Now it’s time to add content!
1. Set up your main pages
Once you have uploaded your theme and plugins, you should set up your main pages in addition to the blog posts. To create a new page (or post), go to the left sidebar of your WordPress dashboard and click Pages > Add New. (Or for a blog entry: Posts > Add New.)
The difference between a page and a post is that a page is static content that exists separately from the blog. A post will appear in your blog feed and come with the search tool. Ultimately, your “pages” are “higher-level” benchmark content that provides the framework for the site. Your blog posts are the articles you share.
- About Me Page: One of the first things most users will click on is your About Me “-Page. Make it easy for readers to learn more about you and make it clear what they will find on your site.
- Contact Us Page: Create a page so people you can reach! Make sure you indicate what type of emails you will or will not reply to so nobody spams you.
As your website grows, you may find that You need to create additional pages to showcase your top blog posts. My most visited pages are About, Start Here and Destinations.
See also: How do I create a multilingual website?
2. Learn the basics of SEO
High-quality, consistent content within your niche is crucial.
Before you start writing, familiarize yourself with SEO and keyword usage . Resist the urge to study on the go. You will later waste a lot of time optimizing posts that are not SEO friendly (in my experience!). More importantly, people can find your content on Google search.
Yoast’s blog and Backlinko are great resources for learning the basics of SEO and implementing them on your travel blog from day one . (Thank me later.)
See also: How do I create a multilingual website?
3. Create a content plan
As you learn about SEO, create a content plan. Find a consistent schedule that works for you and stick to it. And by consistent, that could mean once a week or once a day, depending on your goals and the time it takes you to create quality content.
I post every day, Sunday through Thursday . Friday and Saturday tend to be less busy days, so these are my “days off”.
To get the momentum going, you need to post as often as possible. Think of it this way: you want to give people a reason to come back, and when they do, you want them to have something new to read. Otherwise, they probably won’t come back.
Helpful articles:
10 ways to be a more productive blogger
How to blog while working full – Zeit
10 Skillshare courses perfect for bloggers
See also: How do I create a multilingual website?
4. Creating “pillars” of content
This is part of my personal content strategy. When starting out, it’s best to stick to 2-3 categories to focus on and create lots of content for. Then expand from there. For example, a category can be a specific travel destination, a region, or a type of travel. You could start with solo travel, European travel and fashion. Or maybe blogging tips, women’s travel, and photography.
Create three to five pieces of content for each of these categories before branching out further. So if someone comes to your site from one of those interests, they’ll have a lot to read.
See also: How do I create a multilingual website?
5. Beautiful Images and Graphics
Everyone loves visuals, and that’s especially true on social media and Pinterest! Getting your travel content out on social media platforms is SO important when it comes to building an audience and getting organic readers (who keep coming back to your site).
The best Way to do this, use high-quality images and graphics for each blog post you share.
- Unsplash: For beautiful, high-resolution, royalty-free images
- Adobe Suite for photographers: I use Adobe Photoshop and Lightroom Classic to design Pinterest and sidebar graphics, and edit my photos.
- TBA Presets for Lightroom: I edit all my images using my Create custom presets A consistent aesthetic across all my photos
- Canva Pro: A great and free resource for creating custom graphics
Step 5 : Take my blogging class!
After seven years I am finally ready to start my blogging master class in early 2020!
If so looking for more in depth advice I have a very detailed and robust blogging -Course developed using my years of blogging expertise to help you launch, grow and monetize your website. It gives you an honest look at how I run this site and provides in-depth analysis, tricks, tips, and expert insight into what I do. You’ll learn everything I know about creating a successful blog.
I’ll help you create engaging content, build a lasting brand, master SEO, increase your fan base in on social media and make a lot more money. I’ll give you the tools to succeed – and then show you how to use them! Coming very soon!

BONUS: Passion vs. Blogging Success
Before As you leave this page, I wanted to offer something that I feel a lot of “getting started guides” leave out – wise advice.
I started my blog seven years ago and learned everything through trial and error until I figured out what worked. In 2012, there weren’t many blogging guides out there, and no one had “managed” to follow in their footsteps. Well, there are tons of guides out there, all claiming to be the stairway to heaven.
I don’t want to give you another step-by-step guide. I want to help you succeed.
Consider this “bonus step” as an extra step because I care about it and I really want you to be successful and the only way to do it , giving you a healthy dose is reality. So bear with me as I share some of the deep stuff before you dive deep into blogging.

I’m so grateful for the incredible experiences I’ve had as a professional travel blogger.
While it’s easy to “physically” start a blog, it takes countless hours of (99% unpaid) work, creativity, and most importantly, the determination to build a brand and maintain permanent vacation, you don’t typically see the insane amount of work, which is put into writing, creating content, taking photos, editing videos and sharing on social media. If you want your travel blog to be successful, you must start with pure intentions and the motivation to share your passion with others. Otherwise, you’ll burn out.
Ask a successful person what they love most about what they do. Then ask them what they hate about it.
In one of my favorite books, Big Magic, Liz Gilbert describes “the part you don’t like about your career” as the ‘sh !t -Sandwich.” Because at the end of the day, if you’re not ready to eat that sh!t sandwich before dessert, you’re probably going about it the wrong way.
The reason I bring this is Because a lot of people want to see successful travel bloggers and follow that lifestyle, so start a blog to achieve it. But often, the work that goes into running a blog isn’t necessarily aligned with that person’s interests.
If you want to be a successful blogger, you have to love what you do. I wouldn’t normally say that about someone’s job. But with blogging and most entrepreneurial pursuits, I find it true. You don’t have to be a banker to get up in the morning and go to work. Maybe the salary justifies the pain. With blogging, you should probably enjoy most aspects of the workload so that you can get through the burnout periods.
Otherwise, you’ll follow the same path as any career you despise.
Of course we all like to travel. But ask yourself, “Am I passionate about photography, writing, social media, and in constant communication with my community?”
Even though it doesn’t look like it, I love photography not my daily life. Answering emails and posting to Instagram Stories daily are two of my biggest hurdles — and answering hundreds of questions becomes a big ol’ shit sandwich that I’ve been munching on for the past six years. I love my community, but spending hours of my day (every day) responding to comments on social media and emails (especially when I’m on the road) can be overwhelming.
The reality, travel making your job is that you often work more than you travel – even when you are in an exotic location.
But my passion for travelling, connecting with other female travellers, helping people do better to travel, photography and editing photos and writing would still be here regardless of whether they have a large audience or not. That passion outweighs the things I don’t love about what I do, and that’s how I’ve persevered through the years.
If you’re ready to eat this sandwich, then dip in first!
Disclosure: Please note that some of the links above (such as Bluehost, Envato, Elegant Themes, Creative Market and Adobe Creative Cloud) are affiliate links and you will not incur any additional cost Earn a commission when you make a purchase. I would never recommend anything I personally don’t like and the proceeds go towards keeping this site updated and free for everyone!
See also: How do I create a multilingual website?
.