Before you start, read this
Updated:
This free step-by-step guide will walk you step-by-step through all the steps you need to take to create a website (or a blog) need. for your business or brand in 30 minutes or less.
Reading: How to create a website at home
Table of contents
- How to register a domain name
- How to find a web hosting company
- How to set up a website
- How to add pages and make other customizations
Don’t you know anyone Code?
No problem – you don’t have to.
We wrote this guide especially for beginners. However, if you’re interested in learning code, read this guide instead (not recommended for beginners).
Are you afraid of making a mistake?
We’ve got the most common ones Make mistakes when you create a website so you can spot them and avoid them.
However, if you ever get stuck setting up your website, we offer free help.
Worried a waste of money and time?
Domain names are only $10/year and web hosting is $5/month but are refundable within the first 30 days. Worst-case scenario, you’ve spent $10 developing new skills.
The average time to set up a website using this guide is around two hours – most manage to lay a solid foundation on this time to build.
Ready to build your website today? Grab a coffee or tea and get started!
Step 1: Register a domain name (www.)
(Some of the links in this guide are affiliate links. We only recommend services and companies that we personally use.)
First things first: Every website needs a name.
Without a name (aka a domain name), your website simply cannot function. Think of it as a street address for a house, where the address is the domain name and the house is your website.
Owning a domain name gives you full control of your entire website, no matter what.
There are a few rules to keep in mind when choosing a domain name:
- If you are starting a business website, your domain name should match your company name, e.g . B. yourcompanyname.com
- If you plan to create a personal website. strong> or a personal blog for yourself, then YourName.com is always a great option.
- Don’t get too complicated – most of the more unique domain names were bought decades ago. Go for something that fits the tone and purpose of your site.
Use this free tool to check if the domain name you want is available:
Where to buy a domain name

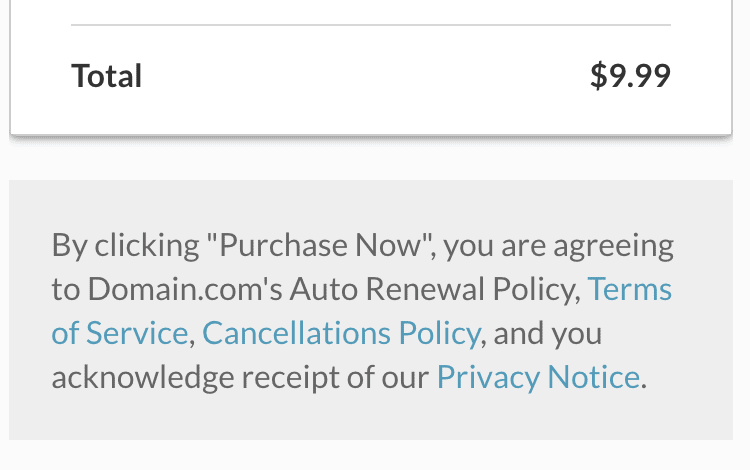
Domains cost around $10/year and are renewed every year unless you sign up for decide to terminate.
You can choose a .com, .net, .org, .co. uk, .ca or .de domain name from domain. Other similar domain registrars you can use are Godaddy and Namecheap.
If you want your domain name extension to target the world population, try registering a .com version. If targeting local visitors from Canada or Germany, choose the .ca or .de extension.
When purchasing a domain name through Domain.com, use the coupon code WEBSITESETUP25 “.
This can help you get a domain name 20% cheaper (.com for $7.99/year).
The registration process is easy and you get access to Your personal domain instantly.
Be aware that there are over 100 million active domain names, so the best are long gone.
Don’t dwell on them too much – You can always buy another domain name (if needed). So get one before it’s taken.
Step 2: Get a web hosting account
Congratulations! You should have your own domain name by now.
Don’t worry about it not working because you don’t have a website yet.
To fix this problem, we need one Web hosting plan.
Web hosting is a service that connects your website to the internet and then allows you to manage a website.
Where can I get web hosting? How much does it cost?
Entry-level web hosting costs between $40 and $60/year. Like any subscription, you can cancel at any time.
The web hosting service allows you to easily set up a website using pre-installed free website building platforms (WordPress, Drupal and other website builders).
See also: How to Get Backlinks (15 Quick and Simple Strategies)
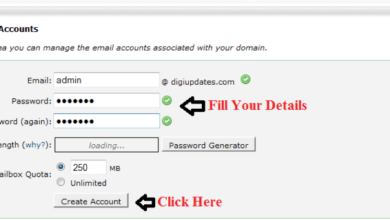
Fortunately, if you have registered a domain name through Domain.com, you can also get a web hosting plan from them. Just log into your account, search for “web hosting” and sign up for their service (costs $45/year).
Alternatively, if you want to save some money or bought your domain elsewhere, you can use Bluehost as your web hosting provider (costs around $40 for 12 months). p>
Bluehost will activate your hosting account instantly and you can start building a website under your own domain name.
Registration is easy, just go to Bluehost.com and click ” Start now”. “. We’ve also created a step-by-step guide to purchasing web hosting with Bluehost (in case you decide to use it instead of Domain.com).
Step 3: Set up hosting a website over the internet
Now it’s time to set up a website.
Most web hosting services offer various free website building platforms to create one website. In this example we’re using WordPress.
WordPress is the most popular free website builder, powering over 40% of all websites on the internet. We’ve compiled the stats (1, 2, 3) to show and analyze how websites are built – WordPress is the clear winner.
Since you already have a domain name and web hosting , You can install WordPress totally free on either Domain.com or Bluehost.com
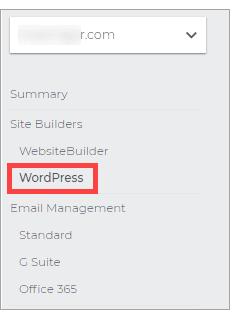
Option A: On domain.com you can do it in the left pane Click on WordPress:
Option B: In Bluehost, all you need to do is click “Create Website”. strong> button.
The next step is to determine the purpose of your website. You can choose between blog, store, business website or portfolio website/resume.
If it’s not quite what you want, you can select an option in the “Other”.

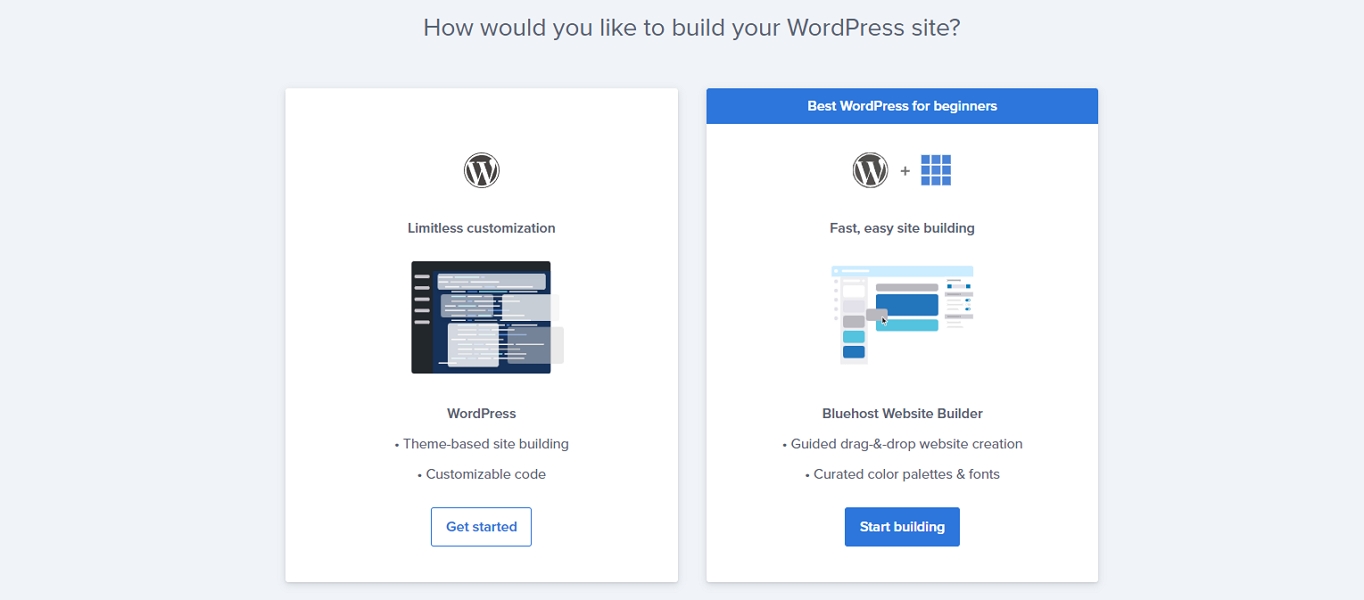
Next, choose how you want to create your website. Bluehost offers two options: using Bluehost’s own website builder or WordPress.
Since we wanted to use a theme-based website building platform, we chose WordPress.
Click on “Get Started” and your WordPress installation process will begin.
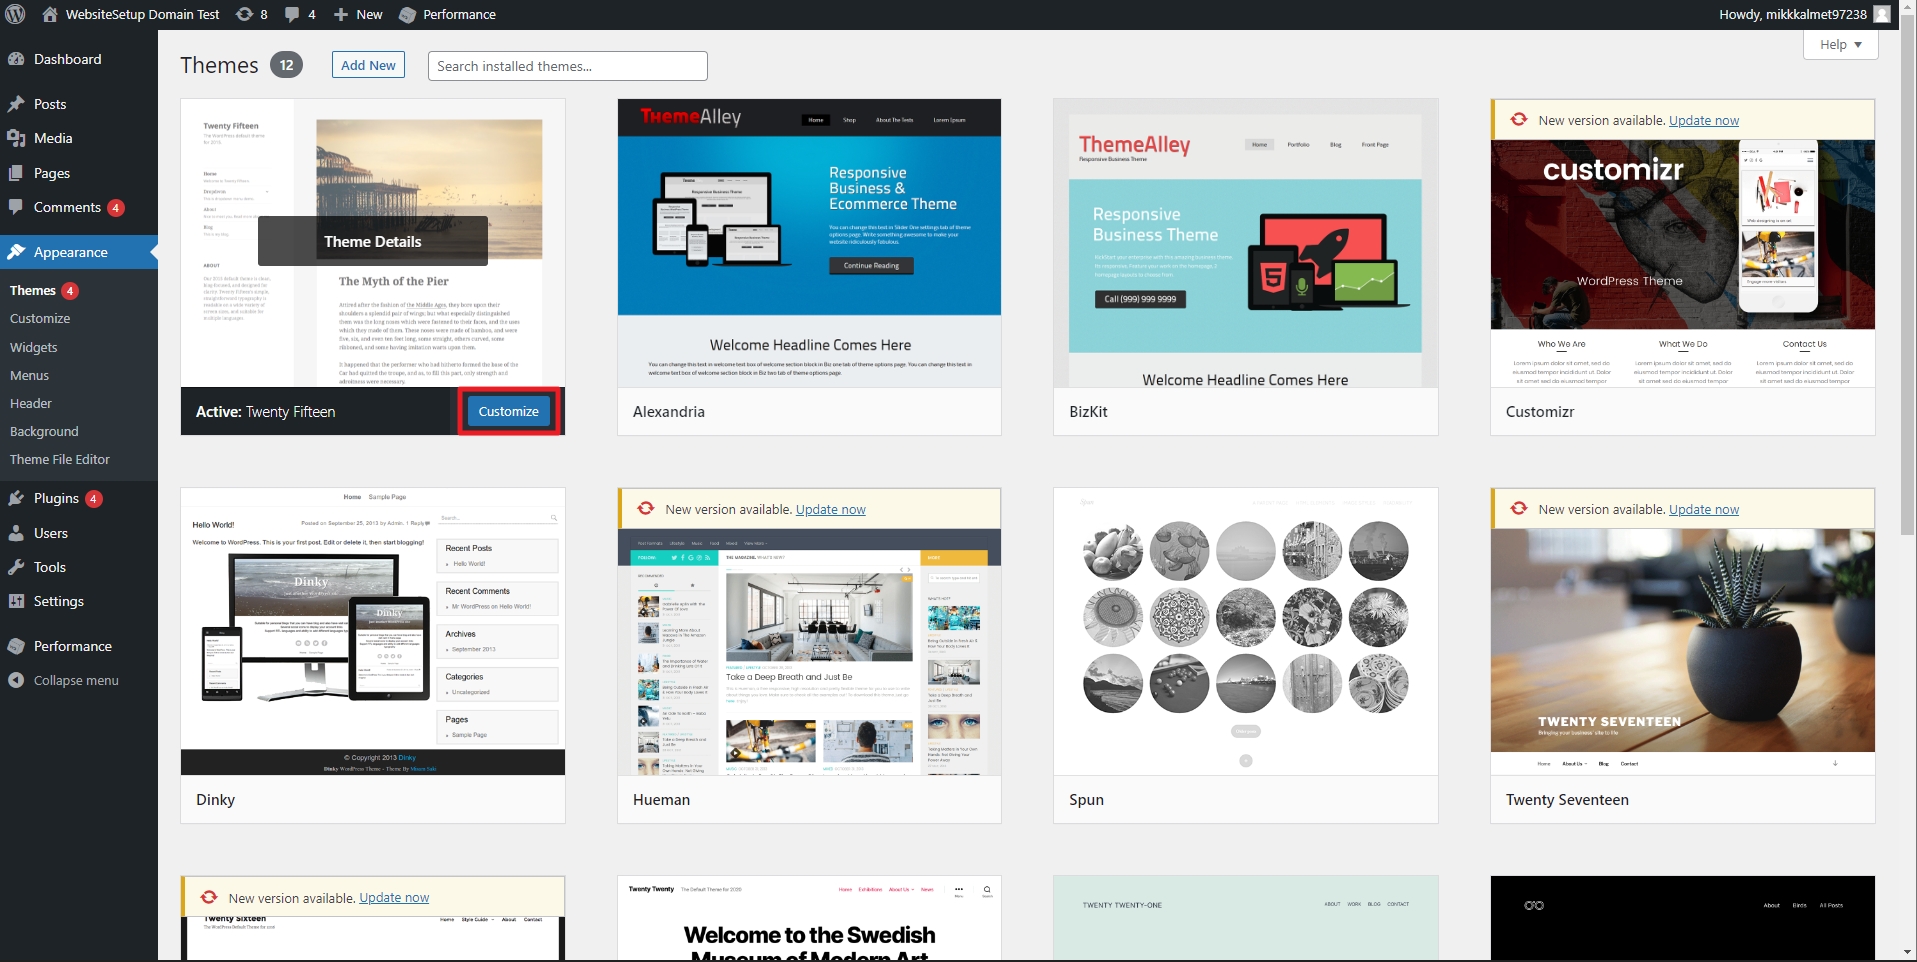
Once the installation is complete, you will need to log in to your WordPress Login Dashboard.
Right now it is important for us to start customizing the new WordPress site and all you have to do is hit the Customize Site button click.
In the left sidebar you will see options to change the design of your website, such as:
- Title and Tagline
- Website logo
- Fonts
- Colors
- Sidebar and much more…
Note: The opt ions shown will vary depending on which theme you have installed. We recommend playing around with the drag-and-drop editor and experimenting with different fonts and color schemes to refine your desired aesthetic.
Once you’ve got your website’s design customized to perfection, it’s time to Time to move on Pages and content.
Step 4: Add pages and customize your site
By now you should have successfully set up a WordPress website – the basics Your website has been created, and now it’s time to start drafting.
The first step is to create the pages you need most. We have compiled a list of the most popular pages that most business websites have:
- Home page
- About us
- Contact page – here, you can share your social Add links (Facebook page, Twitter, etc.)
- Our services/products
- Blog
- Gallery
- References/ reviews
If you’re not sure what your website should contain, read this article on the 12 critical elements every website needs.
Once you’ve decided on yours have pages, it’s time to add them to your site. To do this, you also need to set up a navigation system for your website.
Part 1. Adding new pages in WordPress
A blank website with no pages or content is not of much use to anyone. Therefore, in order to make the website accessible and interesting, we need to add some pages and blog posts.
To add pages to your WordPress site, navigate to “Pages” in the menu on the left , and click the Add New button there.

This will take you to WordPress -Block editor – also called Gutenberg editor.
If this is your first time visiting this, you’ll see a quick step-by-step guide explaining how it works and where certain features are located.
It’s pretty easy to work ; everything is block based, which means if you want to add something to your site, you just have to select and fill in the right “block” from the menu.

On the left side of the content block area, there are several content options to choose from. Each serves a different purpose and adds a different visual element to the page.
Alternatively, the menu on the right allows you to change some site-wide settings, such as the author, the page’s permalink (URL), the featured image and more.
See also: Offline Survey Apps: 12 Tools to Help You Get the Job Done
Or at the top of the right menu, you can click the “Block” tab and adjust the settings for each of the blocks you’ve selected on the page.
Once you are happy with the page, you can make it either public or private. The former makes the content visible to any visitor, while the latter means it’s only visible to you via your website dashboard – this is a useful option if you’re still working on a specific page.
There is there is also an option to preview the changes you’ve made or schedule a date and time to publish the page.
Part 2. Organize Your Site Navigation
Now that you’ve created the pages, it’s time to add them to the navigation bar.
This is the menu that resides throughout your site and gives visitors access to the rest of the content offers.
To customize your navigation system, click the “Appearance” tab in the left column, followed by “Menus”.
The name of the menu doesn’t matter as this is only visible to you, but make sure to check the box n that says this is your main menu.
Once you’ve created the menu, you can start adding and organizing the pages there.

You can also create sub-items, which means that pages are shown when a user mouses over them.
For example, here we did this by adding “About Us” and “Contact Us” under the “About” category.
Part 3. Modify/Add New Themes and Layouts
To customize your website, navigate to your WordPress dashboard and select Appearance from the left-hand menu.
Here you can change the design of your website tweak, add and change widgets, the menu structure a customize and so on.
Basically any change you want to make to your website can be made from the “Appearance” tab.
Plus, if you’re comfortable with coding, you can even add custom CSS to fully personalize your site.
Part 4. Adding Blog Posts (Optional)
While adding a blog is optional, creating a blog is often a good idea. It provides a channel where you can post fresh content, demonstrate your professional expertise, and add value to your website visitors.
It’s also a good idea to have your own blog page and Keep your home page static.
To do this, create a blank page (Pages > Add New), name it “Blog” (or a suitable alternative – “blog” makes sense as it automatically creates the address: yoursite.com/blog) and publishes it.
Then select it as Your from “Post Page” either under Appearance > Customize > Homepage Settings or under Settings > Reading.
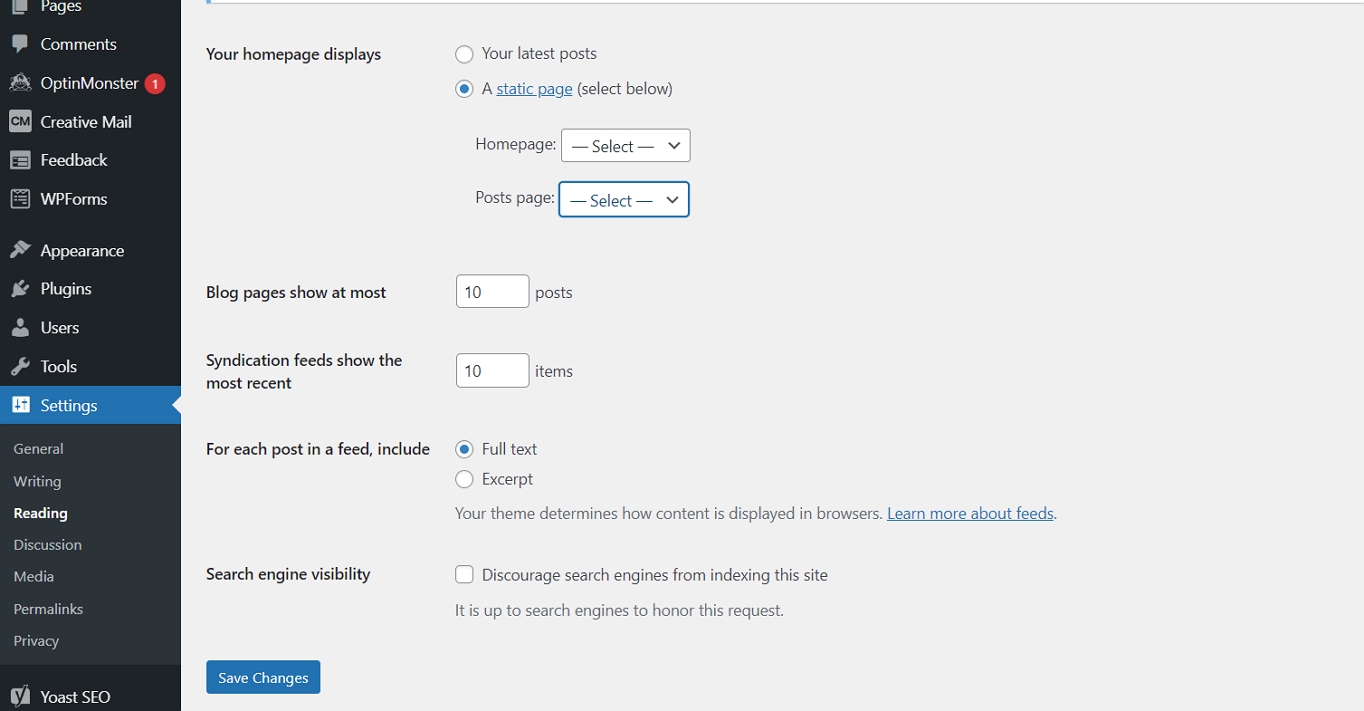
Your choice page automatically displays all blog posts when you save them cher – make sure to include the page in your navigation menu.
Once you’re set up, you can start creating your blog posts. This can be done via “Posts” and “Add New”.

After clicking “Add New”, you will be taken to the editor page where you can start writing and customizing your content.
Add images, text, a title and anything else needed for the blog post.The right sidebar also has options for applying categories and tags, defining a snippet, and setting up a featured image – these features improve your page’s discoverability and categorization.

If When you’re done, click “Publish” and your post will appear on the appropriate blog page.
Finally, connect your site to Google Search Console
The Google Search Console allows you to track your site’s visitors from the search engine and also gives you a better idea of what type of content is most popular.
GSC also gives you an overview of the health of your site. It’s a useful, free tool to get an inside look at your site.
Setting up the tool shouldn’t take longer than about 10 minutes. Here’s a step-by-step guide.
Congratulations! By now you should have a fully functional website. If you have any questions about this guide, don’t hesitate to contact us.
See also: Benefits of Starting a Dance Youtube Channel
.