A personal portfolio website is like a digital resume. It can make a big difference in your career. It can be a great platform for you to post your work and portfolio, it could help you gain an audience or followers for yourself, it could be a great way to impress or attract employers. It can also act as your digital resume and help bring you some great opportunities.
Many may have some questions about the technical skills that would be required to create a personal portfolio website, the good ones Message is Just a little knowledge of HTML and CSS is enough to create your own personal website with GitHub Pages. Also, some background on basic Git commands might be helpful. If you have no idea about HTML, CSS or Git commands, it’s still fine. I have provided the details and references to help you create one for yourself.
Reading: How to create a personal website io
The steps required are:
- Step 1 – Create Build a GitHub Repository for Your Website
- Step 2 – Download a Free Template
- Step 3 – Customize Customize the template to your requirements
- Step 4 – Make the contact form work with Formspree
- Step 5 – Publish the code to your GitHub site repository
- Step 6 – Create a domain on your behalf
- Step 7 – Done, your website is ready!
In this article, I will give you guidelines on how to create a personal portfolio website for free using GitHub pages with some amazing features like a contact form give to allow users Contact you directly from your website. I will also give you details on how to get some amazing templates and tools for free that will give your website a dynamic look. The only potential cost would be the cost of the domain if you opted for a custom personal URL, but otherwise it’s completely free.
Go to your GitHub and create a new repository in the following format. This differs from a regular repository and therefore follows the naming conventions. The structures for a personal website and organization are slightly different here in this article, which we will see in detail about the personal portfolio website.
Please note that the name of this repository is [your Git username].github.io
See also: Webflow for blogging: 4 steps to getting started
In my case my GitHub account username is “rsharankumar”, please use your username and create this repository. You can also configure the readme file later, if you are using a custom domain and pointing to this site, then you would also need to add a file called “CNAME”, this file should have the name of your domain. You can find my repository here
We have several free HTML templates available. One such site that offers a variety of free templates is HTML5, check them out and download them once you find the template that suits your needs.
There was a template called Dimensions , which I found perfect game for my requirement. Here is a screenshot of the template as shown on their website
Alternatively, if you don’t find the options interesting then You can also create one yourself from scratch or buy a template.
Open the template you downloaded and start making changes to it. A little knowledge of HTML and CSS is usually sufficient to make the necessary changes to the template. First, try to focus on fixing the content in the template, removing the modules that you don’t think are necessary for your purpose, and start editing the high-level content like your name, basic profile info, and the Details to focus on We’re making progress.
Some key points to consider when updating the template
- Enter your name and a summary on the Home page
- Update the links to your social media profiles
- Add your profile picture to the website
- Add additional information about yourself and your portfolio add
- Add links to places where you write, contribute, or participate. Don’t forget to add links to your blogs, Kaggle profile, and other places related to your work.
See also: How to Create a Website Free of Cost?
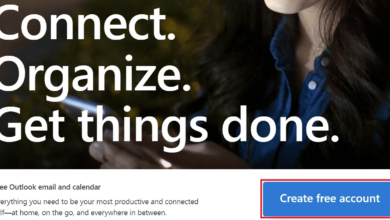
Providing links to your social media profiles should be sufficient , so anyone who stumbles across your website can reach you, but with a contact form it looks more professional. In general, you need a dedicated server for the contact form to work, but now it’s easy with the help of Formspree.
Create an account in Formspree and make a note of your form ID. Now go to the website folder and open the “index.html” and go to the session that contains the code for the contact form. And update the below highlighted “form_id” with yours and make sure the method=”post”.
That’s it, now you also have a working contact form so your website visitors can now just use the form directly to contact you directly, rather than going to extra lengths to reach you through other means.
Once you’re happy with the updates you’ve made to the repository, it’s time to code into yours created repository.
- Open Terminal/Shell if you’re using Mac/Linux, or a tool like Git Bash if you’re using Windows computers.
- From Terminal or Gitbash, go to the folder directory where you have your website’s scripts and files.
- Initialize the directory with the “Git init” command
- And add the remote repository for the first time with the following command
- Use can use the command “git add” v Use to push your changes to the staging area. The command to use is:
- Then use “git commit” to save the changes with an appropriate message
- Finally, push the scripts and files into the repository with git push. The command would look like this:
If you have any questions about this process, read the article here. The required steps are clearly explained.
If you want to make it more professional or have a custom URL, buy a domain and point it to this GitHub page. If you are unsure about buying a domain and making changes to it, read the article here.
Here is the link to my website. If you don’t use a domain for yourself, it’s completely free and can be created in under an hour. If you are using your own domain it may take a little over an hour as the updates made to your domain would take time. Below is a video tutorial on how to create a personal portfolio website
See also: 2 Killer Examples of Successful Health and Fitness E-Commerce Marketing
.